EasyManua.ls Logo

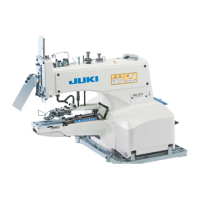
JUKI MB-1377 User Manual

JUKI MB-1377
18 pages
To Next Page IconTo Next Page
Page #1 background imageLoading...
Page #1 background image
i
ENGLISH
INSTRUCTION MANUAL

Table of Contents

Other manuals for JUKI MB-1377

Questions and Answers:

JUKI MB-1377 Specifications

General IconGeneral
Max Stitch Length5 mm
Needle SystemDB x 1
Foot LiftManual
Lubrication systemAutomatic
Max. sewing speed1, 500 sti/min

Summary

Specifications Overview

Sewing Machine Preparation and Setup

2-1. Installation Guide

Instructions for setting up the sewing machine on a table, including securing it with screws.

2-2. Lubrication Procedure

Detailed steps for applying oil and grease to various machine parts for proper function.

2-3. Attaching the Needle

Procedure for inserting and securing the needle into the needle bar for sewing.

2-4. Attaching the Needle Bar Cover

Steps to attach the protective cover for the needle bar assembly.

2-5. Attaching the Button Tray Assembly

How to install the tray that holds buttons during the sewing process.

2-6. Threading the Machine

Guide on how to thread the sewing machine, following a specific sequence of points.

Sewing Machine Adjustment Procedures

3-1. Thread Tension Adjustment

Adjusting the tension of the thread for sewing buttons, with two tension posts described.

3-2. Thread Pull-Off Lever Adjustment

Adjusting the thread pull-off lever's position to ensure proper thread feeding during sewing.

3-3. Adjusting the Tension Lever

Setting the correct clearance for the tension lever and thread guide for smooth thread flow.

3-4. Adjusting the Nipper

Adjusting the nipper and its block to prevent incorrect thread holding during operation.

3-5. Adjusting Thread Tension Guide on Face Plate

Adjusting the thread tension guide on the face plate to reduce thread tension if needed.

3-6. Needle-to-Looper Relation

Aligning the needle and looper correctly for proper stitch formation and thread engagement.

3-7. Needle Guide Position

Setting the correct clearance between the needle guide and the needle.

3-8. Button Clamp Height Adjustment

Adjusting the height of the button clamp unit relative to the feed plate.

3-9. Work Pressing Force

Adjusting the work pressing force by setting the distance between nut and pressure bar.

3-10. Button Clamp Stop Lever Adjustment

Setting the button clamp stop lever for easy insertion and removal of buttons.

3-11. Thread Tension Release Timing

Adjusting the timing of the tension discs releasing the thread during sewing.

3-12. Setting for 2- or 4-Hole Buttons

Procedures for setting the machine for sewing 2-hole or 4-hole buttons.

3-13. Setting Number of Stitches

Steps to change the number of stitches for button sewing.

3-14. Stop-Motion Position Adjustment

Adjusting the stop-motion mechanism to ensure the machine stops correctly after sewing.

3-15. Automatic Thread Trimmer

Adjusting the position of the moving knife for the automatic thread trimmer.

3-16. Clearance: Button Clamp Lifting Lever and Adjusting Screw

Ensuring proper clearance between the button clamp lifting lever and the adjusting screw.

3-17. Setting the L-Shaped Lifting Rod

Instructions for correctly setting the L-shaped lifting rod for machine operation.

3-18. Knot-Tying Mechanisms

Adjustments for the knot-tying mechanisms, including connecting plate and stopper.

Maintenance, Subclass Models, and Attachments

4-1. Connecting Belt Metal Fittings

Instructions for connecting the belt and its metal fittings to the machine.

4-2. Subclass Models Overview

Information about different subclass models of the sewing machine.

(1) Attachments for Shank Buttons (Pearl Buttons) (Z033)

Installing and operating attachments for shank buttons (Pearl buttons).

(2) Attachment for First Process of Wrapped-Around Buttons (Z041)

Installing and adjusting the attachment for the first process of wrapped-around buttons.

(3) Attachment for Second Process of Wrapped-Around Buttons (Z035)

Installing and adjusting the attachment for the second process of wrapped-around buttons.

(4) Attachment for Snaps (Z037)

Installing and adjusting the attachment for snaps.

Troubles and Corrective Measures

Thread Breakage Troubleshooting

Common causes and corrective measures for thread breakage during sewing.

Machine Forms Seam After Short Run

Troubleshooting issues when the machine forms a seam after running briefly.

Buttons Not Sewn Tightly

Identifying causes and solutions when buttons are not sewn tightly.

Poorly Tensed Last Back-Tack Stitch

Addressing issues where the last back-tack stitch has poor tension.

First Stitch Trails Long Thread from Button Right

Troubleshooting long thread trails from the button's right side on the first stitch.

Thread Trimming Failure

Corrective actions for failures in the thread trimming mechanism.

Needle Thread Cut in Two Places on Fabric Wrong Side

Resolving issues where the needle thread is cut in two places on the fabric's wrong side.

Long Button Thread After Trimming

Correcting problems with long button threads remaining after trimming.

Variable Remaining Thread Length After Trimming

Addressing variations in remaining thread length after trimming on the wrong side.

(5) Attachment for Metal Buttons (Z038)

Related product manuals