Do you have a question about the JUKI MB-1800 and is the answer not in the manual?
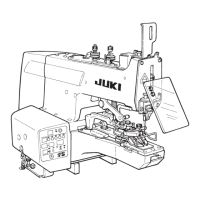
Identifies the main parts of the sewing machine unit with a diagram.
Step-by-step instructions for mounting the sewing machine head onto the table.
Procedure for attaching the bed cover and rubber bases to the machine head.
Details on connecting the power cord for different voltage configurations.
Instructions for wiring the power switch according to voltage requirements.
Guide for installing the needle bar cover for safety and protection.
Instructions for fitting the eye protection cover to prevent needle-related hazards.
Steps for assembling and installing the thread stand unit.
Procedure for attaching the button tray to the sewing machine.
Detailed steps for correctly inserting and securing the needle.
Instructions on how to thread the sewing machine according to the diagram.
Identifies and explains the function of each switch on the operation panel.
Provides a table of stitch shapes, stitch size, and number of stitches for patterns.
Guides users through basic operations using the control panel.
Instructions for performing stitching operations without the crossover thread.
Details advanced control panel operations and settings.
Explains how to utilize the memory switches for storing settings.
Adjusting thread tension, hauling amount, and release timing.
Ensuring proper relation between needle and looper, and needle guide.
Procedure for adjusting the thread trimming mechanism.
Adjusting button clamp height, pressing force, stop lever, and feed origin.
Installing and adjusting optional accessories like the save button bar and wiper.
Instructions for attaching pearl button shank attachments.
Installing the attachment for the first stage of wrapped-around buttons.
Installing the attachment for the second stage of wrapped-around buttons.
Procedure for attaching the snap fastener accessory.
Instructions for installing the metal button attachment.
Guide for installing the optional device for stitching without crossover thread.
| Brand | JUKI |
|---|---|
| Model | MB-1800 |
| Category | Sewing Machine |
| Language | English |