EN
24
6. The next step is to nd the reversing light.
Turn the ignition key to on mode (or
corresponding ignition mode if the vehicle
does not have an ignition key). Apply the
parking brake and reverse gear. Localise
the position of the reversing lights (white
light). Use the vehicle’s wiring diagram or
a suitable test method to nd the 12/24
volt cable to the reversing light.
7. Feed the camera cable up to the reversing
light cable.
8. The reversing light on most vehicles is
connected with two cables, unless the
socket is earthed. The negative cable
is usually black and the positive cable
coloured. Use a multimeter if in doubt.
9. After localising the cables, switch o the
ignition and remove the negative cable
on the car battery.
10. Join the red cable with the supplied
connector to the positive cable on the
reversing light. Use pliers and press down
the connector to ensure good contact
between both cables.
FIG. 4
11. Join the black cable with the supplied
connector to the negative cable on the
reversing light or earth.
12. Secure the cables with cable ties or
insulating tape.
13. Reconnect the negative cable to the
battery.
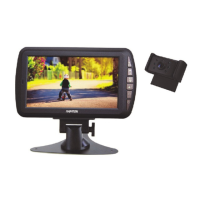
Positioning the monitor
The monitor can be placed on the dashboard
or fastened to a sun shade or headrest.
IMPORTANT:
Position the monitor so that it does not
obstruct the driver’s view.
1. Remove the rear number plate.
FIG. 1
2. Hang the supplied mounting plate
(together with the camera) behind the
number plate, without concealing the
number plate.
FIG. 2
3. Remove the protective paper from the
adhesive pad on the mounting plate so
that the plate fastens to the number plate.
Make sure the surface is well cleaned
before mounting. If the number plate is
mounted in a holder, fasten the mounting
plate to the holder.
4. Fit the number plate.
FIG. 3
5. Choose a route for the camera’s power
cable through the vehicle to the reversing
light. Some vehicles have a hole for the
cable to pass through, for example where
the number plate light is tted. If there
is no hole, drill a hole near where the
power cable is connected to the camera
according to the instructions below. If
there is a hole, go to step 5.
– Choose a place for the cable bush
and then remove the number plate
and camera.
– Check that there are no vehicle
components such as electrical parts
for fuel system components behind
or near where the hole is to be
drilled. Take the necessary
precautions to avoid damaging any
vehicle components.
– Fit the supplied cable bush in the drill
hole to protect the cables from the
sharp metal edge. Pull the camera
cables through the bush into the
vehicle.
 Loading...