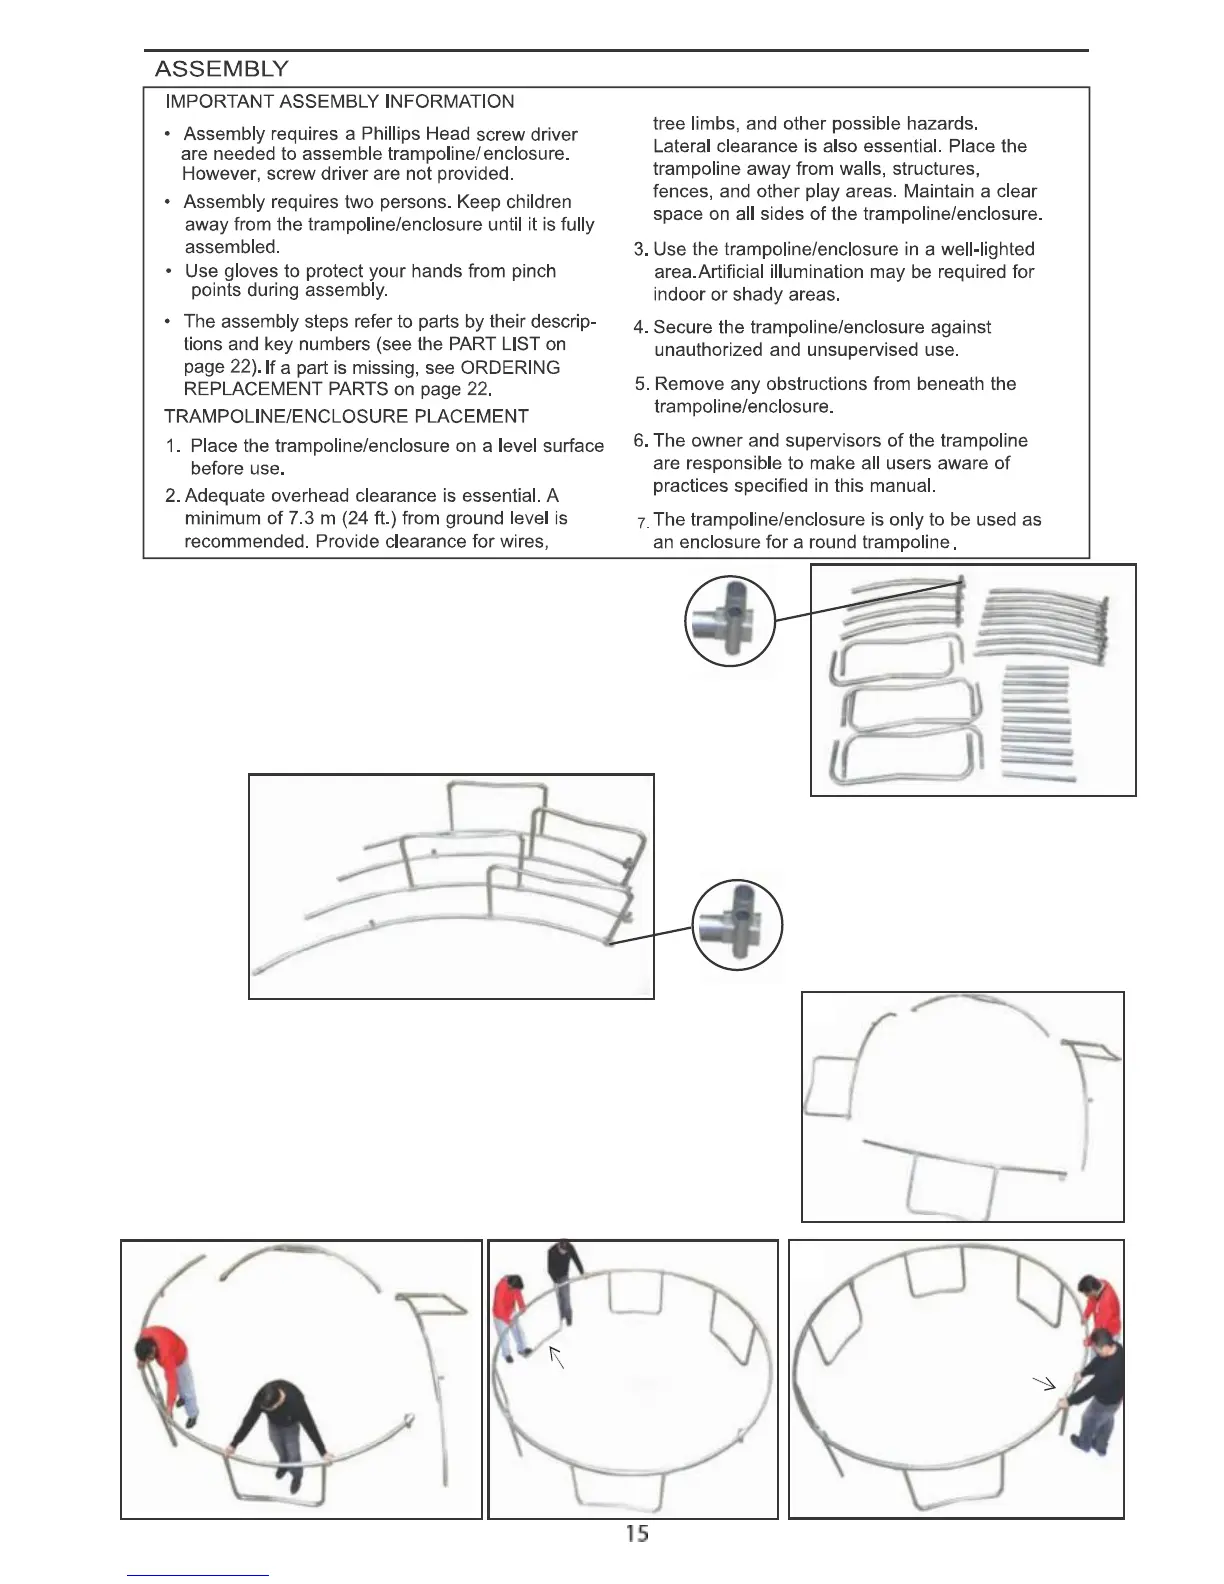
Connect Toprail(2) with t-connector w/slot(4) to toprail(1) with t-connector(3).
Then connect another toprail with t-connector to finish 1 section. Should
have total of 4 sections (a and b) completed as below diagram.
Lay out all of the parts in groups :
4 Toprails with T-connector w/ round slot (2)
8 Toprails with T-connector (1)
12 Leg extensions (5)
6 " W" shaped legs (6)
Once the leg sections has been connected, lay it out as seen: Making sure A
sections lay across from each other. B sections lay across from each other but
the legs should not match laying on the same directions as seen:
A
A
A
A
B
B
B
B
2.1) Have 2 people connect the section A and B together. Follow the steps
until all 4 sections has been connected and is now a full circle.
2.2) Now bring in the leg section and connect it to the 2 T-connector as
shown.
2.3) Finish connecting the last leg section to the other 2 T-connectors.
1.
1.
2.
2.
2.1.
A
A
B
B
2.2. 2.3.
A
A
B
B
1
2
5
6
T-connector+
Welded tube(4)
T-connector+
Welded tube(4)
A
A
B
B
 Loading...