•
(Optional) Grounding cable with lug, screws, and washers (not provided)
•
(Optional) 23-in. mounting brackets (provided)
Mount the Optical ILA
NOTE: Place the rack in its permanent location, allowing adequate clearance for airflow and maintenance, and
secure it to the building structure. If you are mounting multiple units in the rack, mount the heaviest unit at the
bottom and mount the other units from bottom to top in order of decreasing weight. The DC-powered optical
ILA weighs 11.8 lb (5.35 kg) and the AC-powered optical ILA weighs 11.7 lb (5.30 kg).
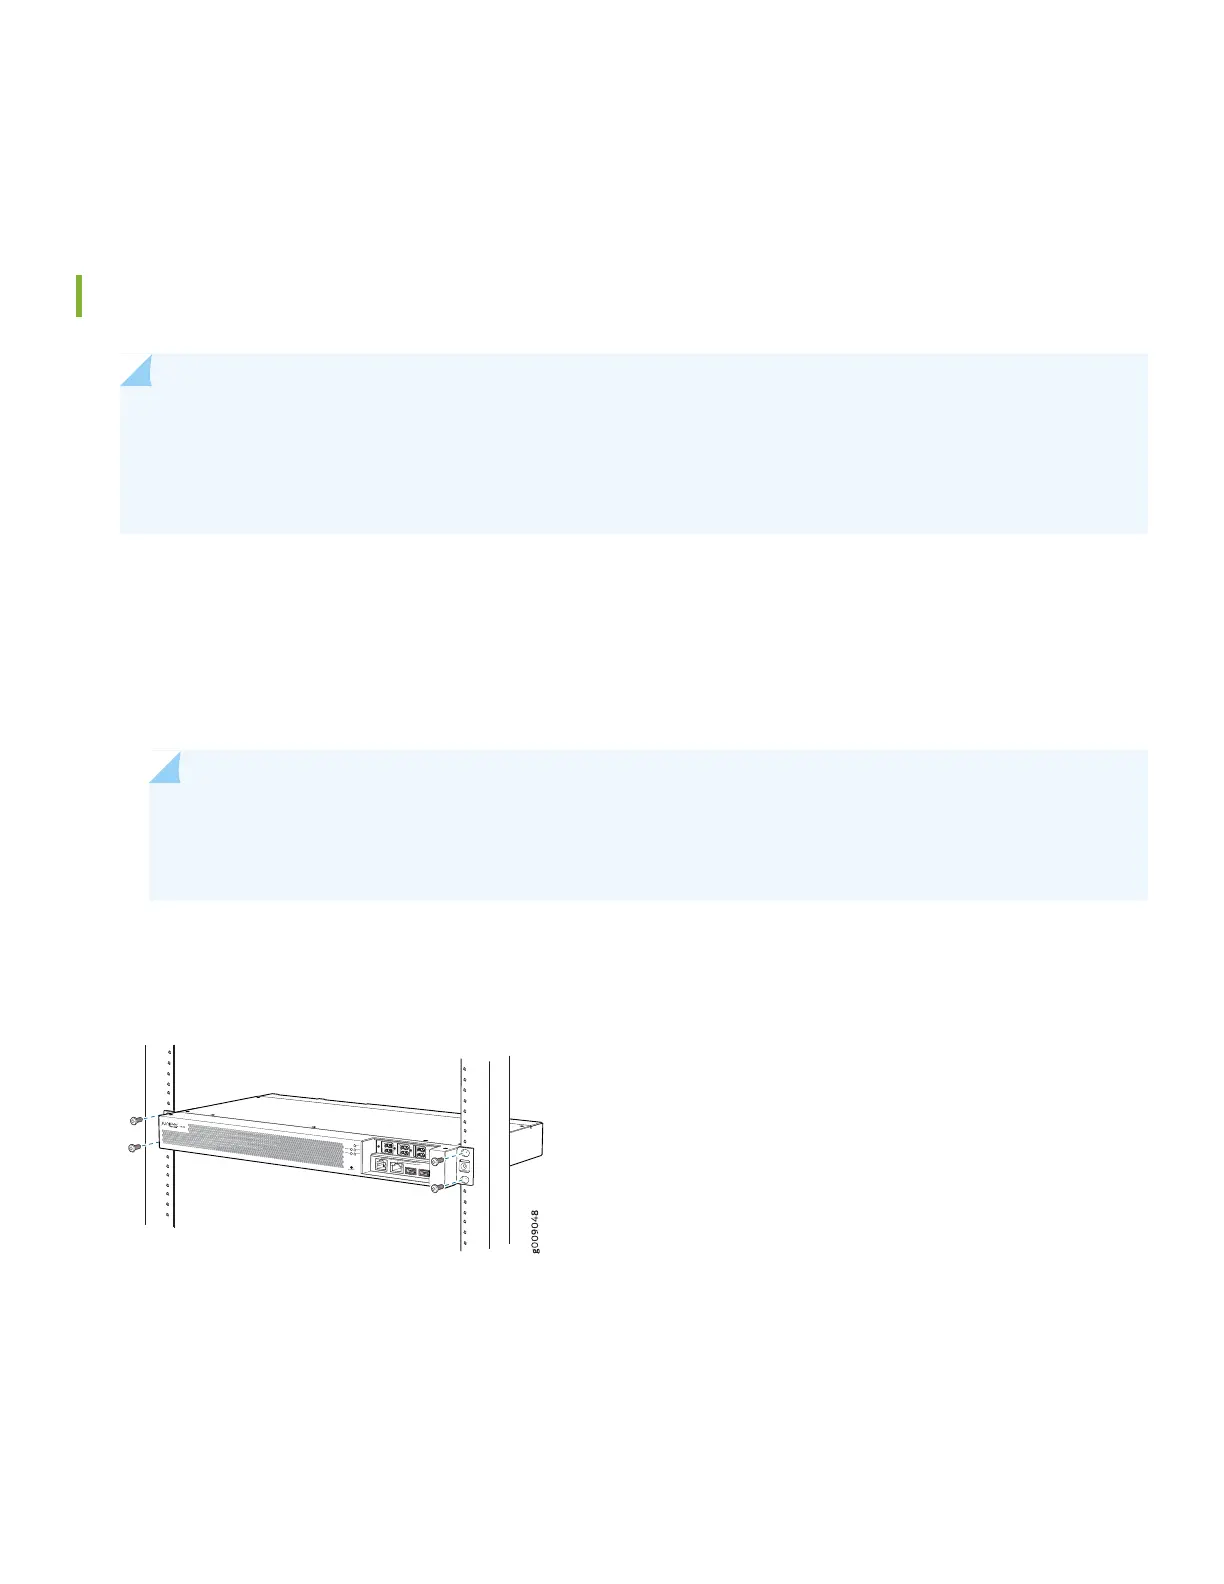
The optical inline amplifier (optical ILA) can be mounted on a two-post rack. To mount the optical ILA on two posts of a
rack by using the provided mounting kit:
1. Attach the ESD grounding strap to your bare wrist and to a site ESD point.
2. Position the optical ILA in such a manner that the FRUs are next to the hot aisle.
NOTE: The 19-in. brackets are attached to the optical ILA when they are shipped. If you want to attach the
23-in. brackets, unscrew the 19-in. brackets from the chassis, and attach the 23-in. brackets by using the
same screws.
3. Use four mounting screws (and cage nuts and washers if your rack requires them) to attach the optical ILA to the rack
as shown in the illustration.
LINEAIN
LINEAOUT
LINEBIN
LINEBOUT
MONAOUT
MONBOUT
CON
MGMT
USB
USB
ON/OFF
OSCA
OSCB
PWR
SYS
ALM
4. Tighten the screws.
5. (Optional) Attach a grounding cable to earth ground and then attach it to the chassis grounding point.
2