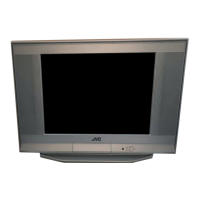
This document describes the JVC AV-21KM3BN and AV-21KM3SN colour televisions, covering their functions, usage, and maintenance.
Function Description
The JVC AV-21KM3BN and AV-21KM3SN are remote-controlled colour televisions designed for home entertainment. They feature a menu-driven system for easy control and offer a wide range of functionalities for viewing and connecting external devices.
Key Features:
- Channel Capacity: The TV can preset 100 programmes from VHF, UHF bands, or cable channels. It also supports tuning cable channels.
- Connectivity: It includes two Euroconnector sockets (SCART 1 and SCART 2) for connecting external devices like video recorders, video games, and audio sets. A front AV input is also available via RCA jacks.
- Audio System: The TV supports Stereo sound systems (Nicam + German), allowing for enhanced audio experiences.
- Teletext: A full-function Teletext (Fastext, Toptext) system provides access to information pages.
- Convenience Features: Direct channel access, Automatic Programming System (APS), programme naming, forward and backward automatic tuning, sleep timer, and child lock are included.
- Safety Features: Automatic sound mute when no transmission is detected, and automatic switch-off to stand-by mode after 5 minutes of broadcasting cessation.
- Headphone Output: A headphone socket is available for private listening.
Usage Features
The television can be operated either via the remote control handset or through the control panel buttons on the front of the TV.
Initial Setup:
Upon first turning on the TV, a message "PLEASE CHECK ANTENNA CABLE AUTO. PROGRAMMING SYSTEM" will appear.
- Language Selection: Use the "P∧" or "P∨" buttons to select LANGUAGE, then "◄" or "►" to choose the menu language.
- Country Selection: Use "P∧" or "P∨" buttons to select COUNTRY, then "◄" or "►" to choose your location.
- Automatic Programming System (APS): Select START with "P∧" or "P∨" and press "◄" or "►" to begin APS. This system automatically programmes received channels into the TV's programme numbers. During this process, "A. P. S. IS RUNNING" will be displayed. After completion, the "PROGRAM." menu appears. APS can be cancelled by pressing "◄" or "►".
- Complete Setup: Press the "STANDARD" button to finalize the initial settings. After this, programme numbers can be changed, named, or new channels programmed manually via the "Install. Menu".
Switching the TV ON/OFF:
- To Switch On: Press the power button on the front of the TV (RED LED turns on for standby). From standby, press a digit button on the remote control, or the Standby/Power button, or Programme Up/Down buttons on either the remote or control panel (GREEN LED turns on).
- To Switch Off: Press the standby button on the remote control (GREEN LED turns RED), or press the power button on the front of the TV.
Menu System Navigation:
- Access Main Menu: Press the "MENU" button.
- Select Submenu: Use "P∧" or "P∨" buttons to select a menu title (SOUND, PICTURE, FEATURE, INSTALL., PROGRAM.), then press "◄" or "►" to enter.
- Exit Menu: Press "STANDARD" to exit any menu.
- Previous Menu: Press "MENU" to return to the previous menu.
Sound Menu:
- Access: Press "MENU" and navigate to SOUND, or press the RED button directly.
- Volume: Adjust with "◄" or "►" buttons.
- Balance: Select BALANCE with "P∧" or "P∨", then adjust with "◄" (left) or "►" (right).
- Bass/Treble: Select BASS or TREBLE with "P∧" or "P∨", then adjust with "◄" (decrease) or "►" (increase).
- Mode: Select MONO, STEREO, or DUAL I-II (if supported by the channel) with "P∧" or "P∨", then change with "◄" or "►". This is useful for dual-language broadcasts or poor stereo reception.
- Effect: Toggle sound effect ON/OFF with "◄" or "►". This can deepen stereo sound or make mono sound appear stereo.
Picture Menu:
- Access: Press "MENU" and navigate to PICTURE, or press the GREEN button directly.
- Brightness/Contrast/Colour/Sharpness: Select the desired setting with "P∧" or "P∨", then adjust with "◄" (decrease) or "►" (increase).
- Hue (AV mode only): Select HUE with "P∧" or "P∨", then adjust with "◄" (decrease) or "►" (increase). This is only functional for NTSC 3.58/4.43 systems.
- Mode: Change picture size (AUTO, 4:3, 16:9) with "◄" or "►". Each programme can have its own picture mode setting.
Feature Menu:
- Access: Press "MENU" and navigate to FEATURE, or press the YELLOW button directly.
- Sleep Timer: Select SLEEP TIMER and use "◄" or "►" to set a duration (OFF, 15, 30, 45, 60, 75, 90, 105, 120 minutes). The TV will enter standby after the selected period. The remaining time is displayed on-screen.
- Child Lock: Select CHILD LOCK and use "◄" or "►" to turn ON or OFF. When ON, only the remote control can operate the TV (front panel buttons, except power, are disabled).
- Language: Select LANGUAGE and use "◄" or "►" to change the menu language.
- AV-2 Output: Select AV-2 OUTPUT and use "◄" or "►" to choose between TV or AV-1 as the source for the SCART 2 terminal.
Install. Menu (Manual Channel Programming):
- Access: Press "MENU" and navigate to INSTALL., or press the BLUE button directly.
- Programme Number: Select PROGRAMME with "P∧" or "P∨", then use "◄" or "►" or digit buttons to choose a programme number.
- Band: Select BAND with "P∧" or "P∨", then use "◄" or "►" to choose the band.
- Search: Select SEARCH with "P∧" or "P∨", then press "◄" (backward) or "►" (forward) to start searching for a channel. Press the reverse direction button to stop searching.
- Channel Number (Direct Input): Select CHANNEL with "P∧" or "P∨", then use "◄" or "►" or digit buttons to enter the channel number directly.
- Fine Tuning: Select FINE TUNING with "P∧" or "P∨", then use "◄" or "►" to fine-tune the channel for poor reception.
- Store: Select STORE with "P∧" or "P∨", then press "◄" or "►" to save the channel settings to the selected programme number.
- Modify Settings: To change settings for an existing programme, select its number (without a menu visible), then display the INSTALL. menu and follow the steps above.
Program. (Programming) Menu (Channel Management):
- Access: Press "MENU" and navigate to PROGRAM., then press "◄" or "►".
- Navigation: Use "P∧", "P∨", "◄", or "►" buttons or digit buttons to move through programme numbers. The tuned channel's number and name will be cyan.
- Rename Programme: Move to the desired channel (cyan), press the RED button, use "◄" or "►" to select position and "P∧" or "P∨" to select a letter. Press RED again to store or BLUE to cancel.
- Delete Channel: Move to the desired channel (cyan), press the YELLOW button. The channel will be deleted, and subsequent channels will shift up. Press YELLOW again to confirm or BLUE to cancel.
- Insert Channel: Move to the desired channel (cyan), press the GREEN button. Use "P∧", "P∨", "◄", or "►" to select the insertion point. Press GREEN again to confirm or BLUE to cancel.
- APS (Automatic Programming System): From the PROGRAM. menu, press the BLUE button to enter APS. Follow the language and country selection steps as in initial setup, then start APS to automatically program channels.
Other Features:
- Sound Mute: Press "X" button to mute/unmute sound.
- Information on Screen: Press "i" once for programme number, station name, and sound status. Press "i" again for current time. Press "i" a third time to remove the display.
- Standard Button: Press "STANDARD" (when no menu is visible) to reset PICTURE menu settings (except Picture Mode) to default.
- VCR Control Buttons: Buttons on the remote control with VCR symbols can operate JVC VCRs. Note: May not work with non-JVC devices or all JVC models. "∧" / "∨" buttons can select TV channels for the VCR.
- Teletext: Press "TEXT" button to enter Teletext mode (index page usually displayed).
- Select Page: Use digit buttons to enter a page number.
- Page Navigation: Use "P∧" (forward) or "P∨" (backward) to move one page at a time.
- Double Height Text: Press "TEXT" button repeatedly for top half, bottom half, or full page normal height.
- Concealed Information: Press "?" to reveal/conceal answers on quiz/game pages.
- Stop Automatic Page Change: Press "TEXT" button to stop/allow automatic page changes for multi-section pages.
- Subcode Page: Select Teletext page, press "TEXT", enter 4-digit subcode number. If not displayed quickly, press "X". Press "X" to display.
- Fastext/Toptext: Press RED, GREEN, YELLOW, or BLUE buttons to quickly access colour-coded pages.
- Exit Teletext: Press "TEXT" button to return to TV mode.
Connecting External Equipment:
- General: Switch off all equipment, including the TV, before connecting. Refer to the manuals of external devices.
- AV Mode Selection: Repeatedly press the "AV" button on the remote control to cycle through AV-1, AV-2, AV-2 S, F-AV, and back to TV mode. Alternatively, use "P∧" or "P∨" to return to TV mode.
- AV-1 (SCART 1): For video, audio L/R, and RGB inputs/outputs.
- AV-2 (SCART 2): For video, S-VIDEO (Y/C), and audio L/R inputs/outputs.
- F-AV (Front AV): For video and audio L/R inputs via RCA jacks (e.g., camcorder). If the camcorder has mono audio, connect it to the AUDIO-L jack.
- ANT (Aerial) Socket: Connect devices without Euroconnector or RCA jacks using an aerial cable. Store the test signal from the equipment to programme number 0 via the "Install. Menu" to view it.
- VCR Connection: Connect the VCR to the TV's ANT input with an aerial cable, and/or to AV-1 or AV-2 with a SCART cable, or F-AV with audio/video cables.
- NTSC Playback: Connect an NTSC video recorder and select the corresponding AV mode. NTSC 3.58/4.43 is automatically detected.
- Copy Facility: Video and audio signals from TV or AV-1 (SCART 1) can be output to a video recorder connected to AV-2 (SCART 2). Select the output source via "AV-2 OUTPUT" in the Feature Menu.
- Headphones: Connect stereo headphones to the headphone socket.
Maintenance Features
Care of the Screen:
- Clean the screen with a slightly damp, soft cloth.
- Do not use abrasive solvents, as they may damage the TV screen coating layer.
Troubleshooting (Poor Picture):
- TV System: Ensure the correct TV system is selected.
- Interference: Check if the TV or aerial is too close to loudspeakers, non-earthed audio equipment, or neon lights.
- Ghost Images: Mountains or tall buildings can cause double pictures or ghost images. Adjusting the aerial direction may improve quality.
- Multiple Peripherals: Picture quality may degrade when two peripherals are connected simultaneously. Disconnect one to check for improvement.
Troubleshooting (No Picture):
- Aerial Connection: Verify the aerial is properly connected, plugs are tight, cable is undamaged, and suitable plugs are used. Consult your dealer if in doubt.
- No Transmission: If the TV is not receiving any transmission, ensure the correct keys on the remote control have been pressed.
Troubleshooting (Sound Issues):
- One Speaker: Check if the balance setting is extreme in the SOUND menu.
Troubleshooting (Remote Control):
- No Response: Press the "STANDARD" button again.
- Batteries: Check if the batteries are exhausted. If so, local buttons on the TV can still be used.
- Wrong Menu: Press "STANDARD" to return to TV mode, or "MENU" to return to the previous menu.
No Solution:
- If issues persist, switch the TV off and on. If this does not resolve the problem, contact service personnel; do not attempt to repair it yourself.
Waste Disposal:
- Packaging and packaging aids are recyclable and should be recycled.
- Packaging materials, such as foil bags, should be kept away from children.