EasyManua.ls Logo

JVC CA-FSP5 - User Manual

JVC CA-FSP5
28 pages
Print Icon
To Next Page IconTo Next Page
Loading...
GVT0053-001A
[J]
For Customer Use:
Enter below the Model No. and Serial No.
which are located either on the rear, bot-
tom or side of the cabinet. Retain this
information for future reference.
Model No.
Serial No.
FS-P5 — Consists of CA-FSP5 and SP-UXP5.
COMPACT COMPONENT SYSTEM
SYSTEME DE COMPOSANTS COMPACT
INSTRUCTIONS
MANUEL D’INSTRUCTIONS
SLEEP
STANDBY/ON
MD/AUX
FM/AM
TAPE
CD
DISPLAYDIMMER
REPEATRANDOMPROG
FM MODE
AUTO
PRESET
SOUND
MODE
CD
CANCEL MULTI KEY SET
RM-SUXP5U REMOTE CONTROL
VOLUME
AHB
PRO
COMPACT
DIGITAL AUDIO
CD TAPE FM/AM
COMPACT COMPONENT SYSTEM FS·P5
CD-R/RW PLAYBACK
MD/AUX
TIMER
CLOCK
STANDBY/ON
STANDBY
/
ON
VOLUMEFUNCTION
SOUND
DIRECT OPERATING
AHB PRO
REC
REV.MODE
PHONES
AUTO REVERSE
REC
/
FS-P5[J]_Cover 01.3.27, 2:39 PM3
Question and Answer IconNeed help?

Do you have a question about the JVC CA-FSP5 and is the answer not in the manual?

Summary

Safety Warnings and Precautions

Risk of Electric Shock and Fire Hazards

Warnings about opening the unit, avoiding moisture, and preventing electric shock.

FCC Compliance and Radio Frequency

Information regarding FCC rules for digital devices and radiation.

Canadian Safety and Laser Product Guidelines

Specific safety instructions for Canada and laser product warnings.

Instructions for Safe Use

General Operational Safety

Instructions on reading manual, retaining information, following warnings, and obeying cautions.

Environmental and Electrical Safety

Precautions against water, moisture, heat, and ensuring proper ventilation and grounding.

Handling and Servicing Safety

Guidelines for preventing object/liquid entry, damage requiring service, and user servicing.

Introduction and Important Precautions

Manual Structure and Symbols

Explanation of the manual's organization and the meaning of warning and note symbols.

Installation and Operational Precautions

Key precautions for unit installation, power connection, and moisture condensation.

General Handling and Storage Advice

Advice on handling metallic objects, liquids, and unplugging for extended non-use.

Unit Controls and Indicators

Front Panel Layout

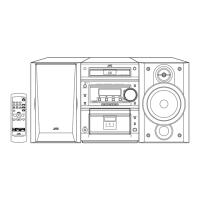
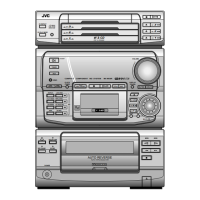
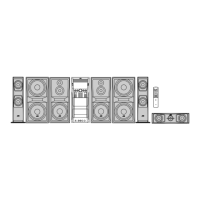
Identification of buttons, indicators, and jacks on the unit's front panel.

Display Window Indicators

Explanation of the symbols and information displayed on the unit's screen.

Front Panel Button Functions

Detailed description of each button on the front panel and its function.

Remote Control Operation

Remote Control Button Functions

Identification and description of all buttons on the remote control.

Remote Sensor Guidance

Instruction on aiming the remote control at the unit's remote sensor.

Getting Started: Setup

Checking Supplied Accessories

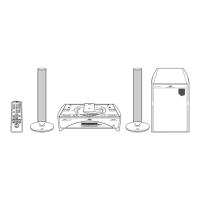
Ensuring all included items like antennas and remote control are present.

Installing Batteries in Remote

Step-by-step instructions for inserting batteries into the remote control.

Connecting Antennas

Guide for attaching FM and AM antennas for optimal reception.

Component Connections

Connecting AM Antenna

Instructions for connecting the AM loop antenna and outdoor AM antenna.

Connecting Speakers

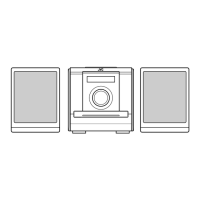
Detailed guide on connecting speakers to the unit, including polarity and impedance.

Antenna Reception Improvement

Tips for better FM/AM reception and antenna placement relative to unit components.

Connecting Other Equipment

Connecting Audio Sources

Instructions for connecting audio equipment via analog and digital inputs.

Final AC Power Connection

Reminder to verify all connections before plugging the unit into a wall outlet.

Common Operations

Powering the Unit On and Off

How to turn the unit on, switch to standby, and turn it off completely.

Setting and Checking the Clock

Steps to set the internal clock and display the current time.

Source Selection for Playback

How to select and start playback from different sources like CD, Tape, FM/AM, and AUX.

Audio Adjustments

Adjusting Volume Level

How to control the sound volume using the unit's controls or remote.

Enhancing Bass Sound

Instructions for using the Active Hyper Bass (AHB) function for richer bass.

Selecting Display Brightness

How to adjust the brightness of the unit's display.

Choosing Sound Modes

How to select preset sound modes like ROCK, POP, JAZZ, CLASSIC, or FLAT.

Listening to Radio Broadcasts

Tuning FM;AM Stations

Steps for manual and automatic tuning of FM and AM radio stations.

FM Stereo;Mono Mode

How to switch FM reception between stereo and mono for better sound quality.

Presetting and Recalling Stations

Guide to saving favorite stations and tuning into them quickly.

CD Playback

CD Format Compatibility

Information on compatible CD types (CD, CD-R, CD-RW) and handling notes.

Basic CD Playback Controls

How to play, pause, stop, skip tracks, and fast-forward/reverse during CD playback.

CD-R and CD-RW Playback Notes

Specific considerations for playing back recordable and rewritable CDs.

Advanced CD Playback Modes

Random Playback

How to play tracks in a random, non-sequential order.

Repeat Playback Modes

Options to repeat a single track, all tracks, or program tracks.

CD Tray Lock Function

How to lock the CD tray to prevent accidental opening or ejection.

Tape Playback

Playing a Cassette Tape

Steps to insert a cassette and start playback on the tape deck.

Tape Reverse Mode Selection

How to select playback for one side, both sides, or continuous tape play.

Cassette Tape Handling

Warnings and advice on handling cassette tapes and avoiding damage.

Recording on Tapes

Recording Essentials

Important notes on recording, copyright, level setting, and tape types.

Protecting Tapes from Erasure

How to remove protective tabs to prevent accidental recording.

Maintaining Recording Quality

Tips for cleaning tape heads, capstans, and pinch rollers for best sound.

Recording Process

Steps to record from FM, AM, or AUX sources onto a cassette tape.

Advanced Recording Techniques

CD Direct Recording

How to record entire CDs or programmed tracks directly onto tape.

One Track Recording

How to record individual favorite tracks from a CD onto tape.

Recording on Both Sides

How to set the tape deck to record on both sides of a cassette.

Using Timers for Automation

Setting Daily and Recording Timers

Guide to setting timers for automatic power on/off and recording.

Selecting Timer Mode and Source

How to choose between Daily or Recording timer and the audio source.

Setting Timer Volume Level

How to set the desired volume level for timer-activated playback.

Sleep Timer Function

Setting the Sleep Timer

How to set the unit to turn off automatically after a specified time.

Managing Sleep Timer Settings

How to check remaining time and cancel the sleep timer.

Troubleshooting Common Issues

Problem Diagnosis and Solutions

Lists common symptoms, their causes, and suggested corrective actions.

Remote Control Troubleshooting

Specific steps to resolve issues related to the remote control's operation.

Maintenance and Care

Proper Disc Handling

Guidelines for handling and storing CDs to prevent damage and ensure longevity.

Cleaning Discs and Unit

Instructions for safely cleaning CDs and the exterior of the main unit.

Cassette Tape Care

Advice on handling cassette tapes and proper storage conditions.

Product Specifications

Amplifier and Tuner Specifications

Technical details for the amplifier section and FM/AM tuner.

CD Player and Cassette Deck Specs

Technical details for the CD player and cassette deck.

General Unit and Speaker Details

Overall unit specifications, power requirements, and speaker details.

Service and Warranty Information

Authorized Service Centers

Contact information for locating JVC authorized service centers.

Important Safety Notice for Servicing

Warning against self-servicing and advising referral to qualified personnel.

Purchasing Accessories

Information on how to buy accessories for your JVC product.

Limited Warranty Details

Warranty Coverage and Obligations

Outlines warranty period, JVC's and customer's responsibilities.

Warranty Exclusions

Lists conditions and circumstances not covered by the product warranty.

Warranty Limitations and Rights

Details on implied warranties, consequential damages, and specific legal rights.

Overview

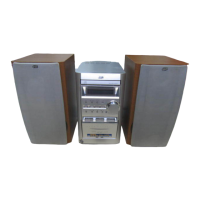
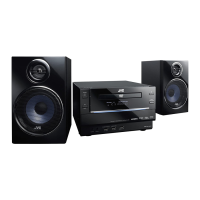
This document describes the JVC FS-P5 Compact Component System, which consists of the CA-FSP5 main unit and SP-UXP5 speakers. It provides instructions for safe use, basic operations, and maintenance.

Function Description:

The JVC FS-P5 is a compact component system designed for audio playback from various sources, including CDs (CD/CD-R/CD-RW), cassette tapes, and FM/AM radio broadcasts. It also supports external audio equipment connection via AUX input/output and optical digital output. The system features a built-in clock with daily and recording timer functions, as well as a sleep timer. Sound enhancement options include Active Hyper Bass (AHB PRO) and several preset sound modes (Rock, Pop, Classic, Jazz, Flat). Recording capabilities include CD Direct Recording and One Track Recording onto cassette tapes.

Important Technical Specifications:

Amplifier:

  • Output Power: 50 W per channel, min. RMS, driven into 6 Ω at 1 kHz with no more than 10% total harmonic distortion.
  • Audio Input Sensitivity/Impedance (at 1 kHz):
    • AUX: 400 mV/48 kΩ
  • Audio Output Level:
    • AUX: 260 mV/5.8 kΩ
  • Digital Output — OPTICAL DIGITAL OUT:
    • Signal wave length: 660 nm
    • Output level: -21 dBm to -15 dBm
  • Speakers/Impedance: 6 Ω – 16 Ω

Tuner:

  • FM Tuning Range: 87.5 MHz – 108.0 MHz
  • AM Tuning Range: 530 kHz – 1710 kHz

CD Player:

  • Dynamic Range: 85 dB
  • Signal-to-Noise Ratio: 90 dB
  • Wow and Flutter: Immeasurable

Cassette Deck:

  • Frequency Response (Normal (type I)): 50 Hz – 14,000 Hz
  • Wow and Flutter: 0.15% (WRMS)

General:

  • Power Requirement: AC 120 V, 60 Hz
  • Power Consumption: 85 W (at operation), 5.8 W (on standby)
  • Dimensions (approx.): 505 mm x 256 mm x 295 mm (W/H/D) (20 1/8 in. x 10 1/8 in. x 11 5/8 in.)
  • Mass (approx.): 10.0 kg (22.1 lbs)

Speaker (SP-UXP5):

  • Speaker Units: Woofer 12 cm (4 3/4 in.) cone x 1, Tweeter 4 cm (1 5/8 in.) cone x 1
  • Impedance: 6 Ω
  • Dimensions (approx.): 160 mm x 256 mm x 213 mm (W/H/D) (6 5/16 in. x 10 1/8 in. x 8 7/16 in.)
  • Mass (approx.): 2.3 kg (5.1 lbs)

Usage Features:

Power On/Off:

  • The unit can be turned on by pressing any play button (CD, TAPE) or source selecting button (FM/AM, MD/AUX), or the STANDBY/ON button.
  • To turn off (standby mode), press STANDBY/ON again. The STANDBY/ON lamp lights red.
  • To completely shut off power, unplug the AC power cord.
  • A small amount of power is consumed in standby mode.

Clock Setting:

  • The clock can be set whether the unit is on or off.
  • Press and hold the CLOCK button for more than 2 seconds to enter setting mode.
  • Use the search buttons (►►| or ◄◄) to adjust hour and minute, then press CLOCK to confirm.
  • The clock is reset to "AM12:00" if the AC power cord is unplugged or a power failure occurs. Tuner preset stations will be erased after a few days in such cases.

Source Selection:

  • Press CD/II for CDs, TAPE for tapes, FM/AM for radio, and MD/AUX for external equipment.

Volume Adjustment:

  • Adjustable from "VOLUME 0" to "VOLUME40."
  • Use the VOLUME +/- control on the unit or the remote control.
  • Headphones can be connected to the PHONES jack for private listening; speakers will be muted.

Sound Enhancement:

  • Active Hyper Bass (AHB PRO): Press the AHB PRO button to cycle through "AHB 1," "AHB 2," and "AHB OFF." "AHB 2" provides stronger bass.
  • Sound Modes: Press the SOUND MODE button to select from "ROCK," "POP," "CLASSIC," "JAZZ," or "FLAT" (cancel). These modes only affect playback, not recording.

Display Brightness:

  • Press the DIMMER button on the remote control to alternate between dim and bright display.

FM/AM Radio:

  • Tuning: Press FM/AM to select the band. Press and hold search buttons (►►| or ◄◄) for automatic search, or press briefly for step-by-step tuning.
  • FM Mode: Press FM MODE to switch between stereo and mono reception, improving reception for weak signals.
  • Presetting Stations:
    • Automatic Presetting: Press and hold AUTO PRESET for more than 2 seconds to store strong signals automatically.
    • Manual Presetting: Tune to a station, press SET, use MULTI KEY >/< to select a preset number, then press SET again. Up to 30 FM and 15 AM stations can be stored.
  • Tuning in a Preset Station: Press FM/AM, then use MULTI KEY >/< to select the desired preset number.

CD Playback:

  • Loading: Press the open/close button (▲) to open the disc tray. Place the disc label side up on the inner circle (for 8 cm CDs) or the larger circle. Press the open/close button again to close.
  • Playing: Press CD/II to start playback.
  • Stopping: Press the stop button (■).
  • Pausing: Press CD/II to pause, press again to resume.
  • Track Navigation: Use MULTI KEY >/< or search buttons (►►| or ◄◄) to skip tracks or fast-forward/reverse within a track.
  • Program Play: Program up to 20 tracks. Load a CD, press PROG, select track numbers with MULTI KEY >/<, press SET, then repeat for other tracks. Press CD/II to start.
  • Random Play: Press RANDOM to play tracks in a random order.
  • Repeat Play: Press REPEAT to cycle through repeating one track, all tracks (normal, program, or random mode), or canceling repeat.
  • Tray Lock: Press STANDBY/ON while holding the stop button (■) to lock the disc tray and prevent ejection. "LOCKED" appears. Repeat to unlock.

Tape Playback:

  • Loading: Press the eject button (▲) for the cassette deck. Insert a cassette with the exposed tape down. Gently close the cassette holder.
  • Playing: Press TAPE (►). The tape direction indicator (► or ◄) flashes slowly.
  • Stopping: Press the stop button (■).
  • Fast-winding: Press search buttons (►► or ◄◄) when the tape is not running.
  • Reverse Mode: Press REV.MODE to cycle through playing one side, both sides once, or both sides continuously.

Recording:

  • Recording on Tape:
    1. Insert a recordable cassette.
    2. Close the cassette holder.
    3. Check recording direction (press TAPE twice then ■ to change).
    4. Start playing the source (FM, AM, or AUX).
    5. Press REC. The REC indicator lights up.
    6. Press the stop button (■) to stop recording.
  • CD Direct Recording: Records the entire CD or a programmed sequence onto tape.
    1. Insert a recordable cassette.
    2. Place a CD.
    3. Press REC. The CD player and cassette deck will automatically stop after recording.
    • To avoid pauses between selections, press CD/II twice after placing the disc.
  • One Track Recording: Records individual tracks from a CD onto tape.
    1. Insert a recordable cassette.
    2. Play the desired CD track.
    3. Press REC. The CD player returns to the beginning of that track and records it.
    4. Repeat steps 2 and 3 for other tracks.
  • Recording on Both Sides (Reverse Mode): Press REV.MODE until the reverse mode indicator is lit. Start recording in the forward direction first.
  • Recording Level: Automatically set, not affected by VOLUME, AHB PRO, or SOUND MODE settings.
  • Tape Protection: Remove small tabs on the back of the cassette to prevent accidental erasure. Cover holes with adhesive tape to re-record.

Timers:

  • Daily Timer and Recording Timer:
    1. Press and hold TIMER for more than 3 seconds.
    2. Set on-time (hour, then minute) using search buttons and TIMER.
    3. Set off-time (hour, then minute) using search buttons and TIMER.
    4. Select timer mode (DAILY TUNER, REC TUNER, DAILY TAPE, DAILY CD) and source using search buttons and TIMER.
    5. Set volume level ("VOLUME 0" to "VOLUME40" or "VOLUME –" for last level).
    6. Press TIMER to complete.
    7. Press STANDBY/ON to turn off the unit.
    • Daily Timer activates daily. Recording Timer activates once.
    • If "VOLUME 0" is selected for REC TUNER, the volume will be off during recording.
  • Sleep Timer:
    1. Press SLEEP on the remote control.
    2. Cycle through time lengths (10, 20, 30, 60, 90, 120 minutes) or "Canceled."
    • The unit automatically turns off after the specified time.
    • Setting Sleep Timer after Daily Timer starts cancels Daily Timer.
    • Setting Sleep Timer after Recording Timer starts cancels Recording Timer, but recording continues until Sleep Timer shuts off power.

Maintenance Features:

Handling Discs:

  • Remove discs by holding the edge and pressing the center hole.
  • Do not touch the shiny surface or bend the disc.
  • Store discs in their cases.
  • Avoid direct sunlight, temperature extremes, and moisture.
  • Clean discs with a soft cloth, wiping in a straight line from center to edge. Do not use solvents or conventional record cleaners.

Cleaning the Unit:

  • Wipe stains with a soft cloth. For heavy stains, use a cloth soaked in water-diluted neutral detergent, then wipe dry.
  • Avoid hard cloths, strong wiping, thinner, benzine, volatile substances (like insecticides), or prolonged contact with rubber/plastic, as these can damage the unit's finish.

Handling Cassette Tapes:

  • If tape is loose, take up the slack by inserting a pencil into one of the reels and rotating.
  • Avoid touching the tape surface.
  • Store tapes away from dusty places, direct sunlight/heat, moist areas, TVs/speakers, or magnets.
  • Cleaning Heads, Capstans, and Pinch Rollers: Use a cotton swab moistened with alcohol. Dirty components can cause impaired sound quality, discontinuous sound, fading, incomplete erasure, or recording difficulties.
  • Demagnetizing Heads: Turn off the unit and use a head demagnetizer.
  • Leader Tape: Wind leader tape first when recording to ensure no music is lost at the start/end of the tape.
  • C-120 Tapes: Not recommended due to potential deterioration and jamming.

JVC CA-FSP5 Specifications

General IconGeneral
BrandJVC
ModelCA-FSP5
CategorySpeaker System
LanguageEnglish

Related product manuals