Filename [DR-MH30EU_09Editing.fm]
Masterpage:Left+
66 EN
SYSTEM CONNECTIONS
Page 66 Friday, 11 June 2004 21:53
These instructions enable you to connect your unit to a Dolby
Digital decoder or an amplifier with built-in DTS.
1 Connect the unit and a Dolby Digital decoder or an amplifier
with built-in DTS using either an optional optical cable or an
optional coaxial cable.
NOTES:
● For Dolby Digital sound, set “DIGITAL AUDIO OUT” to “DOLBY
DIGITAL/PCM”. (
墌 pg. 67)
● For DTS sound, set “DIGITAL AUDIO OUT” to “STREAM/PCM”.
(
墌 pg. 67)
CAUTIONS:
● This unit has a dynamic range of more than 110 dB with regards to its
Hi-Fi audio capability. It is recommended that you check the
maximum level if you are going to listen to the Hi-Fi audio signals
through a stereo amplifier. A sudden surge in the input level to the
speakers may damage them.
● Some speakers and televisions are specially shielded to prevent
television interference. If both are of the non-shielded type, do not
place the speakers adjacent to the TV set as this can adversely affect
the playback picture.
When you can’t switch the audio channel of a bilingual
programme
When the unit is connected with a digital audio device using an
optional optical cable and “DIGITAL AUDIO OUT” is set to “DOLBY
DIGITAL/PCM”, it is not possible to switch the audio channel of a
bilingual programme recorded on a DVD-RAM or DVD-RW (VR
mode) disc. In this case, perform the following steps using the
remote control to switch “DIGITAL AUDIO OUT” from “DOLBY
DIGITAL/PCM” to “PCM ONLY”. (墌 pg. 29)
A Press SET UP to access the Main Menu screen.
B Press we to select “DVD VIDEO SET UP”, then press t.
C Press we to select “AUDIO OUTPUT”, then press t.
D Press rt to select “DIGITAL AUDIO OUT”, then press
ENTER.
E Press rt to select “PCM ONLY”, then press ENTER.
(墌 pg. 67)
F Press SET UP to complete the setting.
G Press AUDIO to select the desired audio channel.
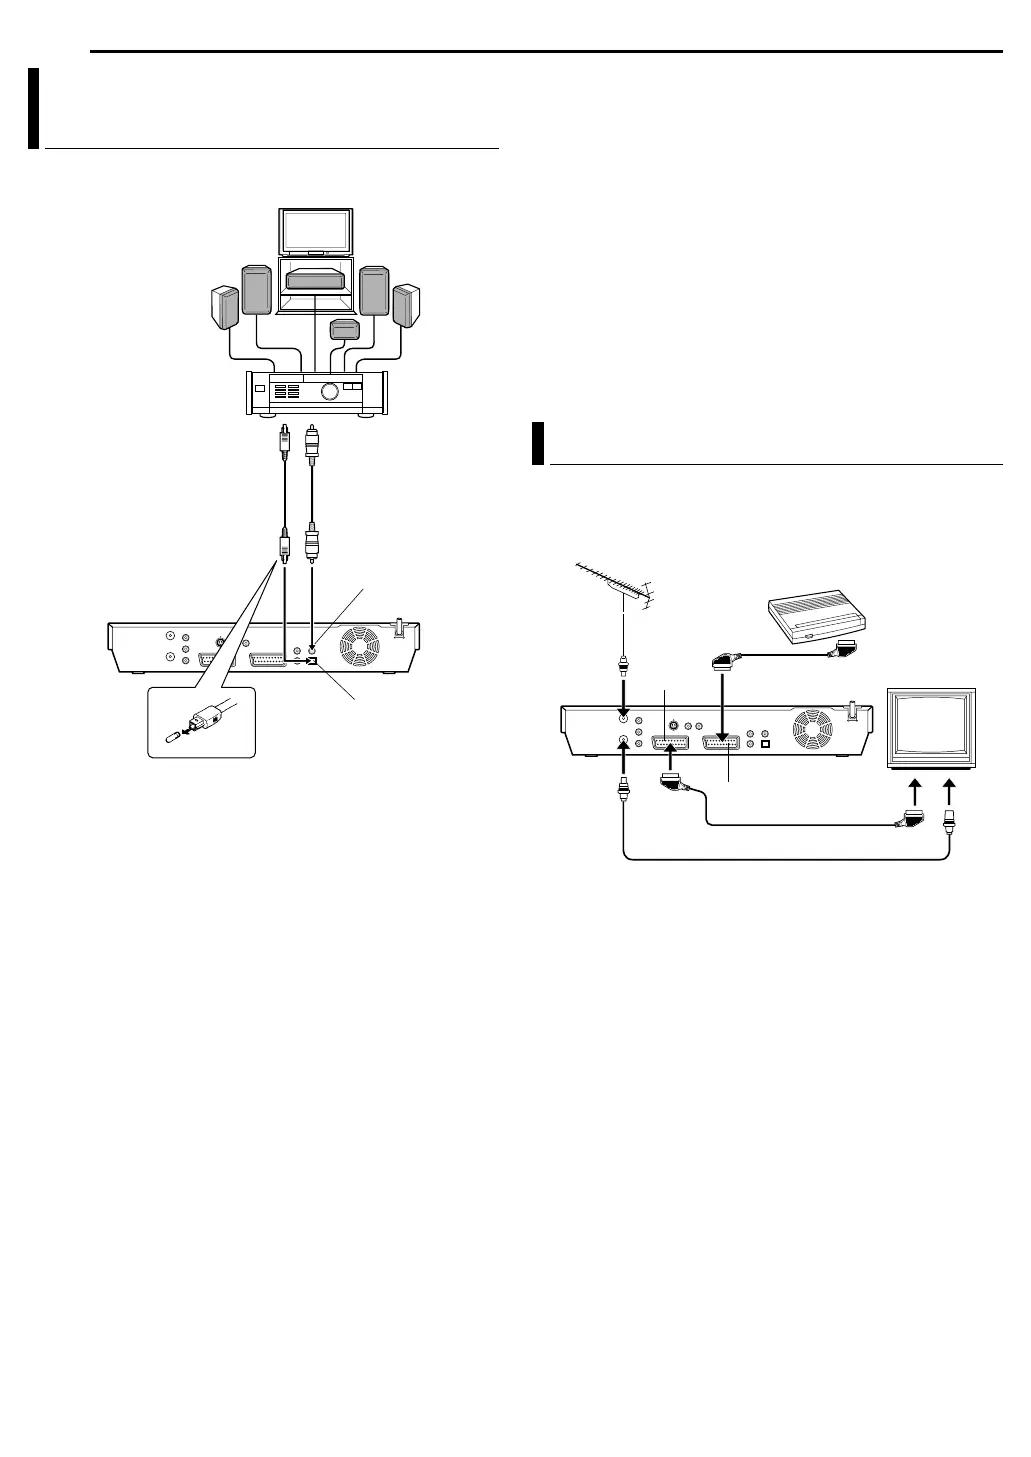
The L-2 IN/DECODER connector can be used as an input
connector for an external decoder (descrambler). Simply connect a
decoder and you can enjoy a variety of programming that is
available through scrambled channels.
1 Set “L-2 SELECT” to “DECODER”. (墌 pg. 61)
2 Connect your unit’s L-2 IN/DECODER connector to the
decoder’s 21-pin SCART connector using a 21-pin SCART cable.
3 Perform the procedure as described in “When Receiving A
Scrambled Broadcast” (墌 pg. 72).
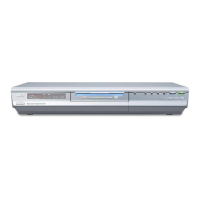
Connecting To A Dolby Digital Decoder
Or An Amplifier With Built-in DTS
Note for connection:
Remove the protection cap from the cable.
Optical cable
(not provided)
Dolby Digital Decoder or
amplifier with built-in DTS
To DIGITAL AUDIO input
Coaxial cable
(not provided)
DIGITAL OUT (COAXIAL)
DIGITAL OUT (OPTICAL)
Connecting/Using A Decoder
TV
RF cable (provided)
TV aerial cable
L-1 IN/OUT
L-2 IN/DECODER
Decoder
DR-MH30EU_00.book Page 66 Monday, June 14, 2004 8:03 AM
 Loading...