26
RECORDING
Advanced Features
Self-Timer
You can set the delay between pressing Recording Start/
Stop and the actual start of recording. If you secure the
camcorder, you (or whomever is operating the
camcorder) can enter the scene before recording starts.
NOTE:
You need the optional RM-V20U remote control unit to
perform this procedure.
ENGAGE RECORD–STANDBY
MODE
1
Make sure the lens cover is open, set the power
switch to CAMERA.
SET TIME DELAY
2
On the RM-V20U, press INTERVAL to set the delay
time. There are four choices, and they appear in the
viewfinder in the following order (each time
INTERVAL is pressed): 15S (15 seconds), 30S
(30 seconds), 1MIN (1 minute) and 5MIN
(5 minutes). Pressing again releases the Self-timer.
START DELAYED RECORDING
3
Press Recording Start/Stop. The tally lamp begins
blinking, and the blinking speed increases about
5 seconds before recording starts. When recording
begins, the lamp stops blinking but stays lit.
RELEASE SELF-TIMER MODE
4
To release when the tally lamp is not blinking, press
INTERVAL continuously until “ ” disappears. To
release when the tally lamp is blinking, press
Recording Start/Stop to stop the blinking, then press
INTERVAL continuously until “ ” disappears.
NOTE:
If the PROGRAM AE dial is set to “ ”, 15S is
automatically selected.
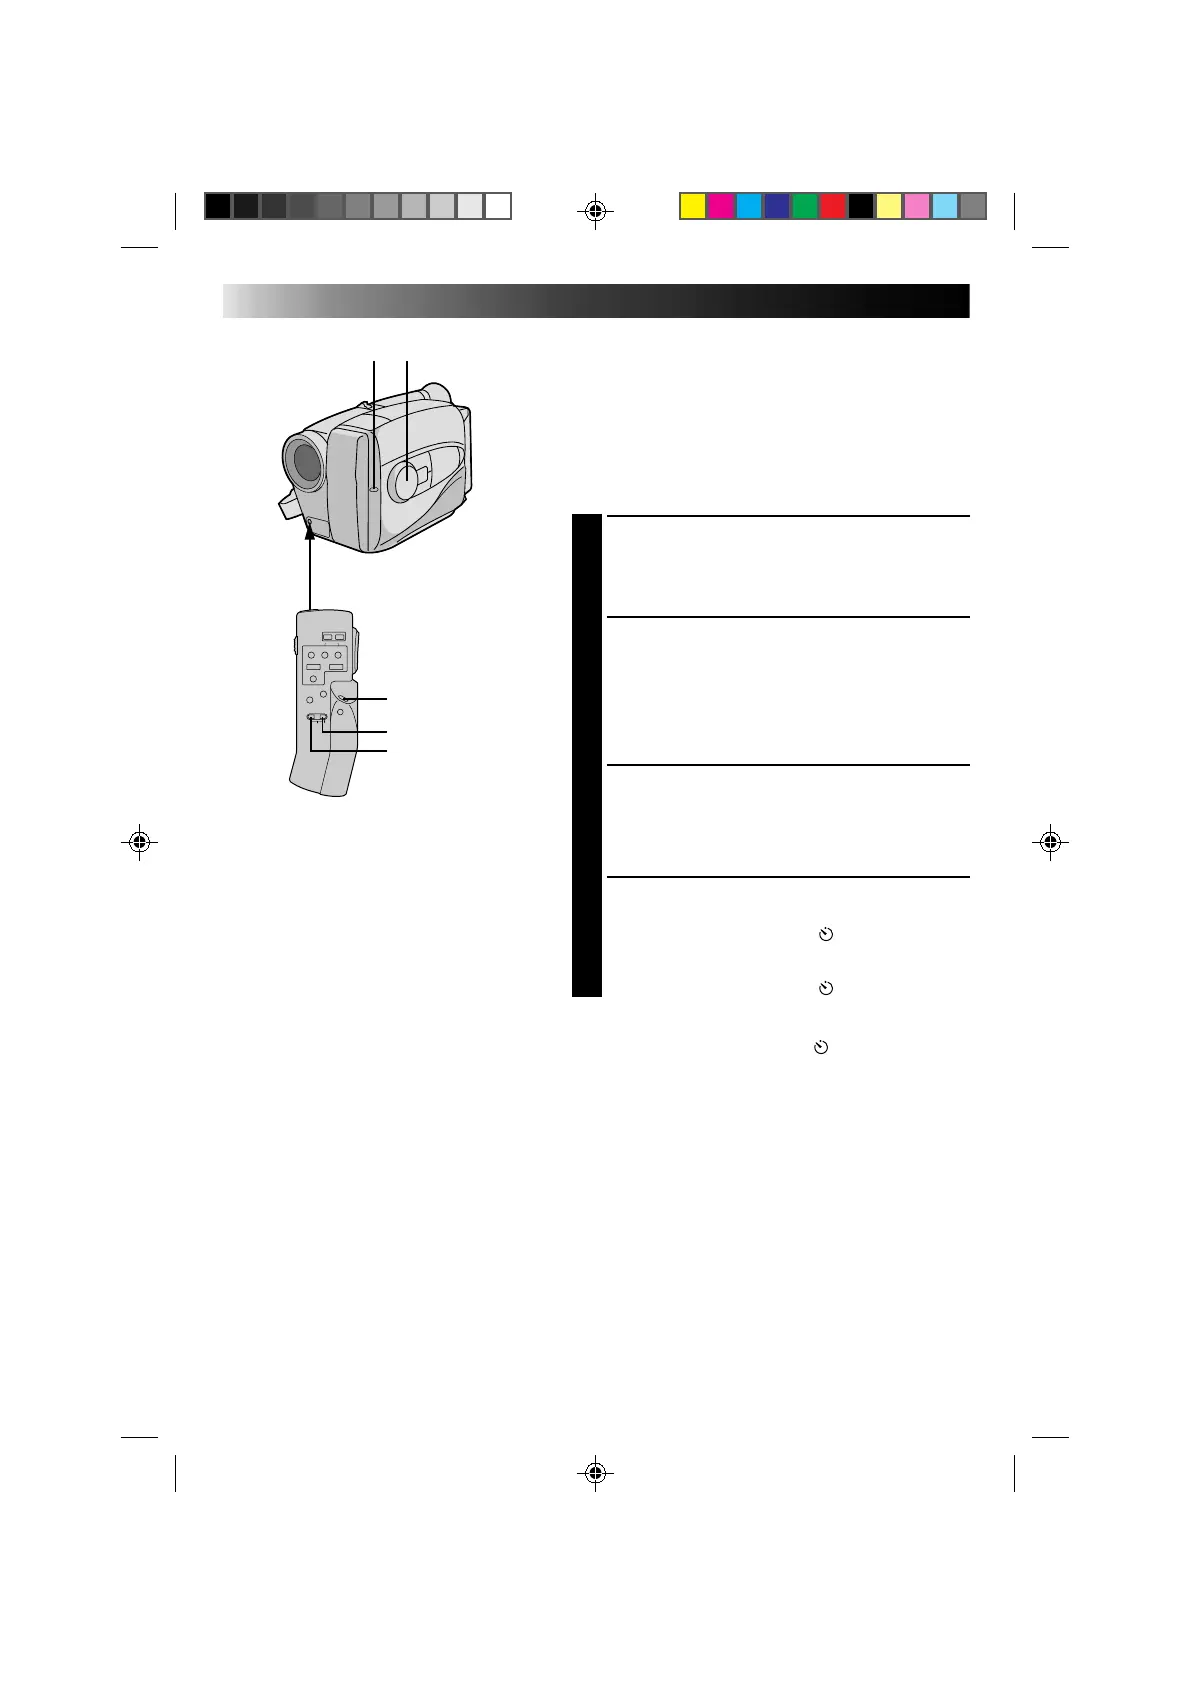
Tally lamp PROGRAM AE
RM-V20U (optional)
START/STOP
INTERVAL
REC TIME
Downloaded from: https://www.usersmanualguide.com/
 Loading...