Do you have a question about the JVC GR-AX280 and is the answer not in the manual?
Warning against exposing the unit to rain or moisture to prevent fire or shock.
Precautions for handling, charging, and disposing of lithium batteries to prevent hazards.
General safety advice, user-serviceable parts, and information on the crossed-out dust bin mark.
Essential operational guidelines and precautions for safe equipment use, covering connections, maintenance, and handling.
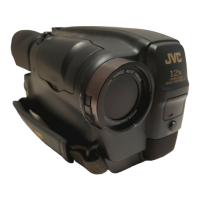
Details on the integrated auto light (GR-AX480 only) and the 22x optical hyper zoom feature.
Explanation of Programme AE with Special Effects and the Program Manager II function.
Lists all accessories supplied with the camcorder, such as power adapter, battery pack, and remote control.
Basic steps for supplying power to the camcorder and inserting a video cassette.
Initial steps for playing back recorded tapes and starting the recording process.
Explains the camcorder's 3-way power supply system using AC adapter, battery pack, or car battery.
Instructions for charging the battery pack, attaching, detaching, and notes on recording time.
Information on the charge marker function and important notes regarding battery performance and care.
Details on using a car battery charger (BH-V3E) and the supplied AC Power Adapter/Charger.
Step-by-step guide for installing and removing the CR2025 lithium battery for clock operation.
Guide to accessing the menu system and setting the camcorder's date and time.
How to set the tape length (T30, T45, T60) for accurate remaining time display.
Instructions for selecting between SP (Standard Play) and LP (Long Play) recording modes.
Step-by-step instructions for opening the cassette holder, inserting, and removing VHS-C cassettes.
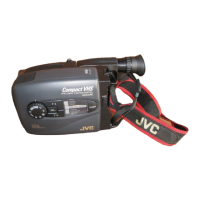
Instructions for adjusting the grip strap and the viewfinder's position and focus.
Instructions for attaching the shoulder strap and mounting the camcorder on a tripod.
Steps to load a cassette and enter the record-standby mode before shooting.
How to begin recording and what to expect in the viewfinder and tally lamp.
Procedure to stop recording and return the camcorder to record-standby mode.
Important notes on tape remaining time indicator, automatic power-off, and lens cover warning.
Instructions for zooming in and out using the power zoom button for magnification changes.
How to change the zoom speed settings (FAST/SLOW) via the menu system.
Using quick review to check recordings and retake to re-record specific segments.
Using the 5-second recording function for quick scene transitions similar to TV programs.
How to use the video light to brighten scenes in low-light conditions.
Warnings regarding the video light's heat, safe operation distance, and handling.
Displaying and recording date, time, or custom characters in the viewfinder or on a TV.
How the camcorder automatically records date information after certain operations.
Using the Select Dial to access shooting effects like Sepia, Sports, and High-Speed Shutter.
Explains Auto Mode Lock, Electronic Fog Filter, ND Effect, and Sepia modes for image enhancement.
Details on Sports and High-Speed Shutter modes for capturing fast-moving action.
How to create smooth fade-ins and fade-outs to a black screen for video transitions.
Applying a wide-screen effect by adding black bars to the top and bottom of the image.
Improving recording quality and brightness in low-light conditions.
Superimposing preset text titles onto recorded video segments.
Entering and displaying custom text titles up to 18 characters using the character generator.
How to access and navigate the camcorder's on-screen menu system for various settings.
Using the menu system to adjust functions like Focus, Exposure, and Character settings.
Explains settings for Focus, Exposure, Date/Time, Tele Macro, and Tape Length.
Explains settings for White Balance (M.W.B.) and Zoom Speed selection.
Settings for REC TIME, INT. TIME (Self-Timer/Time-Lapse), and TALLY LAMP.
Settings for Character Generator, JLIP ID number, and DEMO MODE activation.
Information on how the auto focus system works and situations where manual focus is recommended.
Steps to access the manual focus mode and adjust focus for nearer or farther subjects.
How to access the exposure control menu and manually adjust exposure levels.
Selecting preset white balance modes (Auto, Fine, Cloud, Halogen) or custom settings.
Procedure for memorizing a custom white balance setting using a white object.
How to set a delay time before recording starts automatically.
Instructions for creating animation effects and time-lapse videos by capturing frames at intervals.
Steps to load a cassette and begin playback to view recorded content.
How to stop playback and use fast-forward or rewind functions to search the tape.
Adjusting tracking to eliminate noise bars and improve picture quality during playback.
Features for pausing playback and performing high-speed tape searching.
Using the counter memory to mark and locate specific tape segments easily.
Instructions for inserting batteries, cassettes, and playing back VHS-C tapes on a VCR.
How to connect the camcorder to a VCR using audio/video cables for playback or editing.
How to connect the camcorder to a TV using audio/video or RF connections for playback.
Connecting the camcorder and VCR with audio/video cables to prepare for tape dubbing.
Step-by-step guide for dubbing recorded tapes from the camcorder to a VCR.
Guide to installing the CR2025 battery in the RM-V700U remote control unit.
Overview of the remote's buttons and their corresponding functions for camcorder and VCR control.
Using the remote for Self-Timer, Animation, and Time-Lapse functions.
How to place index codes on the tape using the remote control's VISS button.
Setting up the remote control and VCR for Random Assemble Editing (R.A.Edit).
List of VCR brand codes required to set up remote control compatibility.
How to connect the camcorder to different types of VCRs using the editing cable.
Steps to prepare both the camcorder and VCR before initiating the editing process.
How to mark the beginning and end points of scenes for inclusion in the edited video.
Procedures for correcting registered scene points and important operational notes.
Setting the VCR to record-pause mode to receive the edited scenes from the camcorder.
Initiating the automatic scene copying process and concluding the editing.
Finding edit-out and edit-in points and engaging the insert editing mode.
Executing the insert editing process to replace a segment of recorded tape with new footage.
Locating the precise start point on the tape for recording a new audio soundtrack.
Engaging audio dub-standby mode and beginning the process of recording new audio.
Steps to take after using the camcorder, including powering off and removing the cassette.
Instructions for cleaning the camcorder's exterior, lens, and viewfinder with appropriate materials.
Common issues related to power supply, such as no power or sudden shutoff, and troubleshooting steps.
Causes and solutions for recording not starting or being impossible to perform.
Problems with tape stopping during fast-forward/rewind or not performing the transport function.
Addressing issues like no playback picture, blurred images, error codes, and focus problems.
Troubleshooting date/time display issues, lens cover warnings, and other system errors.
Explanation of various symbols and indicators displayed in the camcorder's viewfinder.
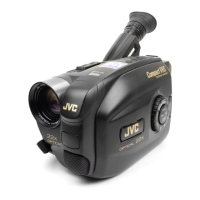
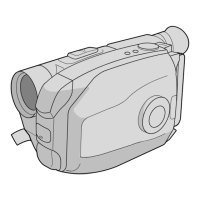
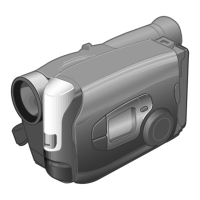
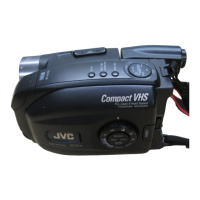
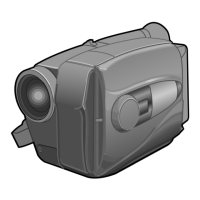
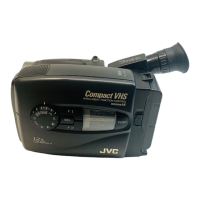
Identifies and describes the camcorder's main control buttons, dials, and switches.
Lists and locates all external connectors, indicators, and other parts of the camcorder.
Critical safety information regarding the video light's heat and battery pack handling and storage.
Guidelines for safe cassette handling, storage, and main unit operation in various environments.
Steps for cleaning video heads using a cleaning cassette to resolve playback issues.
Information on acclimatizing the unit, checking recorded content, and potential head damage.
Detailed technical specifications for the camcorder's format, power, dimensions, and AC adapter.
Specifications for the cassette adapter and a list of optional accessories available.
| Type | Camcorder |
|---|---|
| Recording Media | VHS-C |
| Image Sensor Size | 1/4 inch |
| Focus Adjustment | Auto/Manual |
| Shooting Modes | Auto, Manual |
| White Balance | Auto, Manual |
| Image Sensor | CCD |
| Viewfinder | Color |
| Microphone Type | Stereo |
| Screen Size | 2.5 inches |
| Weight | 1.1 lbs (500 g) |