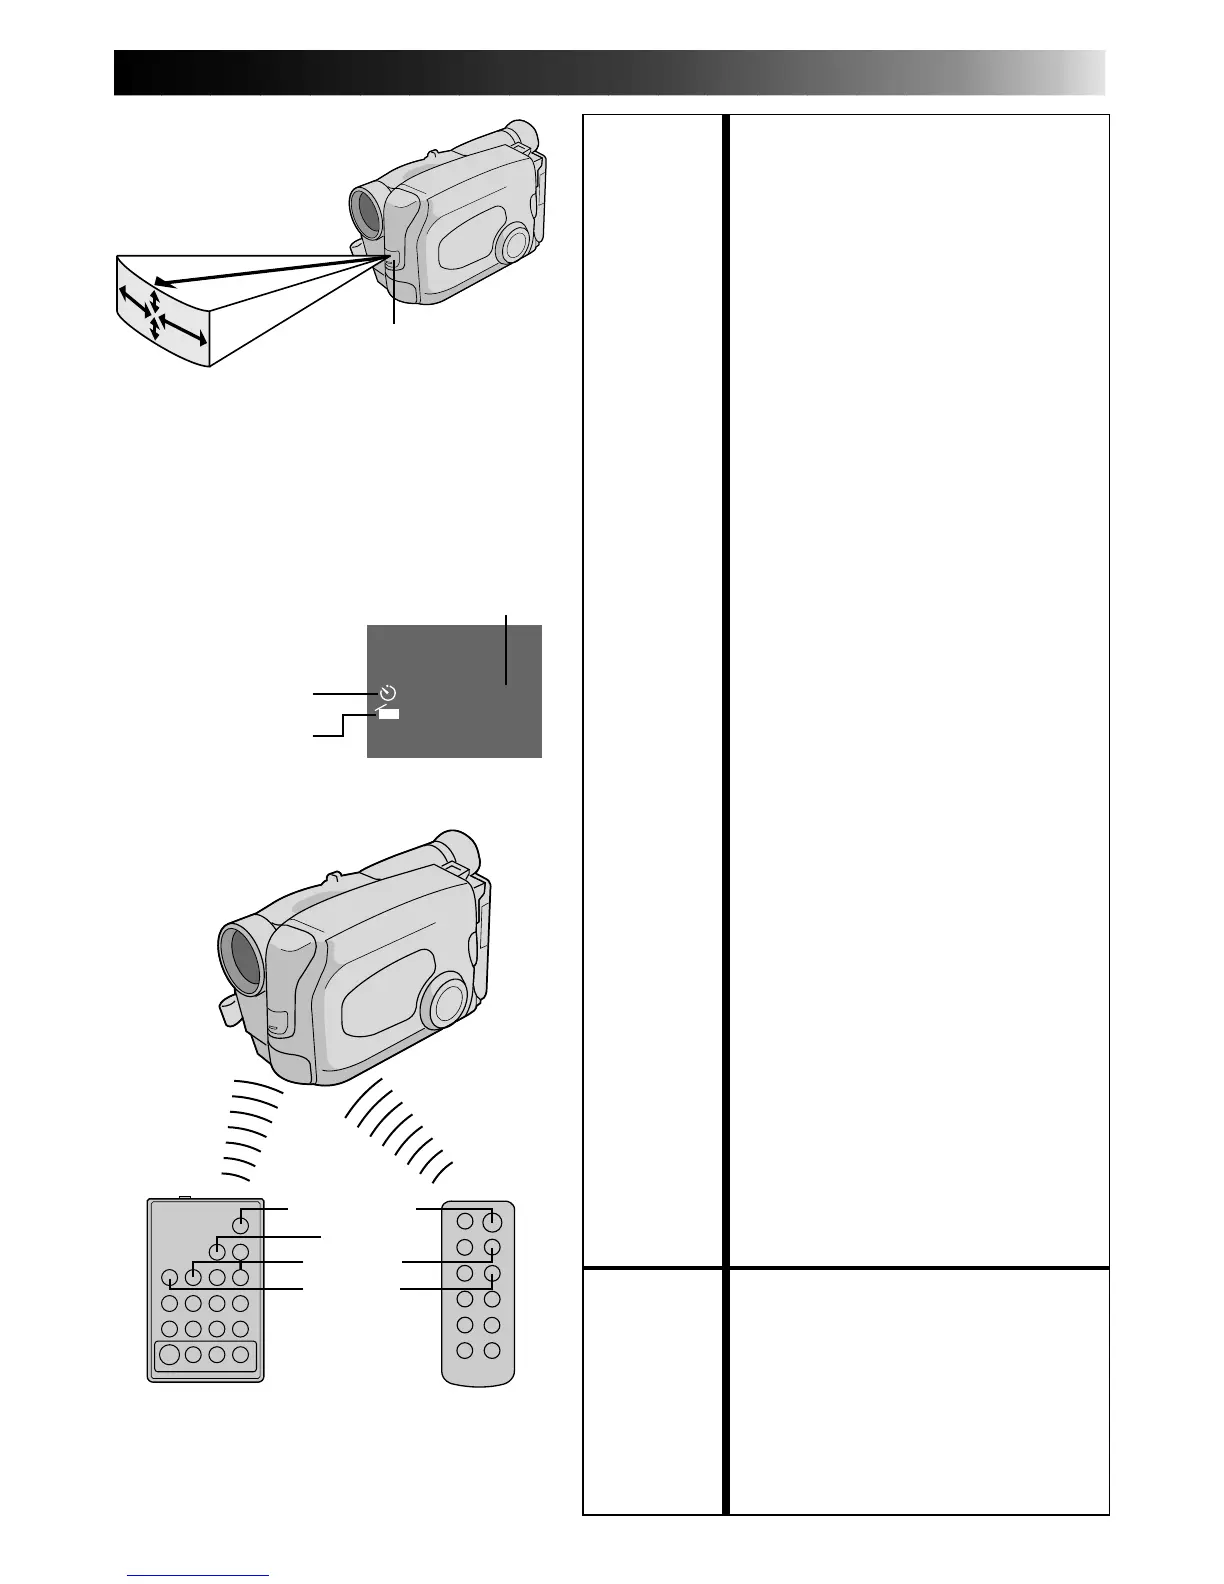
37
15°
5m
15°
30°
30°
Remote sensor
(GR-AX570 only)
When using the remote control, be sure to
point it at the remote sensor. The above
illustration shows the approximate transmitted
beam effective area for indoor use.
The transmitted beam may not be effective or
may cause incorrect operation outdoors or
when the remote sensor is directly exposed to
sunlight or powerful lighting.
1MIN
INDEX
1/2S
INT. TIME
REC TIME
START/STOP
VISS
Rec Time Indicator
Interval
Timer Indicator
Viewfinder
Index Code Marking
FEATURE: Self-Timer, Animation and Time-Lapse
PURPOSE: The remote control lets you set/release
Interval Timer and Rec Time functions as
well as the Menu screen.
OPERATION:
Self-Timer
1) Set
Instead of performing steps 1 through
3 on pg. 26 (“Self-Timer”), press INT.
TIME on the remote control. Each time
INT. TIME is pressed, the Interval
Timer indicator appears, changing in
the following order: 15S, 30S, 1MIN,
5MIN and No indication (off).
2) Release
Instead of setting “INTERVAL TIMER”
to “OFF” in the Menu, press INT. TIME
on the remote control until the Interval
Timer indicator disappears.
Animation
1) Set
Instead of performing steps 1 and 2 on
pg. 27 (“Animation”), press REC TIME
on the remote control. Each time REC
TIME is pressed, the Rec Time
indicator appears, changing in the
following order: 1/4S, 1/2S, 1S and No
indication (off).
2) Release
Instead of using the Menu in step 5 on
pg. 27, press REC TIME on the remote
control until the Rec Time indicator
disappears.
Time-Lapse
1) Set
Instead of performing steps 1 through
3 on pg. 27 (“Time-Lapse”), press INT.
TIME and REC TIME on the remote
control. Each time INT. TIME is
pressed, the Interval Timer indicator
appears, changing in the following
order: 15S, 30S, 1MIN, 5MIN and No
indication (off). Each time REC TIME is
pressed, the Rec Time indicator
appears, changing in the following
order: 1/4S, 1/2S, 1S and No
indication (off).
2) Release
Instead of using the Menu in step 5 on
pg. 27, press INT. TIME and REC TIME
on the remote control until the
indicators disappear.
NOTE:
Also refer to pgs. 26 and 27.
FEATURE: Index Code Marking (RM-V704U or
V700U only)
PURPOSE: To give you automatic access to any
selected point on a recording.
OPERATION: 1) Press VISS once to place the index
code. “INDEX” blinks in the
viewfinder during marking.
NOTE:
If VISS is pressed during Record–Standby
mode, the mark is placed where
RECORDING START/STOP is pressed.
Transmitted beam
effective area
RM-V704U or
RM-V700U
(optional)
OR
RM-V705U
(provided with
GR-AX570 only)