EasyManua.ls Logo

JVC GR-AXM670 User Manual

JVC GR-AXM670
60 pages
To Next Page IconTo Next Page
Page #1 background imageLoading...
Page #1 background image
GR-AXM670
GR-AXM270
COMPACT VHS CAMCORDER
INSTRUCTIONS
LYT0046-001B
Compact VHS
For Customer Use:
Enter below the Model No. and Serial
No. which is located on the bottom of
cabinet. Retain this information for
future reference.
Model No.
Serial No.
Question and Answer IconNeed help?

Do you have a question about the JVC GR-AXM670 and is the answer not in the manual?

JVC GR-AXM670 Specifications

General IconGeneral
BrandJVC
ModelGR-AXM670
CategoryCamcorder
LanguageEnglish

Summary

SAFETY PRECAUTIONS

Warning on lithium battery

Precautions for handling and disposal of lithium batteries.

IMPORTANT PRODUCT SAFETY INSTRUCTIONS

Grounding or Polarization

Proper grounding and polarization for electrical safety.

Lightning Protection

Protecting the unit from lightning surges.

QUICK OPERATION GUIDE

Supply Power

How to connect and use the power source.

Inserting a Video Cassette

Step-by-step guide to loading a video cassette.

Playback Operations

Basic steps for playing back recorded tapes.

Shooting Operations

Basic steps for recording video.

MAJOR FEATURES

Integrated Auto Light

Automatic light feature for low-light shooting.

Picture Stabilizer

Compensates for camera shake during recording.

Special Effects and Zoom

Program AE with Special Effects & Digital Hyper Zoom.

LCD Color Monitor

Details on the camcorder's color monitor.

Provided Accessories

List of items included with the camcorder.

GETTING STARTED

Power Supply and Battery Charging

Explains power options and battery charging procedure.

GETTING STARTED (cont.)

Clock (Lithium) Battery Installation

How to insert/remove the battery for clock operation.

GETTING STARTED (cont.)

Date/Time Setting Procedure

Step-by-step guide to setting the date and time.

GETTING STARTED (cont.)

Recording Mode and Tape Length Settings

How to select modes and set tape length.

GETTING STARTED (cont.)

Loading and Unloading Cassettes

Proper procedure for inserting and removing video cassettes.

GETTING STARTED (cont.)

Grip and Viewfinder Adjustment

Adjusting grip and viewfinder for optimal use.

GETTING STARTED (cont.)

Shoulder Strap and Tripod Mounting

Attaching strap and mounting on tripod.

RECORDING Basic Recording

Load Cassette and Enter Record-Standby

Steps to prepare the camcorder for recording.

Start and Stop Shooting

How to begin and end video recording.

RECORDING Basic Recording (cont.)

Stop Recording

Steps to stop video recording.

RECORDING Basic Recording (cont.)

Shooting While Watching LCD Monitor

How to record using the LCD monitor.

RECORDING Advanced Features

Journalistic and Interface Shooting

Tips for shooting in various angles and self-recording.

Brightness Control

Adjusting the brightness of the LCD monitor.

RECORDING Basic Features

Zooming Operation and Speed Control

Using zoom and adjusting its speed.

RECORDING Basic Features (cont.)

Quick Review and Retake Functions

Checking recordings and re-recording segments.

Picture Stabilizer

Compensates for camera shake during high magnification.

RECORDING Basic Features (cont.)

Date/Time Insert and Auto Record

Displaying and recording date/time information automatically.

RECORDING Advanced Features

Video Light Operation

How to use and control the camcorder's video light.

RECORDING Advanced Features (cont.)

Program AE and Special Effects

Accessing various shooting effects and AE modes.

Select Shooting Mode

How to select different shooting modes.

RECORDING Advanced Features (cont.)

Auto Mode Lock and Release

Locking controls and re-enabling them.

Creative Shooting Modes

Fog Filter, Sepia, Sports, High-Speed Shutter.

RECORDING Advanced Features (cont.)

Fade and Wipe Effects

Creating professional scene transitions like fades and wipes.

RECORDING Advanced Features (cont.)

Wide Mode

Creates a widescreen effect with black bars.

Super LoLux (Gain Up)

Improves recording in low-light conditions.

RECORDING Advanced Features (cont.)

Instant Titles

Superimposing preset text titles onto recordings.

Using Menu For Detailed Adjustment

Accessing and Navigating the Menu

Entering and moving through the camcorder's menu system.

Making Settings

Adjusting settings for various functions via the menu.

RECORDING Advanced Features (cont.)

Focus, Exposure, and White Balance

Settings for focus, exposure, and white balance adjustment.

Tape Length and Zoom Speed

Settings for tape length and zoom speed.

RECORDING Advanced Features (cont.)

Recording Time and Title Language

Settings for animation, time-lapse, and title language.

Digital Zoom and Color Bar Functions

Controlling digital zoom and using color bars.

Demo Mode

Activates an automatic demonstration of features.

RECORDING Advanced Features (cont.)

Auto Focus Operation and Limitations

How auto focus works and its limitations.

RECORDING Advanced Features (cont.)

Manual Focus Adjustment

Step-by-step guide for manual focus control.

RECORDING Advanced Features (cont.)

Manual Exposure Control

Adjusting exposure manually for desired brightness.

RECORDING Advanced Features (cont.)

Manual White Balance Adjustment

Setting white balance manually for accurate colors.

RECORDING Advanced Features (cont.)

Self-Timer Recording

Setting a delay before recording starts.

RECORDING Advanced Features (cont.)

Animation and Time-Lapse Recording

Creating stop-motion and time-lapse effects.

PLAYBACK Basic Playback

Load Cassette and Select Playback Mode

Steps to insert tape and set mode for playback.

Playback Controls

How to play, pause, stop, rewind, and fast-forward.

PLAYBACK Features

LCD Monitor Brightness and Speaker Volume

Adjusting monitor brightness and audio volume.

Tracking Adjustment

Eliminating noise bars during playback.

PLAYBACK Features (cont.)

Still Playback and Shuttle Search

Pausing playback and high-speed searching.

Counter Memory Function

Marking and locating specific tape segments.

PLAYBACK Using The Cassette Adapter

Cassette Adapter Setup and Use

Instructions for using the VHS-C cassette adapter.

PLAYBACK Basic Connections

Connecting Camcorder to VCR/TV

Guides for connecting to VCRs and TVs.

TAPE DUBBING

Equipment Setup and Dubbing Process

Steps for connecting and performing tape dubbing.

USER MAINTENANCE

After Use Procedures

Steps to take after operating the camcorder.

Cleaning the Camcorder

Instructions for cleaning the exterior, lens, and monitor.

TROUBLESHOOTING

Power and Recording Problems

Solutions for power supply and recording issues.

Playback and Tape Transport Issues

Diagnosing playback and tape movement problems.

TROUBLESHOOTING (cont.)

Other Common Symptoms and Solutions

Solutions for various other operational issues.

Controls and Indicators

Camcorder Controls

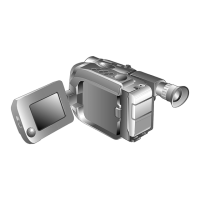
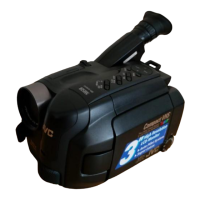
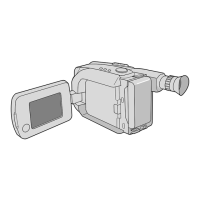
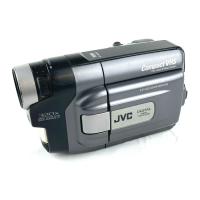
Identification and function of various buttons and dials.

Connectors and Indicators

Location and purpose of ports and status lights.

CAUTIONS

Video Light and Battery Safety

Safety precautions for the video light and batteries.

General Battery Precautions

Important rules for safe battery usage and care.

SPECIFICATIONS

General, Video, and Audio Specs

Technical details for general, video, and audio systems.

Camera and Power Adapter Specs

Technical details for camera components and power adapter.

Cassette Adapter and Accessories

Specifications for the cassette adapter and optional accessories.

FOR SERVICING (Only in U.S.A.)

Locating a JVC Service Center

Information on finding authorized service centers.

User Repair Warning

Emphasizes using qualified service personnel for repairs.

WARRANTY (Only in U.S.A.)

Limited Warranty Terms and Coverage

Details of the product's limited warranty and what is covered.

Warranty Service Procedures

Requirements for obtaining warranty service.

Related product manuals