Do you have a question about the JVC GR-AXM70 and is the answer not in the manual?
Provides guidance on how to navigate and utilize the instruction manual effectively.
Highlights the danger of exposing the camcorder to rain or moisture.
Details hazards and precautions related to the lithium battery used in the device.
Specifies the correct AC Power Adapter/Charger and its usage conditions.
Provides a caution regarding the plug of the AA-V11U AC Power Adapter.
Provides essential guidelines for the safe installation of the camcorder.
Details instructions for safe antenna installation and grounding.
Provides rules for safe use of accessories like stands and tripods.
Advises caution when moving products combined with carts.
Warns against using the product near water or in wet environments.
Discourages inserting objects or spilling liquids into the unit.
Discourages the use of attachments not recommended by the manufacturer.
Details how to clean the camcorder safely using a damp cloth.
Advises situating the product away from heat sources.
Instructs users not to service the unit themselves and to refer to qualified personnel.
Lists conditions that necessitate referring the product for service.
Emphasizes using manufacturer-specified replacement parts.
Recommends a safety check after any service or repairs.
Explains how to connect and attach the battery pack for power.
Details the step-by-step process for loading a video cassette.
Guides through the process of playing back recorded tapes.
Explains the fundamental steps for starting and stopping recording.
Describes the feature that compensates for camera shake during recording.
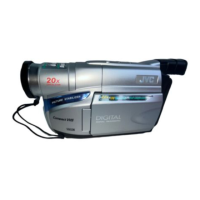
Explains the digital zoom capability, doubling optical magnification.
Details various shooting effects accessible via the Program AE dial.
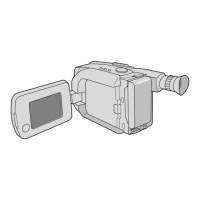
Highlights the adjustable LCD color monitor for viewing.
Introduces the feature for creating edited videos by selecting clips.
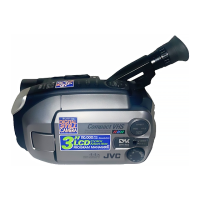
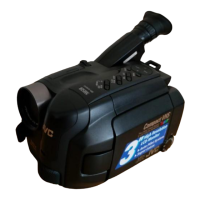
Lists the accessories provided with the camcorder.
Describes the camcorder's 3-way power supply system and its usage.
Details the procedure for charging the camcorder's battery pack.
Explains how to attach and detach the battery pack for operation.
Explains the REFRESH function for fully discharging the battery before recharging.
Describes the charge marker for remembering battery status (charged/discharged).
Provides instructions for powering the camcorder using a car battery.
Details how to connect and use the AC Power Adapter for operation.
Explains how to insert or replace the lithium battery for clock operation.
Guides on adjusting the viewfinder for optimal viewing and focus.
Details the procedure for setting the camcorder's date and time.
Explains how to set the tape length for accurate remaining time display.
Guides on selecting the recording mode (SP or EP) based on preference.
Provides a step-by-step guide for loading and unloading video cassettes.
Explains how to adjust the grip strap for comfortable operation.
Details how to attach and adjust the shoulder strap for carrying.
Guides on how to securely mount the camcorder on a tripod.
Instructions for loading a cassette before starting recording.
Explains how to shoot using the viewfinder, entering Record-Standby mode.
Details how to initiate recording by pressing the Start/Stop button.
Explains how to stop recording and re-enter Record-Standby mode.
Guides on shooting using the LCD monitor, entering Record-Standby mode.
Explains how to adjust the LCD monitor for different shooting angles.
Details how to shoot oneself using the LCD monitor.
Explains how to adjust the brightness of the LCD monitor using the BRIGHT dial.
Details how to use the power zoom lever for zooming in and out.
Explains how to check the end of the last recording automatically.
Guides on re-recording segments by finding the start point for new recording.
Explains how to use the PROGRAM AE select dial for various shooting effects.
Locks the camcorder in Full Auto mode to prevent accidental operation.
Re-enables controls previously disabled by Auto Mode Lock.
Creates a misty white look, softening the image for a fancy effect.
Darkens the picture to counter glare, similar to using an ND filter.
Records the scene in sepia monochrome for an old movie effect.
Enhances dusk, twilight, and fireworks scenes for dramatic effect.
Uses high shutter speed to capture fast-moving action.
Captures faster action than Sports mode with high shutter speeds.
Explains the Full Range AF system and situations where manual focus is needed.
Details how to lock focus in place, useful for subjects moving between shots.
Guides on adjusting focus manually for precise control.
Compensates for unstable images caused by camera-shake.
Explains automatic iris adjustment and manual override for picture quality.
Details pro-style scene transitions like fade-in/out and wipe-in/out.
Records black bars for a cinema-like wide-screen effect.
Allows superimposing preset titles onto recorded footage.
Explains how to enter original titles of up to 18 characters.
Allows displaying date, time, and characters on recordings.
Automatically records the date for 5 seconds after recording initiation.
Guides on adjusting white balance manually for precise color settings.
Explains MWB settings for natural colors under various lighting.
Details the on-screen menu system for simplifying camcorder settings.
Adjusts sensitivity for shooting in dark environments.
Allows shooting subjects close to the lens with focus adjustment.
Sets parameters for Self-Timer and Time-Lapse recording.
Sets parameters for Animation and Time-Lapse recording.
Number for connecting the camcorder to a computer via the J terminal.
Controls the tally lamp to signal the start of recording.
Allows inputting characters for titles.
Allows setting the current date and time.
Sets a delay between pressing Start/Stop and actual recording start.
Allows shooting a series of pictures to create an illusion of movement.
Records sequentially at preset time spans to capture subtle changes over time.
Instructions for loading a cassette before starting playback.
Sets the power switch to PLAY mode for playback.
Details how to start playback and view the picture on the LCD monitor.
Explains how to stop playback.
Guides on rewinding or fast-forwarding the tape during stop mode.
Explains how to adjust LCD brightness using the BRIGHT dial.
Details how to adjust the speaker volume using the VOLUME dial.
Eliminates noise bars on the screen during playback.
Allows pausing during playback and resuming normal playback.
Enables high-speed search in either direction.
Makes it easier to locate a specific tape segment using the counter.
Details connecting the camcorder to a VCR for editing, dubbing, and playback.
Explains connecting the camcorder to a TV with A/V input connectors.
Details connecting the camcorder to a TV without A/V input connectors.
Describes using the VHS-C cassette adapter for playback on a VHS VCR.
Guides on connecting and performing tape dubbing from camcorder to VCR.
Details connecting the camcorder and VCR for tape dubbing.
Sets up the camcorder and VCR for the dubbing process.
Engages the VCR's AUX and Record-Pause modes for dubbing.
Locates a spot just before the desired edit-in point for dubbing.
Presses PLAY on the camcorder and engages the VCR's Record mode.
Engages VCR's Record-Pause and presses PAUSE on the camcorder.
Repeats steps for additional editing and stops when finished.
Explains creating edited videos by selecting up to 8 'cuts' for automatic editing.
Details setting the remote to operate the VCR using the VCR CODE LIST.
Guides on using the remote control to operate the VCR functions.
Details various connection types for R.A.Edit with different VCRs.
Inserts a recorded tape and sets the Power switch to 'PLAY'.
Turns on VCR, inserts tape, and engages AUX mode.
Presses PLAY/PAUSE, then R.A. EDIT to display the counter.
Locates the beginning of a scene and registers it using IN/OUT.
Locates the end of a scene and registers it using IN/OUT.
Repeats steps for additional editing and stops when finished.
Presses CANCEL to erase the most recently registered point.
Engages VCR's Record-Pause mode via remote or manually.
Presses EDIT on camcorder to copy selected scenes to VCR.
Enters still/pause mode on completion and presses STOP on both units.
Steps to take after using the camcorder, including power off and battery removal.
Wipes the camcorder's exterior gently with a soft cloth.
Details cleaning the LCD monitor gently with a soft cloth.
Blows the lens with a blower brush and wipes with lens cleaning paper.
Explains how to remove the eyepiece for cleaning.
Removes dust from the viewfinder using a blower brush.
Guides on re-aligning and re-attaching the eyepiece.
Addresses problems related to the camcorder not receiving power.
Troubleshoots issues preventing recording or the start of recording.
Solves problems with playback picture, noise bars, blurriness, or counter indication.
Addresses tape stopping during fast-forward/rewind or inability to perform these actions.
Covers various issues like tape not ejecting, functions unavailable, or image problems.
Provides guidance for using the AC Power Adapter/Charger in different regions.
Advises on using an AC plug adapter for non-standard AC wall outlets.
Details FCC compliance rules and potential interference issues.
General warnings and rules for battery usage and safety.
Provides specific cautions for handling and using the nickel-cadmium battery pack.
Provides guidelines for proper use and storage of VHS-C cassettes.
Lists actions to avoid for the safety of the main camcorder unit.
Specifies conditions and places to avoid when using the unit.
Lists environments and conditions to avoid when leaving the unit.
Warns against actions that could damage or impair the unit.
Explains the automatic head cleaning feature and troubleshooting for dirty heads.
Warns against actions that could damage the LCD monitor.
Advises on prolonging the LCD monitor's service life.
Explains phenomena like screen heating or spots that are not malfunctions.
Warns about severe damage from moisture condensation on the head drum.
Advises stopping use and consulting a dealer if malfunctioning occurs.
Provides contact information and instructions for finding a JVC service center.
Outlines the terms and duration of the limited warranty for the product.
| Camcorder Media Type | VHS-C |
|---|---|
| Focus Adjustment | Auto/Manual |
| Microphone Operation Mode | Stereo |
| Viewfinder Type | Electronic |
| Effective Pixels | 270, 000 pixels |
| Image Sensor | 1/4-inch CCD |
| LCD Screen Size | 2.5 inches |
| Shooting Modes | Auto, Manual |
| White Balance | Auto, Manual |
| Lens Aperture | F/1.6 |
| Viewfinder Screen Size | 0.5 inches |