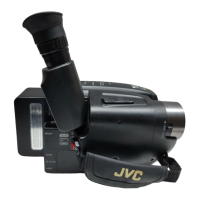
Do you have a question about the JVC GR-AXM25 and is the answer not in the manual?
Handling and disposal of lithium batteries to prevent hazards.
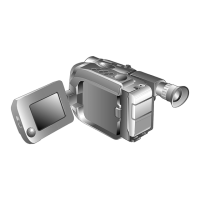
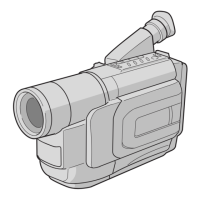
Procedures for setting up the camcorder and its components.
Guidance on installing and grounding antennas safely.
Guidelines for operating the camcorder safely.
Procedures for maintenance and repair.
Instructions for powering the camcorder.
Steps for playing back recorded tapes.
Steps for recording video.
Compensates for unstable images caused by camera shake.
Explains the digital zoom capability.
Accessing various shooting effects via the AE select dial.
Details about the adjustable LCD color monitor.
Steps for charging the battery pack using AC power.
Instructions for using the battery pack.
Explains the charge marker on the battery pack.
Steps for inserting or removing the clock battery.
Manual adjustment of the viewfinder for optimal viewing.
Setting the power switch to "CAMERA" for viewfinder adjustment.
Adjusting the diopter for clear focus in the viewfinder.
Setting the power switch and AE dial for date/time.
Accessing the camcorder's menu screen.
Navigating to the Date/Time function in the menu.
Adjusting the date and time values.
Initiating the clock operation after setting date/time.
Exiting the menu screen.
Selecting tape length for accurate remaining time display.
Choosing between SP (Standard Play) and EP (Extended Play) modes.
Opening the LCD monitor to access the cassette compartment.
Ejecting the cassette holder.
Inserting or removing the video cassette.
Closing and locking the cassette holder.
Closing the LCD monitor.
Adjusting the grip for comfortable use.
Securing the shoulder strap.
Mounting the camcorder on a tripod.
Steps for loading a cassette into the camcorder.
Preparing the camcorder for recording.
How to begin recording.
How to stop recording.
Preparing the camcorder for shooting using the LCD.
Beginning recording while viewing the LCD monitor.
Stopping recording.
Offers different angles for dramatic results.
Shooting yourself while viewing your image on the LCD.
Adjusting the LCD monitor brightness.
How to use the zoom lever for zooming in and out.
Checking the end of the last recording by rewinding and playing back.
Re-recording segments by finding the start point.
Selecting shooting effects by turning the AE select dial.
Locks camcorder in Full Auto mode to prevent accidental changes.
Enhances dusk, twilight, and fireworks scenes for dramatic effect.
Captures fast-moving action with high shutter speed.
Captures fast action more effectively than Sports mode.
Provides continuous shooting ability from close-up to infinity.
Locks focus in place, useful when subjects pass or for specific framing.
Setting the AE select dial for manual focus.
Adjusting focus for distant or near subjects.
Locking the manual focus position.
Exiting manual focus mode.
Activating the picture stabilizer to compensate for shake.
Selecting the AE dial for exposure adjustment.
Increasing brightness using the + button.
Decreasing brightness using the - button.
Resetting exposure to initial settings.
Selecting modes for fade or wipe transitions.
Choosing the Fade/Wipe function.
Setting fade or wipe transition modes.
Starting recording to activate fade-in or wipe-in.
Ending recording to activate fade-out or wipe-out.
Cancelling the selected fade or wipe standby mode.
Fades the picture in or out to a black screen.
Gradually turns the picture into or from a mosaic pattern.
A black screen moves in like a shutter or opens from the center.
A black screen gradually covers or uncovers the image.
Selecting the wide mode for a cinema-like effect.
Activating the wide screen function.
Engaging the wide screen mode.
Returning to the normal screen view.
Displaying preset titles on the screen.
Selecting the AE dial for title display.
Selecting the title function.
Choosing from preset titles to superimpose.
Accessing the menu to set characters.
Navigating to the character set menu.
Entering original titles up to 18 characters.
Finishing character input and returning to normal screen.
Displaying date, time, and characters on screen.
Selecting the AE dial for display options.
Activating the display function.
Cycling through date, time, or date/time display modes.
Automatically recording date for 5 seconds after recording initiation.
Setting the AE dial for white balance adjustment.
Selecting the M.W.B. function.
Choosing a white balance preset.
Manually adjusting focus for white balance calibration.
Adjusting white balance by holding SET for 3 seconds.
Setting the AE dial for menu access.
Opening the on-screen menu system.
Selecting a function from the menu list.
Adjusting various settings like Gain Up, Tele Macro, etc.
Exiting the menu screen.
Adjusts brightness for low-light environments.
Allows shooting subjects close-up at approximately 60 cm.
Sets parameters for Self-Timer and Time-Lapse recording.
Sets parameters for Animation and Time-Lapse recording.
Identifier for connecting camcorder to a computer via J terminal.
Controls the tally lamp signal for recording.
Allows input of custom characters for titles.
Sets the current date and time.
Accessing the menu to set the self-timer.
Setting the delay time for the self-timer.
Exiting the menu after setting the interval.
Initiating recording with a set delay.
Accessing the menu for animation settings.
Setting the recording duration for animation.
Starting the animation recording process.
Repeating recording for multiple frames.
Deactivating the animation mode.
Accessing the menu for time-lapse settings.
Setting the time interval between recordings.
Setting the duration for each recorded frame.
Initiating the time-lapse recording process.
Deactivating the time-lapse mode.
Steps for loading a cassette into the camcorder.
Setting the power switch to PLAY.
Starting playback.
Stopping playback.
Using REW or FF buttons during stop mode.
Adjusting LCD brightness with the BRIGHT dial.
Adjusting speaker volume with the VOLUME dial.
Eliminating noise bars by adjusting tracking.
Pausing playback.
High-speed searching in either direction.
Locating specific tape segments using the counter memory.
Connecting camcorder to VCR using audio/video cables.
Turning on camcorder, VCR, and TV.
Setting VCR and TV to appropriate input modes.
Connecting camcorder to TV using audio/video cables.
Setting the TV to VIDEO or AV mode.
Installing a battery into the cassette adapter.
Inserting the compact VHS cassette into the adapter.
Playing back the adapter/cassette on a VCR.
Removing the cassette from the adapter.
Connecting the camcorder and VCR for dubbing.
Setting up camcorder and VCR for dubbing.
Engaging VCR AUX and Record-Pause modes.
Locating the start point for editing.
Starting the dubbing process.
Pausing the dubbing process.
Repeating steps for additional editing.
Setting the remote to operate the VCR.
Using the remote control for VCR operations.
Connecting the camcorder to a VCR for editing.
Inserting tape and setting power to PLAY.
Turning on VCR and setting AUX mode.
Displaying the R.A. Edit counter.
Registering the in-point for a scene.
Registering the out-point for a scene.
Registering up to 8 scenes for editing.
Erasing the most recently registered point.
Setting the VCR to record-pause mode.
Starting the automatic copying of selected scenes.
Completing the editing process and stopping both units.
Turning off the camcorder after use.
Removing the cassette from the holder.
Closing and locking the cassette holder.
Closing the LCD monitor.
Detaching the battery pack.
Closing the lens cover.
Wiping the exterior with a soft cloth.
Cleaning the LCD monitor gently.
Cleaning the camcorder lens with a blower brush and paper.
Detaching the eyepiece for cleaning.
Cleaning dust from the viewfinder.
Reattaching the eyepiece after cleaning.
Troubleshooting power supply issues.
Troubleshooting recording problems.
Troubleshooting playback issues.
Troubleshooting tape movement issues.
Reasons why the tape fails to eject.
Troubleshooting unavailable functions.
Troubleshooting error numbers like E03.
Reasons for out-of-focus images.
Steps to correct wrong date and time settings.
Indicates cassette status or remaining tape.
Shows the selected recording mode (SP or EP).
Indicates when the AE select dial is switched.
Shows when Fade/Wipe standby mode is active.
Displays the selected tape length.
Indicates when the camcorder is recording.
Shows when the picture stabilizer is active.
Shows the remaining power level of the battery pack.
Alerts about clock battery issues or settings.
Indicates when the end of the tape is reached.
Warns of condensation inside the camcorder.
Controls playback and pause functions.
Starts and stops recording.
Selects automatic exposure modes and special effects.
Controls the zoom magnification.
Connection point for external power.
Outputs video signal for playback on external devices.
Indicates recording status.
The primary display screen for viewing and menus.
Alternative viewfinder for composing shots.
Notes on using the AC adapter/charger in different regions.
Guidance on using AC plug adapters.
Compliance information regarding FCC rules.
General rules and warnings for battery use.
Precautions related to battery packs.
Precautions for using VHS-C cassettes.
Guidelines for storing cassettes properly.
Safety warnings about not disassembling or modifying the unit.
Warnings about using the unit in specific environments.
Warnings about leaving the unit in extreme conditions.
Precautions to protect the unit from damage.
Warnings to prevent damage to the LCD monitor.
Tips to prolong the LCD monitor's service life.
Phenomena to be aware of during LCD monitor use.
Information about the camcorder's head cleaning feature.
Explains moisture condensation and its effects.
What to do if malfunctioning occurs.
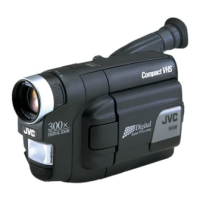
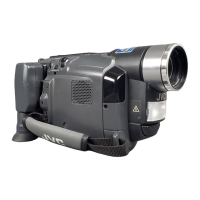
Technical details of the camcorder's general features.
Technical specifications related to the camera components.
Technical specifications for the LCD monitor.
Technical specifications for audio output and speaker.
Specs for the AC adapter/charger.
Technical specs for the cassette adapter.
List of accessories included with the camcorder.
List of accessories available for purchase.
How to find a JVC service center.
Instructions for shipping the product for repair.
How to purchase accessories for JVC products.
Warning against opening the cabinet for service.
Specifies the warranty period for parts.
Specifies the warranty period for labor.
Defines the geographical validity of the warranty.
Details JVC's responsibilities for repairs and replacements.
Steps for the customer to obtain warranty service.
List of items and conditions not covered by the warranty.
Limitations on implied warranties like merchantability.
Legal disclaimers regarding warranty and liability.
Note regarding warranty for refurbished products.
Instructions for customer to record model and serial numbers.
| LCD Screen Size | 2.5 inches |
|---|---|
| Focus Adjustment | Auto/Manual |
| Shooting Modes | Auto, Manual |
| White Balance | Auto, Manual |
| Microphone Operation Mode | Stereo |
| Display Type | LCD |
| Image Sensor | 1/4 inch CCD |
| Viewfinder Type | Electronic |
| Battery Type | Rechargeable Li-Ion |
| Lens | JVC lens |
| Microphone | Built-in stereo |