Do you have a question about the JVC GR-AXM300 and is the answer not in the manual?
Warnings about fire, shock, and battery hazards to prevent serious injury.
Precautions to avoid electric shock and explanations of safety symbols.
Information on power sources, compatibility, and battery handling.
Essential steps for safe and proper product installation, including grounding and ventilation.
Safety measures for installing external antennas and avoiding electrical hazards.
Guidelines for safe operation, accessories, and placement away from hazards.
Procedures for cleaning and protecting the unit from moisture damage.
Instructions for handling repairs and ensuring safety by using qualified personnel.
Instructions for connecting power and using the battery pack for operation.
Steps to insert a video cassette into the camcorder for recording or playback.
How to play back recorded video content and control playback.
Steps to start and stop recording video using the camcorder.
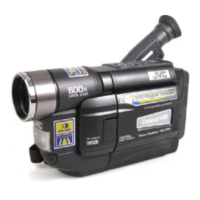
Overview of the camcorder's advanced functions like image stabilization and zoom.
List of accessories provided with the camcorder for enhanced functionality.
Explains the camcorder's power sources and their usage.
Detailed steps for charging and using the battery pack.
Provides estimates of recording duration based on battery type.
Understanding the battery charge marker for status indication.
Connecting to car battery or AC power for continuous operation.
Step-by-step guide for installing and removing the clock battery.
Detailed procedure for configuring the camcorder's date and time.
Choosing between Standard Play (SP) and Extended Play (EP) recording modes.
Setting tape length for accurate recording time display.
Procedures for inserting and removing video cassettes safely.
How to adjust the grip strap for comfortable handling.
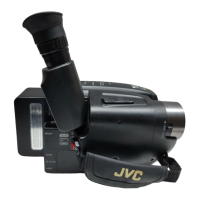
Adjusting the viewfinder for clear visibility and focus.
Instructions for attaching and adjusting the shoulder strap.
How to securely mount the camcorder onto a tripod.
Steps to prepare the camcorder for shooting, including loading cassettes.
How to begin recording video using the viewfinder.
Instructions for stopping the recording process.
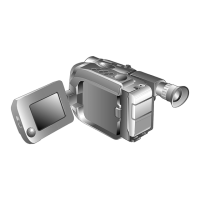
How to enter standby and begin recording using the LCD monitor.
How to stop recording when using the LCD monitor.
Techniques for dynamic shooting angles and self-recording.
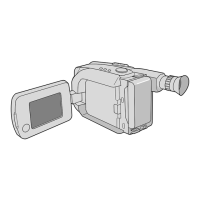
How to adjust the brightness of the LCD screen.
How to use the zoom feature for magnification.
Customizing the zoom speed through the menu settings.
Functions for reviewing and re-recording footage.
How to activate the picture stabilizer for steady shots.
How to display and record date and time on video.
How to use the built-in video light to brighten scenes.
Critical safety warnings regarding the hot video light.
Using the Select Dial to apply various shooting effects.
Locking and unlocking shooting controls.
Applying effects like fog, ND filter, sepia, twilight, sports, and color reversal.
Capturing fast-moving action with a high shutter speed.
Using fade-in/out and wipe effects for scene transitions.
Applying a cinematic wide-screen effect.
Improving image quality in low or poor lighting.
Superimposing preset titles onto recordings.
How to open the camcorder's menu system.
Navigating and selecting desired functions in the menu.
Procedures for adjusting various camcorder settings via the menu.
Descriptions of various menu options like focus, exposure, and white balance.
Configuring settings for time-lapse and animation recording.
Settings for tally lamp, titles, digital zoom, color bars, and demo mode.
Details on how the autofocus system operates and its limitations.
Step-by-step guide for manually adjusting the focus.
How to adjust the camera's exposure settings.
Selecting automatic or manual white balance modes.
How to set a custom white balance using a reference object.
Setting a delay for recording to start automatically.
Creating animation by shooting sequences of still images.
Capturing slow changes over extended periods.
Steps to load a cassette and select playback mode.
How to play back, stop, rewind, and fast-forward tapes.
Adjusting LCD brightness and speaker volume.
Correcting playback issues like noise bars.
Pausing playback and performing high-speed searches.
Using the counter memory to mark and find tape segments.
Preparing the cassette adapter by inserting battery and cassette.
Playing tapes using the adapter and removing the cassette.
How to connect the camcorder to a VCR for editing or playback.
Connecting the camcorder to a TV for playback.
Connecting equipment and preparing for tape dubbing.
Steps for finding edit points, starting, stopping, and segment editing.
How to install the battery in the remote control.
Overview of remote control buttons and their functions.
Using remote for timer, animation, and time-lapse functions.
How to mark tape segments using the remote control.
Pairing the remote control with the VCR.
Setting up and performing random assemble editing.
Connecting the camcorder to various VCR types or pause terminals.
Setting up the camcorder and VCR for the editing process.
Registering scene start and end points for editing.
Performing automatic editing of selected scenes to the VCR.
Detailed steps for insert editing new scenes into recorded video.
How to record new audio onto existing footage.
Steps to take after finishing use, like powering off and removing battery.
Instructions for cleaning the exterior, lens, and viewfinder.
Solutions for no power or sudden power loss.
Troubleshooting recording failures or start issues.
Solutions for playback issues like no picture or blurred images.
Troubleshooting tape stopping or FF/Rewind issues.
Addressing issues like tape eject, function errors, image anomalies, and focus problems.
Handling external interference and reset procedures.
Critical safety warnings regarding the hot video light.
Guidelines for using power adapters and plug adapters.
Compliance with FCC rules and handling radio interference.
Important warnings and guidelines for battery use and care.
Proper handling and storage of video cassettes.
Preventing LCD damage and understanding normal operational phenomena.
Warning about moisture damage and its prevention.
What to do if the unit malfunctions.
Information on finding authorized JVC service centers.
How to purchase replacement or additional accessories.
Warning against user servicing to prevent electrical shock.
Details of the limited warranty, including coverage and service procedures.
Items and conditions not covered by the warranty.
Section for recording product serial and model numbers.
| Camcorder Media Type | VHS-C |
|---|---|
| Optical Zoom | 16x |
| Image Sensor Size | 1/4 inch |
| Minimum Illumination | 1 lux |
| Microphone Operation Mode | Mono |
| Connector Type | Composite video/audio output |
| Display Type | LCD |
| Display Size | 2.5 inch |
| Type | Camcorder |
| Image Sensor | CCD |
| Low Light Performance | 1 lux |
| LCD Screen | 2.5 inch |
| Focus Adjustment | Automatic |
| White Balance | Automatic |
| Recording Media | VHS-C |
| Zoom | 16x optical |