Do you have a question about the JVC GR-AXM50 and is the answer not in the manual?
Lists major sections and subsections for easier reference.
Explains how to connect polarized or 3-wire grounding plugs to power outlets safely.
Advises operating the product only from the indicated power source type.
Warns against overloading wall outlets and extension cords to prevent fire.
Instructs on routing power cords to prevent damage from pinching or walking.
Emphasizes not blocking cabinet openings for proper product ventilation and cooling.
States the product should only be mounted as recommended by the manufacturer.
Provides guidance on grounding outside antennas to protect against surges and static.
Advises unplugging the unit and disconnecting the antenna during lightning storms.
Warns about locating antenna systems away from overhead power lines to avoid fatal contact.
Provides safety guidelines for using accessories and mounting products.
Details how to clean the camcorder using a damp cloth after unplugging.
Advises referring all servicing to qualified personnel to avoid hazards.
Lists conditions under which the product requires servicing by qualified personnel.
Stresses using manufacturer-specified replacement parts for safety.
Recommends safety checks after service to ensure safe operating condition.
Guides on connecting and using the battery pack for power.
Explains the steps to open the holder and insert a video cassette.
Details how to set power to PLAY, press PLAY/PAUSE, and stop playback.
Outlines steps for opening the lens cover, setting power to CAMERA, and starting recording.
Features an auto light to brighten scenes in dim lighting conditions.
Compensates for camera shake to provide stable images at high magnification.
Allows access to various shooting effects by turning the PROGRAM AE dial.
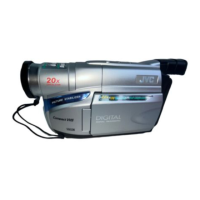
Offers digital circuitry for doubling magnification, providing a 36X hyper zoom.
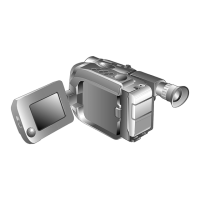
Features a color LCD monitor for viewing and shooting, with adjustable angles.
Enables easy creation of edited videos by selecting up to 8 cuts for automatic editing.
Explains the camcorder's 3-way power supply system and basic power operations.
Details the procedure for connecting the AC adapter and charging the battery pack.
Guides on attaching and detaching the battery pack for operation.
Describes the charge marker on the battery pack for tracking charge status.
Explains how to use an optional car battery cord for powering the camcorder.
Details how to connect and use the AC power adapter for continuous operation.
Provides instructions for inserting and replacing the clock battery for memory functions.
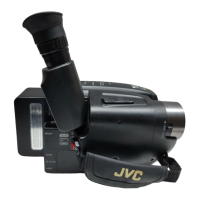
Guides on positioning the viewfinder and adjusting the diopter for clear focus.
Details the process for setting the camcorder's date and time for accurate recording.
Explains how to select tape length to ensure accurate remaining time display.
Guides on choosing between SP (Standard Play) and EP (Extended Play) recording modes.
Provides step-by-step instructions for loading and unloading video cassettes.
Explains how to adjust the grip strap for comfortable operation and access to controls.
Guides on attaching and adjusting the shoulder strap for secure carrying.
Details how to securely mount the camcorder onto a tripod.
Instructions for loading a cassette before starting recording.
Guides on entering Record-Standby mode and shooting using the viewfinder.
Explains how to press the Start/Stop button to begin recording.
Details how to press the Start/Stop button again to end recording.
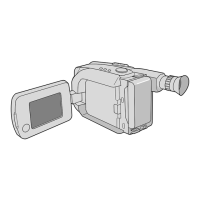
Guides on shooting using the LCD monitor, including angle adjustments.
Provides tips for shooting from different angles for dramatic results.
Explains how to shoot oneself by tilting the LCD monitor upward.
Guides on adjusting the LCD monitor brightness using the BRIGHT dial.
Explains how to use the power zoom lever for zoom in/out effects and hyper zoom.
Allows checking the end of the last recording by pressing the Retake button.
Guides on re-recording certain segments by using the Retake button.
Details how to use the built-in video light to brighten scenes in dim lighting.
Explains how to use the PROGRAM AE dial to access various shooting effects.
Locks the camcorder in Full Auto mode to prevent accidental operation.
Re-enables controls disabled by Auto Mode Lock.
Creates a misty white picture effect, softening the image.
Darkens the picture to counter glare effects on the subject.
Records scenes in sepia-tinted monochrome for an older movie effect.
Enhances dusk, twilight, and fireworks scenes for natural and dramatic results.
Captures fast-moving action with high shutter speed.
Captures faster action than Sports mode with higher shutter speeds.
Covers auto focus capabilities and situations requiring manual focus.
Explains the camcorder's full-range AF system for continuous shooting.
Locks focus in place, useful when subjects pass or for specific framing.
Guides on manually adjusting focus for precise control and optimal image sharpness.
Compensates for camera shake to provide stable images, especially at high magnification.
Allows manual adjustment of the iris for picture quality, overriding auto settings.
Provides professional scene transitions like fade-in/out and wipe-in/out effects.
Creates a cinema-like widescreen effect by recording black bars at the top and bottom.
Allows superimposing preset titles onto recorded video.
Enables entering original titles of up to 18 characters for video customization.
Allows displaying date, time, and custom characters on the video.
Automatically records date for 5 seconds after recording initiation.
Provides manual adjustment for precise color temperature and white balance.
Sets color temperature for the light source to achieve natural colors.
Explains the on-screen menu system for simplifying camcorder settings.
Adjusts sensitivity for shooting in dark environments for brighter images.
Allows shooting close-up subjects with improved focus at a shorter distance.
Sets parameters for Self-Timer and Time-Lapse recording.
Sets parameters for Animation and Time-Lapse recording.
Necessary for connecting the camcorder to a device using the J terminal.
Controls the tally lamp signal for recording start.
Allows inputting characters for titles and date/time inserts.
Allows setting the current date and time.
Sets a delay between pressing the record button and the actual start of recording.
Creates an illusion of movement by shooting a series of slightly different pictures.
Records subtle changes over an extended period by capturing at preset time spans.
Instructions for loading a cassette for playback.
Guides on setting the power switch to PLAY for playback operation.
Details how to press PLAY/PAUSE to start playback and view the image.
Explains how to press the STOP button to end playback.
Guides on using REW or FF buttons to move the tape during stop mode.
Explains how to turn the BRIGHT dial to adjust image brightness.
Explains how to adjust speaker volume using the VOLUME dial.
Guides on turning the volume dial up or down.
Eliminates noise bars on the screen during playback by adjusting tracking.
Pauses playback by pressing PLAY/PAUSE, resuming with another press.
Allows high-speed search in either direction using FF or REW buttons.
Helps locate specific tape segments by resetting and marking the counter.
Details connecting the camcorder to a VCR for editing, dubbing, and playback.
Guides on connecting the camcorder to a TV with A/V inputs for playback.
Explains connection to a TV without A/V inputs using an RF unit.
Instructions for using the cassette adapter to play VHS-C tapes on a VCR.
Guides on connecting the camcorder and VCR to dub tapes, including finding edit points.
Enables easy video editing by selecting up to 8 cuts for automatic assembly.
Explains how to set the remote control to operate the VCR by entering a code.
Details how to use the remote control for basic VCR operations like PLAY, STOP, PAUSE.
Guides on connecting the camcorder to different types of VCRs for editing purposes.
Instructions for preparing the camcorder by inserting a tape and setting the power switch.
Guides on preparing the VCR by turning it on and engaging AUX mode.
Explains how to access R.A. EDIT display and select scenes.
Shows how to display the edit counter in the viewfinder and on the TV screen.
Details how to locate and register the start point (IN) of a scene.
Details how to locate and register the end point (OUT) of a scene.
Guides on repeating steps to register up to 8 scenes for editing.
Explains how to erase the most recently registered point using the CANCEL button.
Guides on engaging VCR's Record-Pause mode and starting automatic editing.
Provides instructions for installing and replacing the battery in the remote control unit.
Explains using remote control buttons for Self-Timer, Animation, and Time-Lapse functions.
Guides on using the VISS button to place index codes for automatic access to recording points.
Details how to record a new scene into a previously recorded tape, replacing a section.
Explains how to record a new soundtrack on a prerecorded tape using the microphone.
Provides steps for powering off, ejecting the cassette, and removing the battery pack.
Guides on cleaning the camcorder's exterior, lens, LCD monitor, and viewfinder.
Lists possible causes and solutions for power supply issues.
Addresses problems related to performing recording and starting the recording process.
Covers issues with playback picture, noise bars, and blurred or interrupted images.
Addresses problems with tape stopping during fast-forward/rewind or inability to perform these actions.
Covers miscellaneous issues like tape not ejecting, functions unavailable, and image blurriness.
Warns about the video light becoming extremely hot and potential burn injuries.
Notes the adapter's automatic voltage selection for international use.
Advises using an AC plug adapter for outlets not matching the standard plug type.
Provides essential safety rules for using batteries, including avoiding heat and disposal.
Offers cautions for handling and using the camcorder's rechargeable battery packs.
Provides guidelines for proper use, storage, and protection of VHS-C cassettes.
Lists important safety warnings regarding the main unit, including not opening or disassembling it.
Offers precautions to prevent damage and ensure the longevity of the LCD monitor.
Lists general specifications including format, power, signal system, and cassette details.
Details audio output specifications like impedance and connector type.
Provides specifications for the AC power adapter/charger, including power requirements and dimensions.
Lists specifications for the cassette adapter, including dimensions and weight.
Lists accessories included with the camcorder, with a reference to page 6.
Lists optional accessories available for purchase.
Provides information on finding JVC authorized service centers and contacting them.
Lists the address and contact information for JVC's national service headquarters.
Outlines the terms and conditions of the limited warranty provided by JVC Company of America.
| Video Format | VHS-C |
|---|---|
| Image Sensor Size | 1/4 inch |
| Image Sensor | CCD |
| Effective Pixels | 270, 000 pixels |
| Viewfinder Size | 0.5 inch |
| Type | Camcorder |
| Viewfinder | Black & White |
| Battery Life | Approx. 1 hour (with supplied battery) |