EN
38
USING THE REMOTE CONTROL UNIT
!
@
9
4
)
r
#
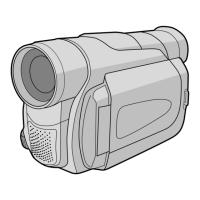
● Make sure to set “S/AV INPUT” to “OFF” in the Menu
Screen (
墌 pg. 31).
● When editing on a VCR equipped with a DV input
connector, an optional DV cable can be connected
instead of an S-Video cable and audio/video cable.
To Remote PAUSE
or R.A.EDIT
TV
To PAUSE IN $
Editing cable***
Audio/Video
cable
(provided)
* Connect when an S-Video cable is not used.
** When connecting cables, open this cover.
*** Provided with the optional Remote Control kit
RM-V717KITU.
Connector
cover**
To AV
(
To EDIT )
To
S-VIDEO
q
Programme
Random
Assemble
Editing Menu
1
2
3
4
5
6
7
8
–– :–– ~
~
~
~
~
~
~
~
––
NIOUT
MOD E
–
–
:
––
0
:
000
TOTAL
CODETIME
VCR
5 If using a Fade/Wipe at the beginning of the scene,
press FADE/WIPE 9 on the remote control.
• Cycle through the effects by pressing repeatedly, and
stop when the one you want is displayed.
6 At the beginning of the scene, press EDIT IN/OUT
@ on the remote control. The Edit-In position appears
in the Random Assemble Editing Menu.
7 At the end of the scene, press EDIT IN/OUT @. The
Edit-Out position appears in the Random Assemble
Editing Menu.
8 If using a Fade/Wipe at the end of the scene, press
FADE/WIPE 9.
• Cycle through the effects by pressing repeatedly, and
stop when the one you want is displayed.
• If you select a Fade/Wipe effect for an Edit-Out point,
the effect is automatically applied to the following
Edit-In point.
• When you use Fade/Wipe effects, that time is
included in the total time.
9 If using Playback Special Effects, press EFFECT !
(墌 pg. 35).
10
Repeat steps 6 through 9 to register additional
scenes.
• To change previously registered points, press
CANCEL # on the remote control. The registered
points disappear, one at a time, from the most
recently registered point.
• If you are not using Fade/Wipe or Programme AE with
special effects, repeat steps 6 and 7 only.
NOTES:
● When choosing a scene, set Edit-In and Edit-Out points
so that there is a relatively large difference between
them.
● If the search time for an in-point exceeds 5 minutes, the
recording deck’s Record-Standby mode will be cancelled
and editing will not take place.
● If there are blank portions before or after the Edit-In and
Edit-Out points, a blue screen may be included in the
edited version.
● Since time codes register time only as accurately as
seconds, the time code total time may not match the total
programme time exactly.
● Turning off the camcorder’s power erases all registered
Edit-In and Edit-Out points.
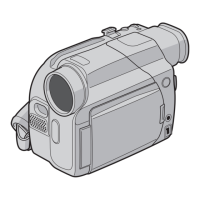
SELECT SCENES
4 Point the remote control at the camcorder’s remote
sensor. Press PLAY (
4
) ) and then press R.A.EDIT
ON/OFF r on the remote control.
The Random Assemble Editing Menu appears.
S-Video cable
(optional)
To
S-VIDEO IN
White to
AUDIO L IN
Red to
AUDIO R IN
Yellow to
VIDEO IN*
1 GR-D90/70A EN 35-40 03.2.4, 17:0838