Do you have a question about the JVC GR-D72 and is the answer not in the manual?
General warnings about electric shock and not opening the unit.
Warning to protect the unit from rain, moisture, and water.
Notes on rating plate location and AC adapter safety cautions.
Cautions regarding NTSC signal compatibility, battery packs, and AC adapter.
Hazards and precautions for handling lithium batteries.
Information on mercury content in lamps and disposal.
Advice on ensuring adequate space for ventilation and avoiding heat sources.
Warnings about naked flames, water containers, and direct sun exposure.
Cautions on carrying the unit, finger safety, and tripod use.
Warning about tripping on connecting cables.
Lists and illustrates the accessories included with the camcorder.
Instructions for attaching the lens cap for lens protection.
Step-by-step guide on attaching the shoulder strap to the camcorder.
Instructions for attaching core filters to cables to reduce interference.
Procedure for charging the camcorder's battery pack using the AC adapter.
Instructions for powering the camcorder using the AC adapter.
Safety warnings and information about lithium-ion batteries.
Steps to adjust the camcorder's grip for comfortable operation.
Instructions for setting the camcorder's date and time.
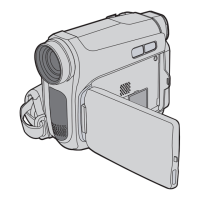
Instructions to adjust the brightness of the LCD monitor and viewfinder.
Guide on how to attach the camcorder to a tripod.
Procedures for inserting and removing memory cards.
Step-by-step guide to start recording video.
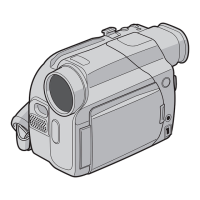
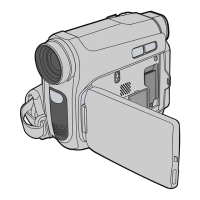
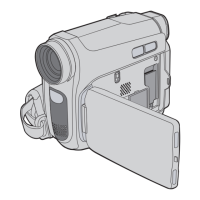
Explains how to use the LCD monitor and viewfinder.
How the remaining tape time is displayed on the camcorder.
Instructions for using the zoom function to magnify images.
Tips for shooting from different angles for dramatic results.
How to record yourself using the camcorder.
Explanation of the time code recorded on tape for scene location.
Guide on how to start recording from a specific point on a tape.
Steps to play back recorded video from a tape.
How to pause playback to view a still image.
Function to find blank sections on a tape for recording.
How to perform high-speed search during playback.
Operating the camcorder's playback functions using the remote control.
How to play back video in slow motion.
How to advance playback frame by frame.
Using zoom during playback to magnify the image.
Adding creative effects to video playback.
How to connect the camcorder to a TV or VCR for playback.
How to take still pictures using the camcorder.
Transferring still images from tape to a memory card.
Viewing stored still images one by one.
Automatically playing back all stored still images.
Browsing multiple files at once using an index.
Displaying details about stored image files.
Turning off on-screen indicators during playback.
Preventing accidental deletion of files on a memory card.
Removing files from a memory card.
Setting print options for compatible printers.
Selecting specific images and number of prints for printing.
Resetting the print count for all images.
Creating a new folder and resetting file naming sequence.
Formatting a memory card to clear all data.
Overview of the camcorder's on-screen menu system.
Detailed settings for video and D.S.C. recording modes.
System settings like BEEP, REMOTE, DEMO MODE, and PRIORITY.
Settings for on-screen display elements like BRIGHT, DATE/TIME, TIME CODE.
Selecting picture quality mode for still images.
Selecting the image size for still photos.
How to select recording media for snapshot images.
Settings for video playback, including SOUND MODE and NARRATION.
Using the LED light to brighten subjects in dark environments.
Enhancing brightness for low-light shooting.
Applying scene transition effects during recording.
Using automatic exposure modes with special effects.
Setting variable shutter speed for fast-moving subjects.
Compensating for bright snowy conditions.
Compensating for strong direct lighting.
Enhancing evening scenes for natural look.
Applying a sepia tone for an old-photo look.
Recording in black and white for a classic film effect.
Recording still images onto video tape.
How the camcorder automatically focuses on subjects.
Manually adjusting exposure for optimal image brightness.
Locking the iris to maintain consistent exposure in changing light.
Adjusting color reproduction based on lighting conditions.
Manually setting white balance using a white reference.
Connecting to a VCR for dubbing video content.
Performing digital dubbing with DV-equipped units.
Connecting the camcorder to a PC via USB or DV cable.
Adding narration or other audio during playback.
Replacing a section of recorded video with new footage.
Notes on charging and battery operation.
Additional notes on cassette handling.
Refers back to video recording section.
Refers back to DSC recording section.
Troubleshooting steps when the camcorder does not power on.
Solutions for issues preventing recording.
Explanation of vertical lines due to high contrast.
Explanation for screen color changes in direct sunlight.
How to enable date/time display during recording.
Troubleshooting blinking indicators.
Reasons why digital zoom might not function.
Steps to take when playback has no picture.
Troubleshooting playback noise or blue screen.
Solutions for memory card playback issues.
Reasons why snapshot mode may be unavailable.
Addressing unusual colors in snapshots.
How to fix dark snapshot images.
How to fix bright snapshot images.
Troubleshooting white balance activation issues.
Reasons why wipe/fader effects may not function.
Troubleshooting B&W fader issues.
Troubleshooting Program AE with special effects.
Adjusting GAIN UP for slow shutter speed appearance.
Troubleshooting when the power/charge lamp is off.
Resolving the "Set Date/Time!" error message.
Troubleshooting absence of picture.
Ensuring functions are available by setting Power Switch correctly.
How to delete protected files from a memory card.
Avoiding black bars by using the DIS feature.
Correcting issues with DV cable connection.
Information about the LCD monitor heating up.
Explanation of bright spots on LCD/viewfinder.
Troubleshooting cassette loading problems.
Steps for removing a stuck memory card.
Troubleshooting no picture on the LCD monitor.
Addressing jittery images on the LCD monitor.
How to enable time code display.
Error codes related to unit malfunction.
Warnings and precautions for handling battery packs.
Guidelines for using and storing video cassettes.
Guidelines for using and storing memory cards.
Precautions for preventing damage to the LCD monitor.
Safety and usage precautions for the camcorder body.
Explains condensation and its potential damage.
What to do if serious malfunctions occur.
Steps to follow after using the camcorder.
Instructions for cleaning the camcorder's exterior, monitor, and lens.
General specifications of the camcorder.
Specifications related to video recording and format.
Specifications related to still image capture.
Electrical specifications for various connectors.
Power requirements and output of the AC adapter.