8 EN GETTINGSTARTED
I OperationMode
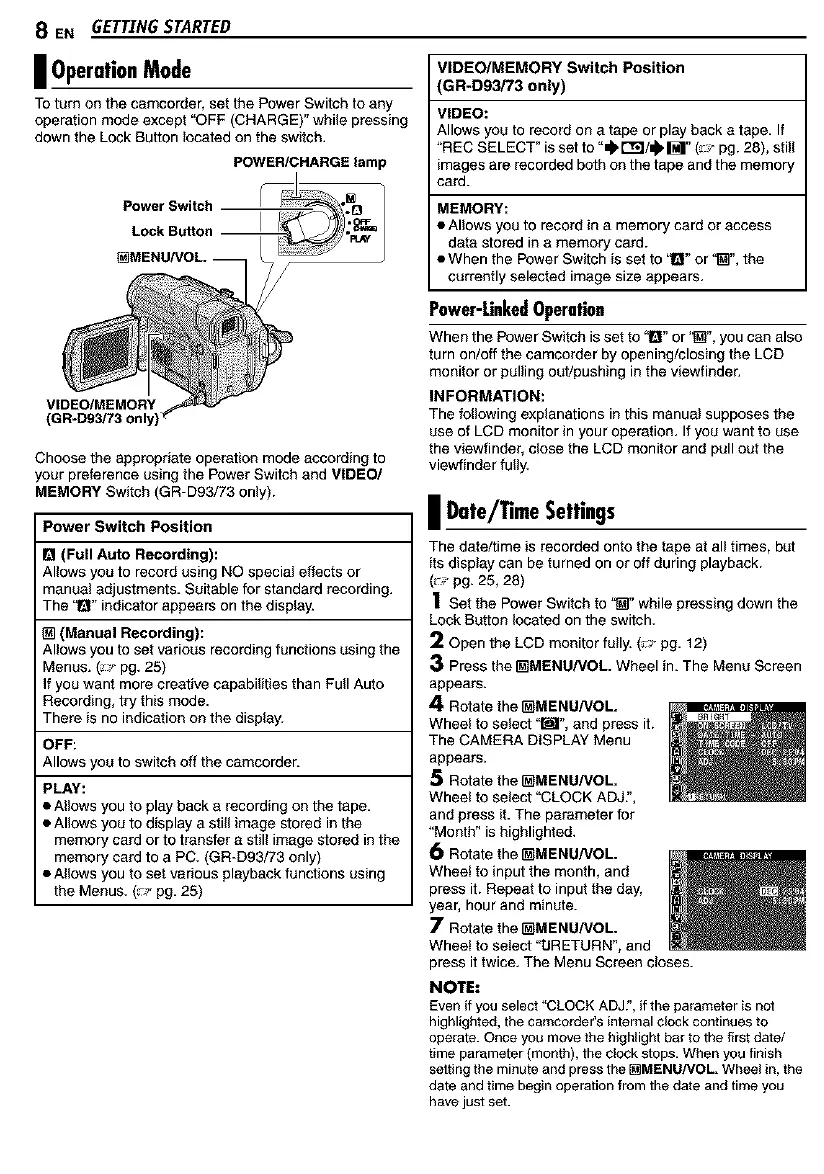
To turn on the camcorder, set the Power Switch to any
operationmode except "OFF (CHARGE)" while pressing
down the Lock Button located on the switch.
POWER/CHARGE lamp
Power Switch
Lock Button
VIDEO/MEMORY
Choose the appropriate operation mode according to
your preference using the Power Switch and VIDEO/
MEMORY Switch (GR-D93/73 only).
Power Switch Position
I_1(Full Auto Recording):
Allows you to record using NO special effects or
manual adjustments, Suitable for standard recording.
The "1_" indicator appears on the display.
(Manual Recording):
Allows you to set various recording functions using the
Menus. (_,,-pg. 25)
If you want more creative capabilities than Full Auto
Recording, try this mode.
There is no indication on the display.
OFF:
Allows you to switch off the camcorder.
PLAY:
• Allows you to playback a recording on the tape,
• Allows you to display a still image stored in the
memory card or to transfer a still image stored in the
memory card to a PC. (GR-D93/73 only)
• Allows you to set various playback functions using
the Menus. (_p pg, 25)
VIDEO/MEMORY Switch Position
GR-D93i73 only)
VIDEO:
Allows you to record on a tape orplay back a tape, If
'REC SELECT" is set to "_ t'_l/_ M" (_,J-pg. 28), still
images are recorded bothon the tape and the memory
card.
MEMORY:
• Allows you to record in a memory card or access
data stored in a memory card.
• When the Power Switch is set to !_" or'_", the
currently selected image size appears,
Power-LinkedOperation
When the Power Switch is set to "l_" or'_", you can also
turn on/off the camcorder by opening/closing the LCD
monitor or pullingout/pushing in the viewfinder.
INFORMATION:
The following explanations in this manual supposes the
use of LCD monitor in your operation, If you want to use
the viewfinder, close the LCD monitor and pull out the
viewfinder fully.
| Date/TimeSettings
The date/time is recorded onto the tape at all times, but
its display can be turned on or off during playback.
(_p pg. 25, 28)
1 Set the Power Switch to '_" while pressing down the
Lock Button located on the switch.
2 Open the LCD monitor fully. (_J pg, 12)
3 Press the _MENU/VOL. Wheel in. The Menu Screen
appears.
4 Rotate the _MENU/VOL.
Wheel to select '_", and press it.
The CAMERA DISPLAY Menu
appears.
5 Rotate the _MENU/VOL.
Wheel to select '=CLOCK ADJ,',
and press it. The parameter for
'Month" is highlighted.
6 Rotate the _MENU/VOL.
Wheel to input the month, and
press it. Repeat to input the day,
year, hour and minute.
7 Rotate the _MENU/VOL.
Wheel to select "tJRETURN", and
press it twice. The Menu Screen closes.
NOTE:
Even if you select "CLOCK ADJ?,if the parameteris not
highlighted,thecamcorder's internal clockcontinues to
operate. Once you movethe highlightbar to the firstdate/
time parameter (month), the clock stops. When you finish
setting the minuteand press the [_MENU/VOL. Wheel in, the
date and timebegin operation from the date and time you
havejust set.