46 EN
REMOTE CONTROL
INDEX (cont.)
R
.
A
.
E
D
I
T
I
N
/
O
U
T
S
T
A
R
T
S
C
E
N
E
F
I
N
D
E
R
P
R
O
G
C
H
E
C
K
T
V
V
O
L
.
OPERATE
MODECLOCK
CH SET
C.MEMORY
DISPLAY
DAILY
AUX
ADD TIME
C.RESET
CANCEL
DATESTOP
START
AUDIO MONITOR
(MONITOR)
TV/VIDEO
TV VCR
TIMER
WEEKLY
A
12
45
3
6
8
0
7
9
B
PUSH JOG
MULTI BRAND
REMOTE CONTROL UNIT
TV
PROG.
P
R
O
G
O
K
EXPRESS PROGRAMMING
STORE
2
1
3
I
L
L
U
M
I
G
U
I
D
E
3
2
!
0
$
#
%
p
o
E
R
1
5
4
e
W
Q
t
r
)
(
w
y
u
i
8
7
9
@
6
*
&
^
T
U
I
Y
q
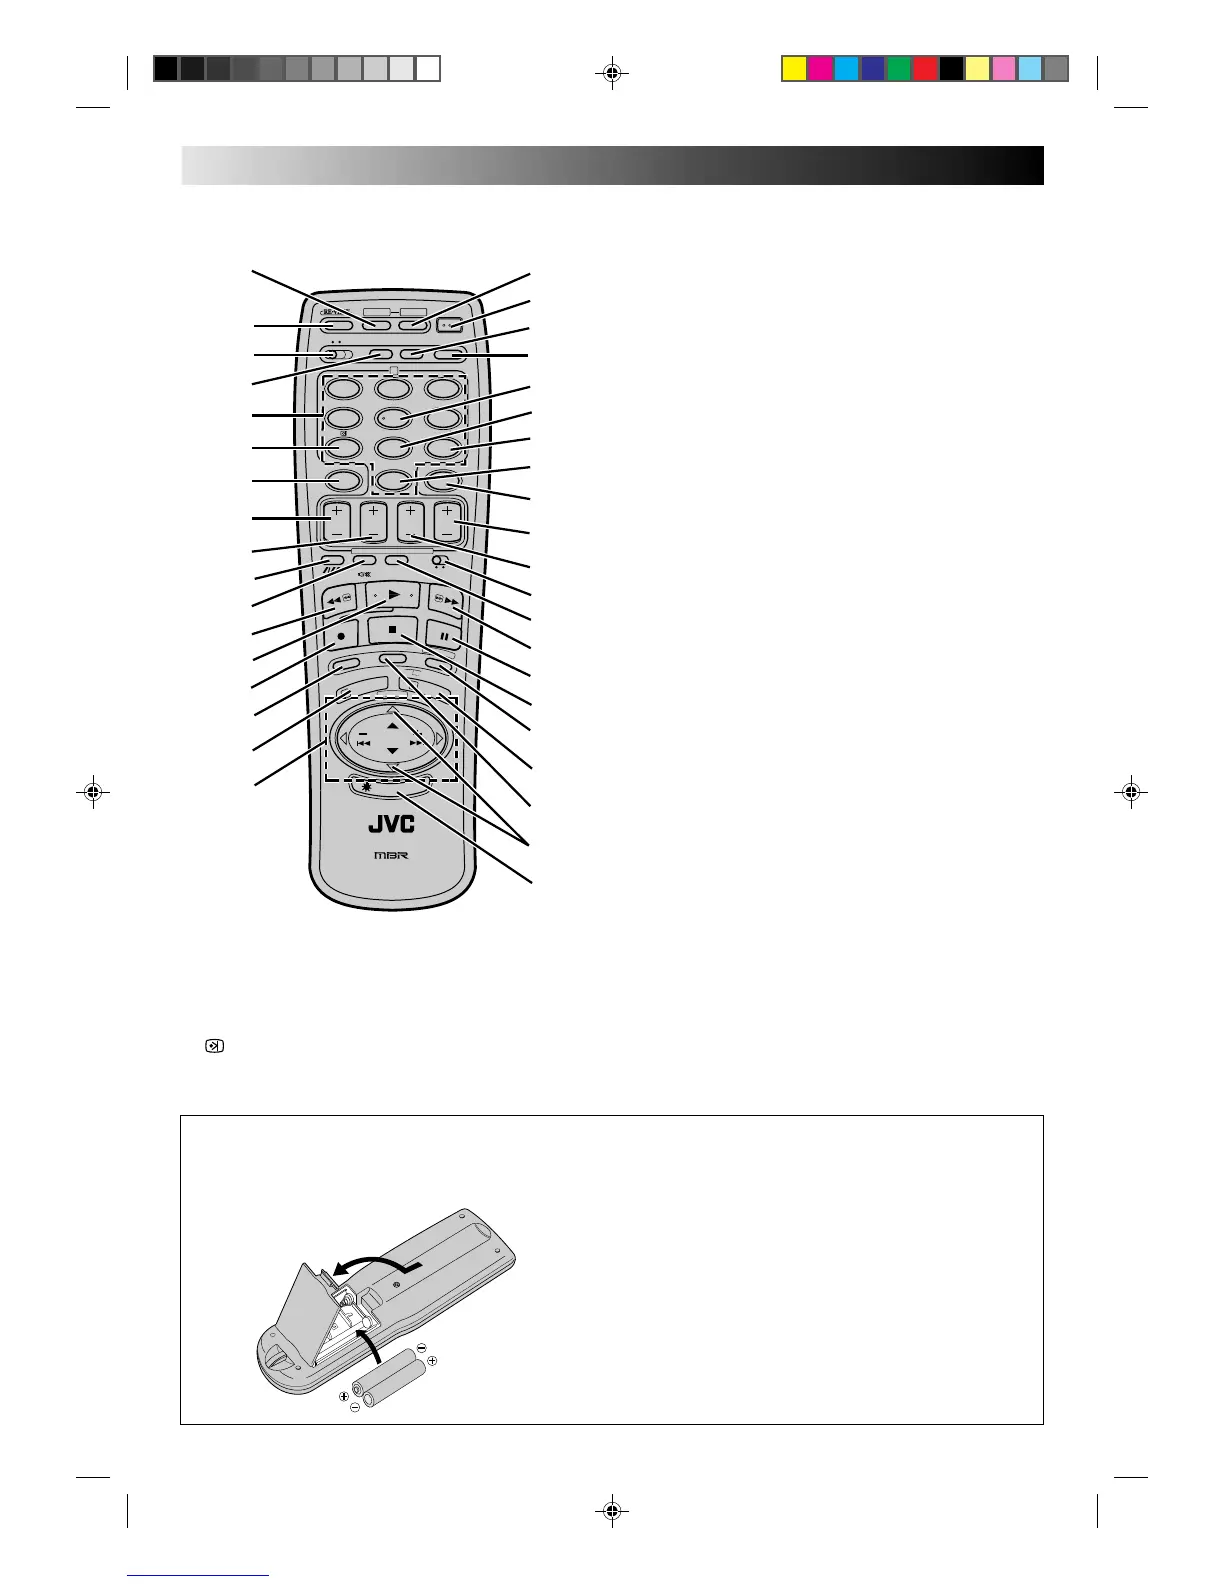
7 CANCEL Button (Z pg. 23)
C.RESET Button (Z pg. 13)
8 START +/– Button Z pg. 26)
9 STOP +/– Button (Z pg. 27)
0 TRACKING Button (Z pg. 11)
SP/LP Button (Z pg. 16)
DIGIT ENTRY Button (Z pg. 29)
! AUDIO MONITOR Button (Z pg. 13)
TV MUTE Button (Z pg. 29)
@ Rewind [REW] Button (Z pg. 9)
# PLAY Button (Z pg. 9)
$ RECORD Button (Z pg. 16)
% SCENE FINDER Button (Z pg. 12)
^ PROG. Button (Z pg. 24)
& PUSH JOG %fi Button (Z pg. 5)
PUSH JOG Button (Z pg. 10)
* STORE Button (Z pg. 38)
C.MEMORY Button (Z pg. 13)
( OPERATE Button (Z pg. 3)
) DISPLAY Button (Z pg. 13)
q MODE Button (Z pg. 17)
w ADD TIME Button (Z pg. 25)
e DAILY Button (Z pg. 25)
r WEEKLY Button (Z pg. 25)
t AUX Button (Z pg. 30)
y TIMER Button (Z pg. 25)
u TV PROG. +/– Button (Z pg. 5)
i DATE +/– Button (Z pg. 27)
o TV/VCR Switch (Z pg. 29)
p TV/VIDEO Button (Z pg. 21)
Q Fast Forward [FF] Button (Z pg. 9)
W PAUSE Button (Z pg. 10)
E STOP Button (Z pg. 9)
R PROG CHECK Button (Z pg. 28)
IN/OUT Button (Z pg. 32)
T OK Button (Z pg. 5)
START Button (Z pg. 33)
Y R.A.EDIT Button (Z pg. 32)
U TV VOL %fi Button (Z pg. 29)
I ILLUMI GUIDE Button (Z pg. 24)
1 CH SET Button (Z pg. 5)
2 REVIEW Button (Z pg. 11)
3 A/B CODE Switch (Z pg. 13)
4 CLOCK Button (Z pg. 7)
5 NUMBER Keys (Z pg. 16)
6 (PDC/VPS) Button (Z pg. 28)
%
%
%
%
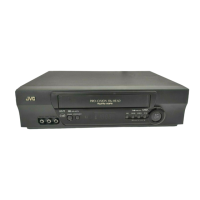
Installing Batteries
1 Open the battery compartment cover.
2 Insert 2 "R6"-size batteries (provided) in the correct
directions.
3 Replace the cover.
How To Use
The remote control can operate most of your video
recorder's functions, as well as basic functions of TV sets of
JVC and other brands (Z pg. 29).
● Point the remote control toward the sensor window.
● The maximum operating distance of the remote control
is about 8 m.
NOTE:
If for some reason the remote control doesn't work properly,
remove its batteries, wait a short time and then try again.