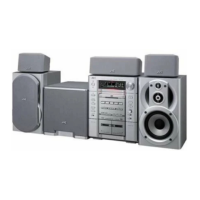
1-14 (No.MB161)
3.1.10 Removing the 5CD changer mechanism assembly
(See Figs.21 and 23)
• Prior to performing the following procedures, remove the metal
cover, rear panel, main board and bridge board.
(1) From the both sides of the main body, remove the two
screws T attaching the 5CD changer mechanism assembly
to the front panel assembly. (See Figs.21 and 22.)
(2) Take out the 5CD changer mechanism assembly from the
main body.
Reference:
When attaching the 5CD changer mechanism assembly,
pass the wires through the sections (n, p) of the plastic
chassis. (See Fig.22.)
(3) From the both and top sides of the 5CD changer mecha-
nism assembly, remove the two screws U and screw V at-
taching the main chassis. (See Fig.23.)
(4) From the top side of the 5CD changer mechanism assem-
bly, remove the three screws W and screw X attaching the
5CD changer mechanism assembly on the plastic chassis.
Reference:
• When reassembling, align the projections (q,r,s) of the plas-
tic chassis to the holes of the 5CD changer mechanism as-
sembly before attaching the screws W and X. (See Fig.23.)
• Align the projections t of the plastic chassis to the holes of
the main chassis before attaching the screw V. (See Fig.23.)
Fig.21
Fig.22
Fig.23
T
5CD changer mechanism assembly
Front panel assembly
T
5CD changer mechanism assembly
Front panel assembly
Wires
n
p
W
W
W
W
X
U
U
V
5CD changer
mechanism assembly
Plastic chassis
q
r
t
t
s
Earth wire
Main chassis
 Loading...