(No.MA028)1-19
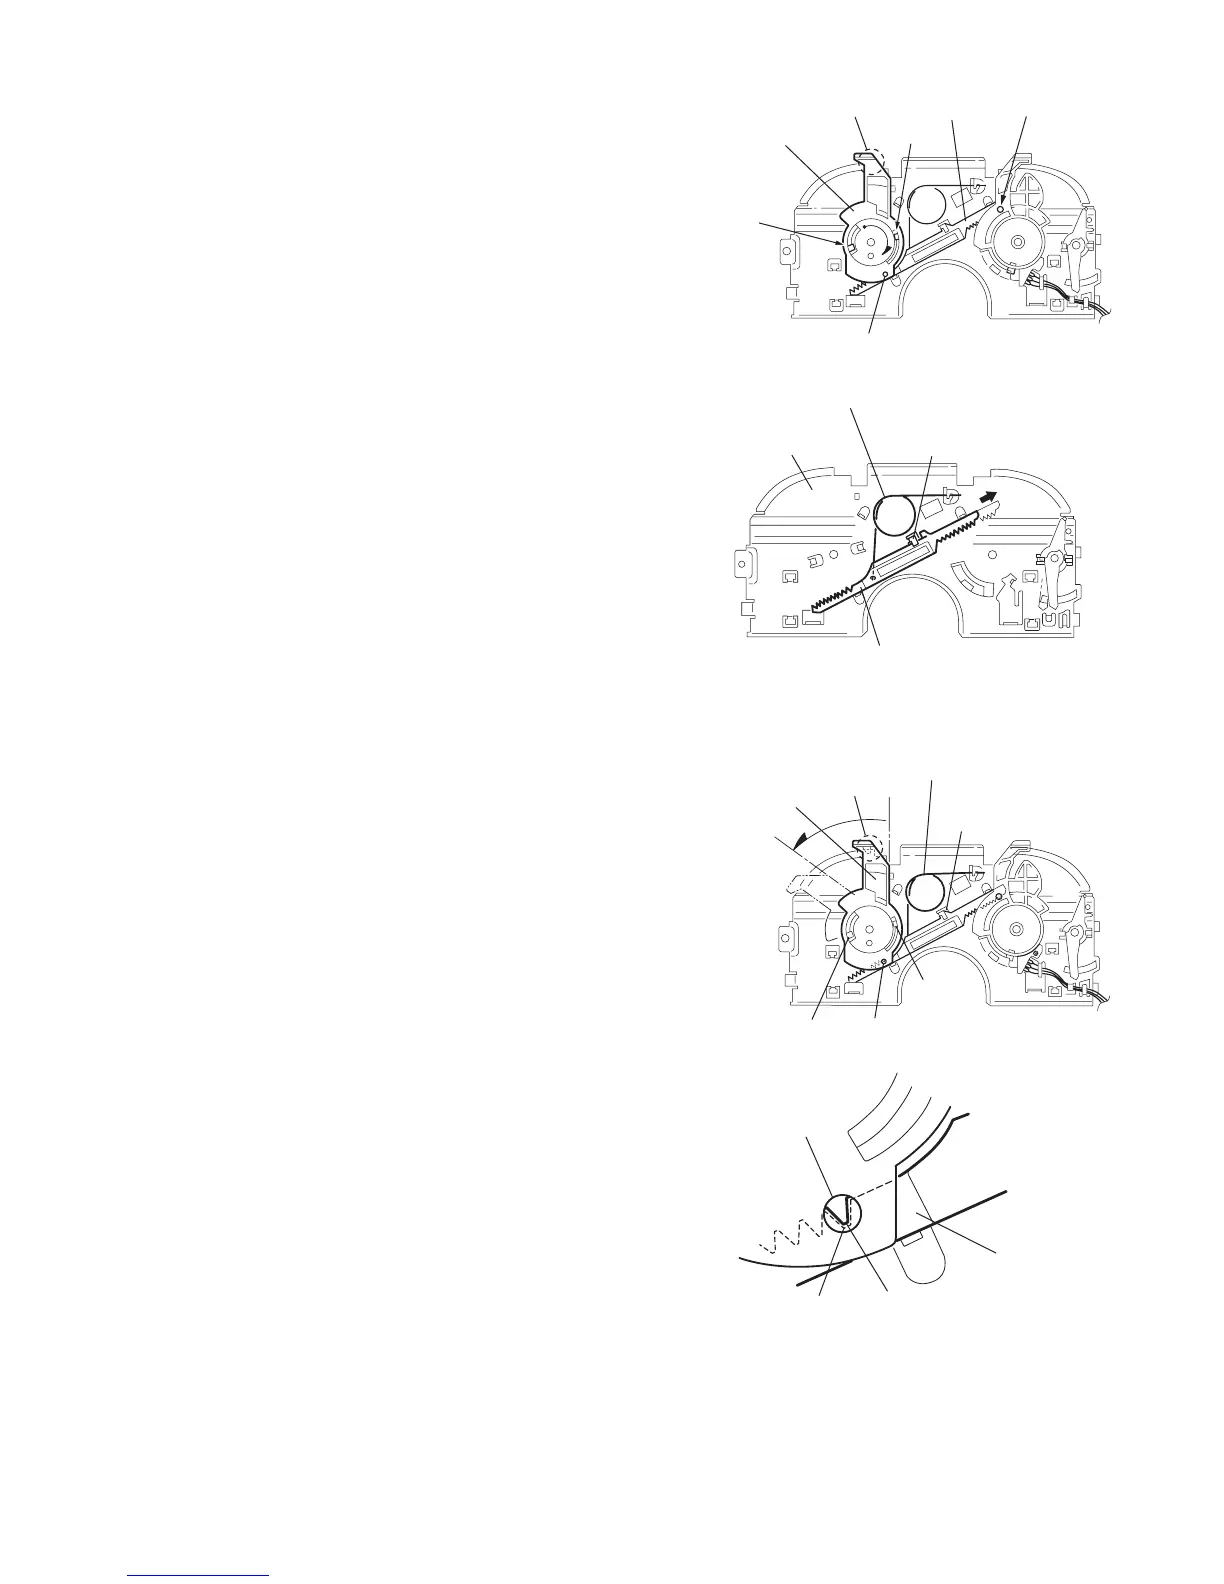
3.2.13 Removing the select arm R / link plate
(See Figs.27 and 28)
• Prior to performing the following procedure, remove the top
plate assembly.
(1) Bring up the select arm R to release from the link plate
(joint a') and turn as shown in the figure to release the two
joints b' and joint c'.
(2) Move the link plate in the direction of the arrow to release
the joint d'. Remove the link plate spring at the same time.
REFERENCE:
Before removing the link plate, remove the mode sw..
Fig.27
Fig.28
3.2.14 Reattaching the Select arm R / link plate
(See Figs.29 and 30)
REFERENCE:
Reverse the above removing procedure.
(1) Reattach the link plate spring.
(2) Reattach the link plate to the link plate spring while joining
them at joint d'.
(3) Reattach the joint a' of the select arm R to the first peak of
the link plate while joining the two joints b' with the slots.
Then turn the select arm R as shown in the figure. The top
plate is joined to the joint c'.
CAUTION:
When reattaching the select arm R, check if the points e'
and f' are correctly fitted and if each part operates prop-
erly.
Fig.29
Fig.30
Joint r
Link plate
Joint b'
Joint b'
Joint c'
Select arm R
Joint a'
Top plate
Link plate
Link plate spring
Joint d'
Select arm R
Joint c'
Joint d'
Link plate spring
Joint b'
Joint b'
Joint a'
Link plate
Joint a'
Point e'
Point f'
 Loading...