Do you have a question about the JVC MINI DV NTCS GR-DVL100 and is the answer not in the manual?
Covers warnings related to electric shock hazards, including product enclosure and plug safety.
Details precautions against moisture, heat, flames, and general usage guidelines like ventilation.
Provides essential safety guidelines for product installation, including grounding, power sources, and ventilation.
Offers safety instructions for installing antennas, including grounding and protection against lightning.
Outlines precautions for safe product usage, covering accessories, water, objects, cleaning, and heat.
Provides guidance on when to seek professional service, replacement parts, and post-repair safety checks.
Details safety measures for operating the camcorder, including lens care, carrying, tripod use, and cable management.
Specifies compatible cassette types and restrictions on commercial use of the camcorder.
Lists all included accessories such as AC adapter, remote control, battery pack, cables, and lens cap.
Step-by-step instructions on how to attach the provided lens cap to protect the camcorder lens.
Explains how the automatic demonstration mode functions and how to cancel it.
Details the camcorder's 2-way power supply system and how to use the AC adapter or battery.
Provides instructions and notes for charging the camcorder's battery pack using the AC adapter.
Step-by-step guide on how to attach and detach the battery pack from the camcorder.
Presents approximate recording times for different battery packs with LCD monitor on/off.
Illustrates how to connect the camcorder to AC power using the AC Power Adapter/Charger.
Instructions for adjusting the grip strap and viewfinder for comfortable and clear operation.
Guides on how to attach the shoulder strap and mount the camcorder on a tripod for stability.
Step-by-step process for setting the camcorder's date and time, and notes on clock operation.
Detailed instructions on how to properly load and unload a cassette into the camcorder.
Explains how to use the erase protection tab to protect valuable recordings on the tape.
Guide to selecting the recording mode (SP or LP) and notes on their implications for recording quality and time.
Instructions on how to start, stop, and pause recording, including using the LCD monitor or viewfinder.
Explains how to adjust the brightness of the camcorder's display screen for optimal viewing.
Details the functions of the different power switch positions: Manual, Full Auto, Off, and Play.
Introduces techniques for journalistic and self-recording, including monitor positioning.
Explains how to select the appropriate snapshot mode for recording still images.
Guides on how to perform snapshot recording and use the motor drive mode for sequential shots.
Explains the different snapshot modes available, such as FRAME, FULL, MULTI-4, MULTI-9, and PIN-UP.
Details how to use the Power Zoom Lever for optical and digital zooming, including limitations.
Explains the role of time code in recording and playback, and its importance for editing.
Provides instructions on how to resume recording from the middle of a tape to maintain time code continuity.
Details how to use the video light to brighten scenes and its operational modes (OFF, AUTO, ON).
Highlights safety warnings regarding the video light's heat and proper usage distances.
Explains the camcorder's auto focus system and situations where manual focus is recommended.
Guides on how to use the manual focus feature for precise focusing, including resetting to auto.
Details how to access and navigate the camcorder's on-screen menu system for detailed adjustments.
Explains settings for recording mode (SP/LP) and sound recording options (12-bit, 16-bit).
Details settings for zoom magnification, gain adjustment, tally lamp, and ID number configuration.
Explains the demonstration mode and digital image stabilizer (DIS) settings for improved shooting.
Details settings for tele macro shooting and wide mode options like CINEMA and SQUEEZE.
Covers settings for wind noise reduction, camera reset, and on-screen display options for connected TVs.
Details settings for date/time display, time code, and clock adjustment for accurate recording information.
Guides on selecting and applying fade and wipe effects for scene transitions during recording.
Explains how to select and use picture wipe and dissolve effects for scene transitions.
Details all available fade and wipe effects, including their visual descriptions and random selection.
Explains how to use Program AE modes like Twilight, Sepia, B/W, Classic Film, Strobe, and Video Echo.
Details the use of slow shutter speeds (4X, 10X) and variable shutter speeds (1/60, 1/100, 1/250, 1/500) for lighting and motion.
Guides on manually adjusting exposure settings for optimal brightness and contrast in various lighting conditions.
Explains how to lock the iris to maintain consistent exposure, especially when shooting moving subjects.
Step-by-step guide for manually setting white balance using a white paper or colored paper for tint adjustment.
Instructions on how to start, stop, control volume, and use basic playback features like pause and shuttle search.
Details frame-by-frame playback and shuttle search for locating specific scenes on the tape.
Explains how to access and use the Video Menu and Display Menu for playback adjustments.
Details settings for sound mode, sync, record mode, and on-screen display options during playback.
Explains how to select sound modes (STEREO, SOUND L/R, MIX) and 12-bit audio modes for playback.
Illustrates how to connect the camcorder to a TV or VCR using S-Video and A/V cables.
Provides instructions for connecting the camcorder to a TV or VCR using only A/V input connectors.
Outlines the steps for connecting the camcorder to a TV/VCR and choosing on-screen display options.
Guides on connecting the camcorder to a PC with a DV connector-equipped capture board for transferring images.
Explains digital dubbing to other DV units and connecting to a digital printer for image transfer.
Step-by-step instructions for dubbing video content from the camcorder to a VCR.
Details how to control on-screen displays (Date/Time, Time Code, etc.) during VCR dubbing.
Instructions for playing back tapes and dubbing to other DV units when using the camcorder as a source player.
Guides on using the camcorder as a recorder for digital dubbing, including setup and recording procedures.
Instructions for installing batteries in the provided RM-V715U and optional RM-V700U remote controls.
Information on the remote sensor's effective range and proper usage of the remote control unit.
Details the functions of each button on the provided RM-V715U remote control unit.
Details the functions of each button on the optional RM-V700U remote control unit for advanced operations.
Explains how to use the remote control's zoom buttons to magnify recorded images during playback.
Guides on setting the remote control and VCR code for Random Assemble Editing compatibility.
Provides a list of VCR brands and corresponding codes for setting up the remote control.
Details connection methods for different VCR types (JVC with pause, JVC without pause, other VCRs).
Provides important notes on connections, core filters, and choosing on-screen display options for editing.
Instructions on how to select and register scene start (Edit-In) and end (Edit-Out) points for editing.
Offers notes on choosing scenes, time code accuracy, and managing registered edit points.
Step-by-step guide on how to perform automatic editing to a VCR using the remote control and camcorder.
Provides notes on editing, pausing, and potential issues with Random Assemble Editing.
Explains how to diagnose and identify timing discrepancies between the VCR and camcorder during editing.
Guides on adjusting the VCR's recording timing based on diagnostic results to improve editing accuracy.
Step-by-step instructions for recording new audio tracks onto tapes recorded in 12-bit mode.
Provides notes on audio dubbing limitations, playback settings, and potential issues with sound.
Guides on recording new scenes into existing recordings with minimal distortion using insert editing.
Offers notes on time code requirements, restrictions, and effects of insert editing.
Addresses common issues like no power, date/time errors, recording failures, and no picture.
Troubleshoots problems related to focus adjustment, cassette loading, and snapshot mode functionality.
Solves issues with snapshot image color, darkness, digital zoom, and special effects not working.
Addresses problems with scene transitions, Video Echo mode, and Slow Shutter appearance.
Troubleshoots issues with picture wipe, scene transitions, Video Echo, and Slow Shutter effects.
Addresses problems with white balance activation and vertical lines or color shifts in the image.
Solves issues where date/time or other indicators and messages do not appear or are unclear.
Troubleshoots problems with the LCD monitor appearing dark, hot, unclear, or with blinking indications.
Addresses problems with sound during recording, playback functions, tape movement, and distorted LCD images.
Troubleshoots blocks of noise, LCD monitor issues, and the appearance of unusual marks on the display.
Explains error codes (E01-E06) and issues with the charger indicator on the AC Power Adapter/Charger.
Troubleshoots problems with the LCD monitor display, printer output bars, and DV connector operation.
Explains various indicators displayed on the LCD monitor/viewfinder during recording, such as REC, PAUSE, and TALLY.
Details indicators for recording modes (SP/LP), zoom level, exposure, white balance, and backlight compensation.
Explains indicators displayed during playback, including sound mode, tape speed, time code, and battery level.
Details warning indications such as no tape loaded, erase protection, head cleaning, and condensation.
Explains indications related to tape loading, tape end, different formats, date/time, and lens cap.
Details error indications for Audio Dubbing, Insert Editing, copying failed, and unit safeguard mode.
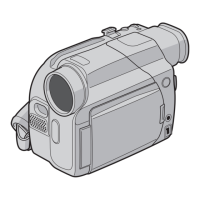
Diagram and list of all physical controls on the camcorder, such as buttons, levers, and switches.
Diagram and list of all input/output connectors on the camcorder, including AV, DV, and S-Video.
Diagrams and explanations of indicators like Tally Lamp and Power Lamp, plus other parts like sensors and speakers.
A comprehensive list of camcorder controls with their functions and corresponding page references.
Provides detailed explanations of camcorder connectors and indicators with their respective page references.
Instructions for proper procedures after using the camcorder, including cassette removal and battery removal.
Guides on cleaning the camcorder's exterior, LCD monitor, lens, and viewfinder.
Covers safety precautions for using the AC adapter, plug adapters, and the camcorder's video light.
Details important cautions for handling, charging, and storing battery packs to prevent hazards.
Provides guidelines for the proper use and storage of Mini DV cassettes to ensure optimal performance.
Offers advice on preventing LCD monitor damage, prolonging its life, and cleaning video heads.
Explains the phenomenon of moisture condensation and its potential damage to the camcorder and tape.
Advises on immediate actions for serious malfunctions and details FCC compliance statements for the device.
Alphabetical listing of terms and features from AC Power Adapter/Charger to Connections.
Alphabetical listing of terms and features from Darken the LCD Monitor to Fade-In/Out.
Alphabetical listing of terms and features from Picture Wipe/Dissolve to Strobe.
Alphabetical listing of terms and features from Tally to Zooming.
Details general specifications like power supply, power consumption, dimensions, weight, and operating conditions.
Lists specifications for digital video camera features, including format, signal format, and tape speed.
Provides technical details for S, AV, DV, and JLIP/EDIT connectors on the camcorder.
Details technical specifications for the AC Power Adapter/Charger AA-V40U, including power and dimensions.
| Optical Zoom | 10x |
|---|---|
| Digital Zoom | 200x |
| Lens Diameter | 30.5 mm |
| Optical Sensor Size | 1/4 inch |
| Optical Sensor Type | CCD |
| Image Stabilizer | Electronic |
| Focal Length | 3.8 mm - 38 mm |
| Microphone Operation Mode | Stereo |
| Recording Media | MiniDV cassette |
| Recording System | Mini DV |
| LCD Screen Size | 2.5 inches |
| Battery Life | Approx. 1 hour |
| Camcorder Media Type | Mini DV |
| Focus Adjustment | Auto/Manual |
| Display Type | LCD |
| Battery Type | Lithium-ion |
| Viewfinder | Color |