Do you have a question about the JVC MX-J270V and is the answer not in the manual?
User instructions for recording model and serial numbers for future reference.
Caution regarding the power switch and remote control operation, emphasizing disconnection.
Precautions against electrical shock, fire, rain, and moisture.
Guidelines for positioning the unit to ensure adequate ventilation and prevent overheating.
Details on Class 1 laser product, labels, and essential safety warnings for laser radiation.
Explains the manual's organization, symbols, and how to use it effectively.
Key safety advice covering installation, power sources, moisture, and general handling.
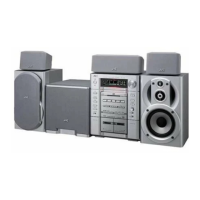
Provides an overview of all buttons and indicators on the main unit.
Guides users through unpacking, setting up batteries, and connecting antennas and speakers.
Specific descriptions of buttons and indicators found on the front panel of the unit.
Explains the various indicators and information displayed on the unit's display window.
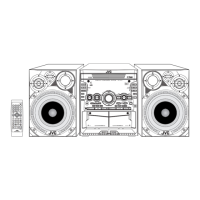
Details the layout and operational functions of the supplied remote control.
Instructions on how to unpack the unit and verify all supplied accessories.
Guidance on inserting batteries into the remote control correctly.
Step-by-step instructions for connecting the FM antenna to the unit.
Instructions for connecting the AM loop antenna and optional outdoor antenna.
How to properly connect speaker wires to the unit's terminals.
Instructions for connecting other devices like VCRs and TVs using audio/video cords.
Crucial step to set the correct AC voltage before plugging in the unit.
Procedure for setting the unit's built-in clock.
How to turn the unit on and switch between different audio sources (FM/AM, CD, TAPE, AUX).
Adjusting the AM tuning step for different regions (9 kHz or 10 kHz).
Activating and deactivating the bass enhancement feature for playback.
How to control the listening volume using unit or remote controls.
Choosing from preset sound modes (surround, SEA) for playback.
Manual and automatic tuning methods for radio reception.
Storing and recalling up to 30 FM and 15 AM stations.
How to load up to three CDs and play them continuously.
Essential functions like play, pause, stop, and resuming playback.
Skipping tracks, fast forwarding/reversing, and programming custom playback sequences.
Playing tracks from loaded CDs in a random order.
Repeating single tracks, entire discs, or programmed sequences.
How to prohibit or cancel disc ejection from the trays.
Instructions for playing VCDs and CD-Graphics discs, including color system adjustment.
Pausing VCD playback and advancing frame by frame.
Displaying disc number, track, and playing time on the TV screen.
Viewing introductory clips and highlight scenes from a VCD.
Interacting with VCDs via on-screen menus for selection and playback.
Displaying enhanced quality still images from VCDs.
Using specific buttons to navigate VCD menu screens.
General steps for navigating VCD menus and selecting playback options.
How to disable the PBC function and play VCDs directly.
Basic procedure for loading and playing cassette tapes in either deck.
Enabling automatic side switching for continuous playback of both tape sides.
Using Music Scan to find the beginning of recorded songs on tape.
Using Music Scan to locate and play the subsequent song on a tape.
Step-by-step guide to recording audio from various sources onto cassette tapes.
Setting up the unit to record continuously on both sides of a cassette.
Recording entire CDs directly onto cassette tapes.
Reducing interference (beats) when recording AM radio broadcasts.
Copying cassette tapes from Deck A to Deck B.
Reducing lead vocals in music to allow users to sing along.
Adding an echo effect to the microphone signal for enhanced vocal performance.
Utilizing Multiplex Sound and Vocal Replace for karaoke playback.
Adjusting microphone and music volume levels for optimal mixing.
Using the microphone with no background music, for practice or recording.
Changing the pitch of songs to suit vocal range for karaoke.
Configuring the unit to turn on or record automatically at set times.
Setting the unit to automatically turn off after a specified period.
Proper methods for handling, storing, and cleaning audio media.
Instructions for cleaning heads, capstans, and pinch rollers for optimal tape performance.
Using a head demagnetizer to maintain sound quality.
| Type | Mini Hi-Fi System |
|---|---|
| CD Player | Yes |
| Radio Tuner | FM/AM |
| USB Playback | Yes |
| Bluetooth | No |
| Speakers | 2 |
| Weight | 4.5 kg |
| Connectivity | USB, AUX |
| Functions | CD, Radio |