1-8 (No.MB251)
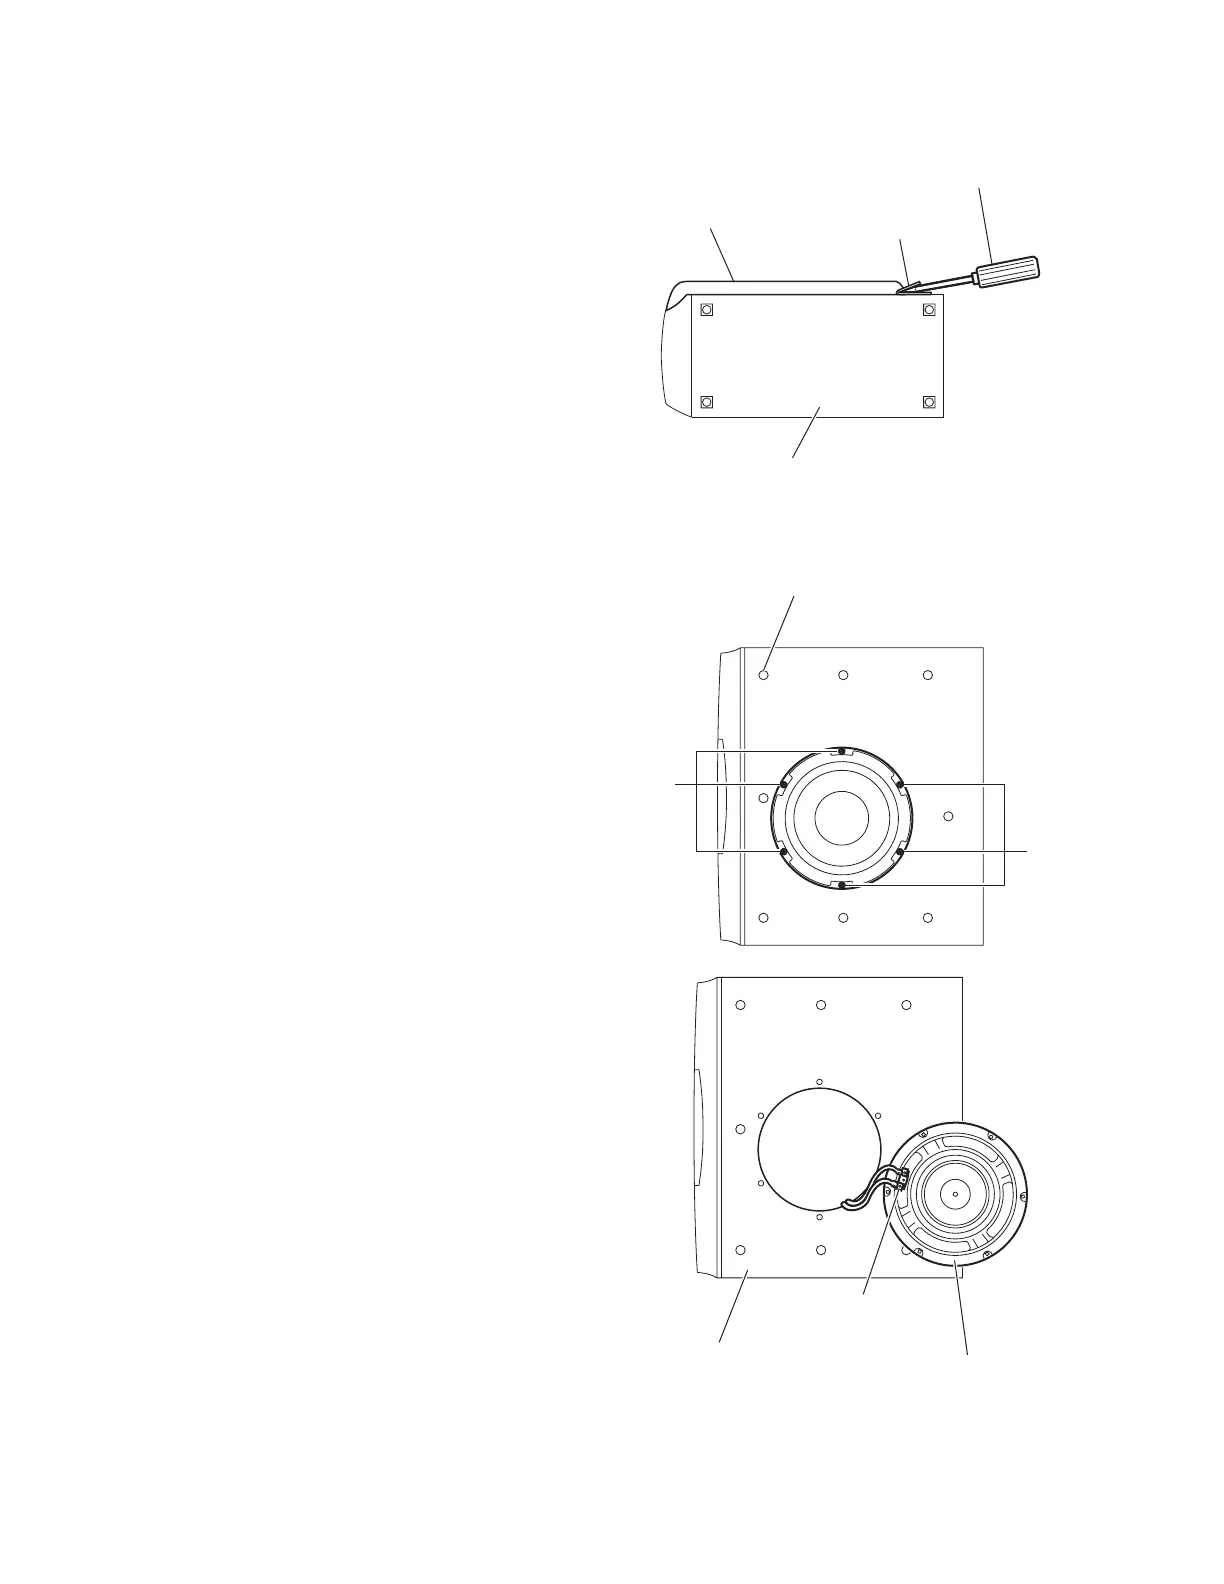
3.6 Removing the net assembly
(See Fig 7)
(1) From side of the main body, insert the tip of the flat-bladed
screwdriver or similar tool into the space between the main
body and net assembly, and lift the net assembly little by
little to remove. (See Fig 7)
Note:
To prevent damaging the net assembly and main body, insert
cushioning plates etc. and below the tip of the flat-bladed
screwdriver or similar tool.
From right side of the main body, release the eight joints d, and
take out the net assembly from the main body. (See Fig 7)
Fig.7
3.7 Removing the speaker.
(See Fig 8 and Fig 9)
• Prior to performing the following procedures, remove the net
assembly.
(1) Remove the six screws H attaching the speaker. (Fig 8)
(2) Take out the speaker from the main body.
(3) Disconnect the wires from the terminal of the speaker. (See
Fig 9)
Fig.8
Fig.9
Net assembly
Flat-bladed
screwdriver,etc.
Cushioning
plate,etc.
Main body
H
H
Joint d (eight joints)
Speaker
Terminal
Main body
www.freeservicemanuals.info
Published in Heiloo, Holland.

 Loading...