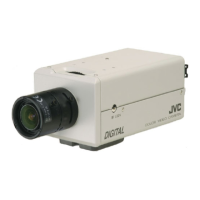
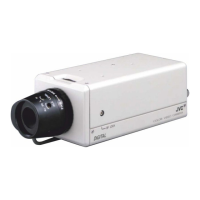
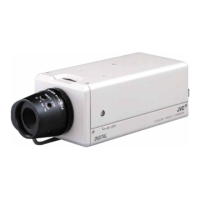
This document serves as an instruction manual for the JVC COLOR VIDEO CAMERA models TK-C9200U, TK-C9200E(EX), TK-C9201EG(EX), TK-C9300U, TK-C9300E(EX), and TK-C9301EG(EX). It provides guidance on the camera's features, installation, operation, and maintenance.
Function Description
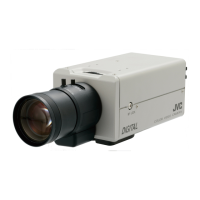
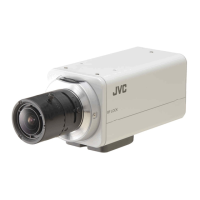
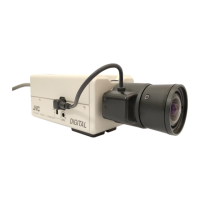
The JVC COLOR VIDEO CAMERA is designed for surveillance and video capture, offering a range of features to enhance image quality and adaptability to various lighting conditions.
Key Functions:
- Wide Dynamic Range (WIDE-D): Available on TK-C9300U, TK-C9300E, and TK-C9301EG models, this function allows subjects with high contrast to be seen clearly and naturally, preventing areas from being overly dark or bright.
- DAY/NIGHT Surveillance: The TK-C9300U, TK-C9300E, and TK-C9301EG models feature an auto IR cut filter that switches on/off, enabling both color and black & white shooting. This is particularly useful for surveillance in changing light conditions. The TK-C9200U, TK-C9200E, and TK-C9201EG models offer an "Easy DAY/NIGHT" function.
- 3D Noise Reduction (3DNR): This feature helps to reduce image noise, resulting in clearer video, especially in low-light environments.
- Privacy Masking: The camera supports 4 areas for privacy masking, allowing users to block out sensitive regions within the camera's field of view.
- Built-in Display Mode: Users can select between CRT or LCD display modes, optimizing the output for the connected monitor type.
- Backlight Compensation (BLC): This function adjusts brightness according to a set photometry area, making subjects easier to see when shooting in backlight.
- Automatic Electronic Shutter (AES): On TK-C9200U, TK-C9200E, and TK-C9201EG models, when AES is activated, the shutter speed automatically adjusts based on brightness.
Usage Features
The manual details various aspects of using the camera, from initial setup to fine-tuning image parameters.
Installation and Connection:
- Lens Mounting: The camera is compatible with CS-mount lenses. A C-mount adapter is required for C-mount lenses. It is crucial to use lenses that do not exceed specific dimensions to prevent damage to the camera's internal parts. For DC IRIS lenses, the manual provides instructions for checking pin arrangement and connecting the lens cable.
- Power Supply: The camera can be powered by AC 24V or DC 12V (TK-C9200U/TK-C9200E/TK-C9300U/TK-C9300E) or AC 220V-AC 240V (TK-C9201EG/TK-C9301EG). The manual includes a table for recommended cable conductor diameters and maximum connection distances to ensure stable power delivery. It warns against connecting AC 24V to a commercial power supply.
- Monitor Connection: A 75 Ω coaxial cable (BNC) such as RG-59 is used to connect the camera to a monitor.
- Alarm Input/Output (TK-C9300U/TK-C9300E/TK-C9301EG only): These models feature alarm input terminals for connecting sensors (infrared, door, metal, manual switch) and alarm output terminals for connecting alarm devices (alarm, indicator, light, buzzer). The alarm input signal should be non-voltage, and the alarm output is an open collector type with specific voltage and current limits.
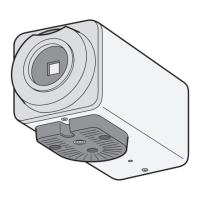
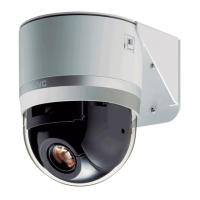
- Camera Mounting: The camera can be mounted on a fixer, pan/tilt unit, or similar. The camera-mounting bracket, initially at the bottom, can be relocated to the top. Users must use screws of specific lengths to avoid damaging internal parts.
- Fall Prevention: When installing the camera, especially on walls or ceilings, professional installation is recommended. A fall prevention wire should be used, connected to a strong section of the ceiling or channel, using a specific screw on the back of the camera.
Setting and Adjustment:
- Switch Settings: The camera features several selector switches on its side panel:
- [D/N AUTO/OFF] DAY/NIGHT Selector: Sets the camera to automatically switch between color (bright conditions) and black & white (dark conditions), or to remain in color mode. Black & white mode can be forced via the menu on specific models.
- [BLC OFF/ON] Backlight Compensation Selector: Activates or deactivates backlight compensation.
- [MONITOR TYPE LCD/CRT] Monitor Type Selector: Configures the camera output for either LCD or CRT monitors.
- [AES OFF/ON] AES Selector (TK-C9200U/TK-C9200E/TK-C9201EG): Enables or disables the automatic electronic shutter. When off, the shutter speed is fixed.
- [WIDE-D OFF/ON] WIDE-D Selector (TK-C9300U/TK-C9300E/TK-C9301EG): Activates or deactivates the wide dynamic range function.
- [FOCUS ADJUST] Focus Adjust Button: Pressing and holding this button opens the lens iris for easier focusing.
- Adjusting Back Focus: This is crucial when using zoom lenses or if the lens focus ring is out of focus. The process involves loosening a fastening screw, adjusting the lens focus ring and back focus adjustment ring, and then tightening the screw. For zoom lenses, it involves adjusting focus at both maximum telephoto and wide-angle positions. Using an ND filter can improve accuracy.
- Fine-tuning Focus (DC IRIS Lens): The "Focus Adjust" mode, activated by pressing and holding the ▲ button, opens the iris and emphasizes contours, making it easier to adjust the DC IRIS lens focus. This mode automatically deactivates after about 30 seconds or by pressing any navigation/SET/MENU button.
- Adjusting Auto White Balance: To ensure accurate color reproduction, the white balance should be adjusted when the main light source changes. This involves selecting "WHITE BALANCE" from the menu, placing a white object at the screen's center, zooming in to fill the screen with white, and then pressing the [SET] button. The camera displays "AWC OPERATION" during adjustment and "AWC OK" upon completion. Error messages (NG, LOW LIGHT, HIGH LIGHT, TIME OVER) indicate issues with the adjustment process.
Maintenance Features
The manual provides essential guidelines for maintaining the camera and ensuring its longevity.
Storage and Location:
- Environmental Precautions: The camera should not be installed in locations exposed to rain, moisture, vapor, oil, corrosive gases, strong radiation, X-rays, strong radio waves, magnetism, vibration, or excessive dirt. The ambient temperature must be within the acceptable range of -10 °C to 50 °C.
- Electromagnetic Interference: Using the camera near devices emitting strong electromagnetic waves (e.g., radio/TV antennas, transformers, motors, wireless devices) may cause image noise or color changes.
- Outdoor Use: The camera is designed for indoor use. For outdoor applications, an optional outdoor camera housing is required.
Cleaning:
- General Cleaning: Wipe the camera with a dry, soft cloth to remove dirt.
- Stubborn Stains: For tough stains, use a neutral detergent diluted with water, followed by wiping with a dry cloth.
- Prohibited Cleaners: Do not use benzene or thinner, as these can damage the surface or cause fogging.
Energy Conservation:
- Power Off: If the camera will not be used for an extended period, turn off the power for safety and energy conservation.
Operational Considerations:
- Grainy Images: When AGC is set to "MID" or "HIGH," sensitivity increases for dark images, which may result in grainy screens. This is a normal characteristic.
- DAY/NIGHT Mode Graininess: In "AUTO" DAY/NIGHT mode, dark locations may show grainy images and white spots as sensitivity increases. This is not a malfunction.
- Condensation: Moving the camera from a cold to a warm place can cause condensation, preventing it from working. In such cases, allow the camera to reach room temperature for about an hour before powering on.
- Power Supply Fluctuations: Momentary disruptions or drops in power supply voltage (e.g., due to lightning or turning on an air-conditioner) may cause image distortion or noise. Ensure the power supply voltage is within ±10% of the camera's rated voltage.
- Afterimages: The 3D noise reduction function may cause afterimages of moving subjects, especially when [DNR LEVEL] is set to "HIGH." This is a normal characteristic.