UX-A7DVD
1-22 (No.22013)
2.3 DVD loading mechanism section
2.3.1 Removing the clamper assembly
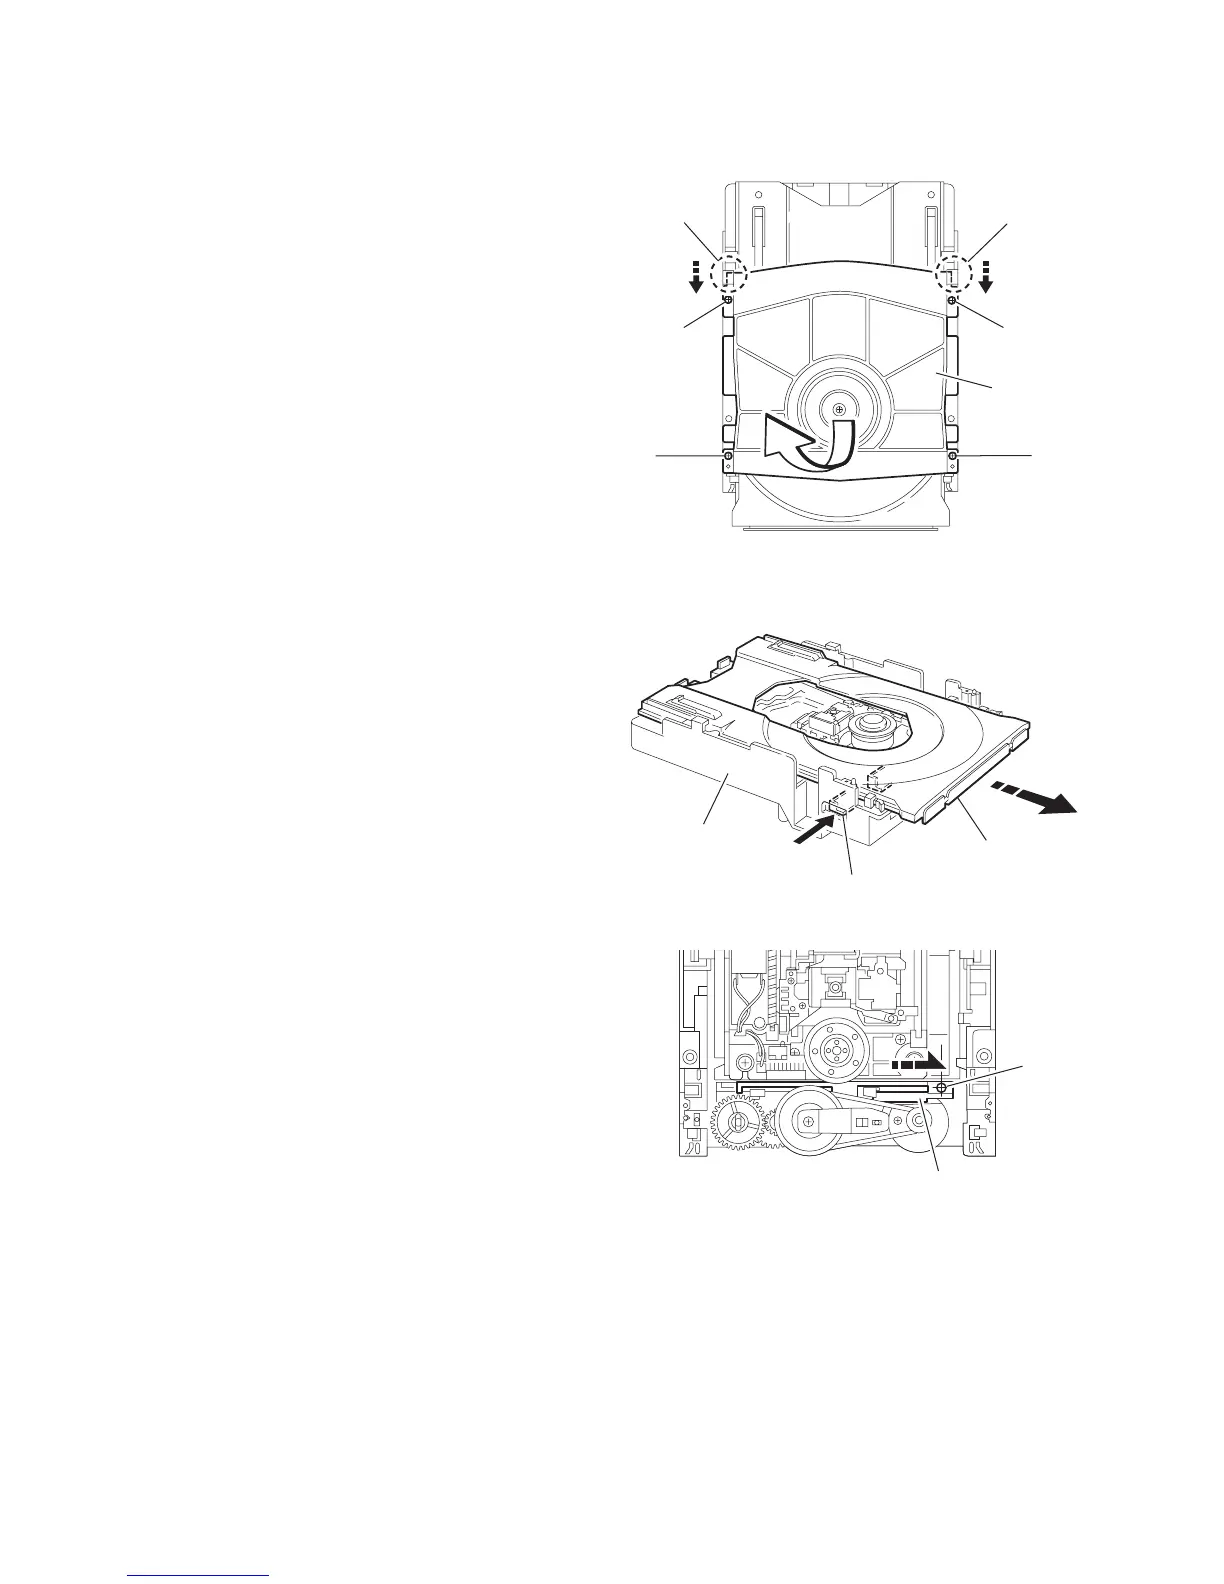
(See Fig.1)
(1) Remove the four screws A attaching the clamper assem-
bly.
(2) Move the clamper assembly in the direction of the arrow to
release the joint a on each side, and remove.
ATTENTION:
When reassembling, reattach the clamper assembly at the two
joints a.
Fig.1
2.3.2 Removing the tray
(See Fig.2, 3)
• Prior to performing the following procedure, remove the
clamper assembly.
(1) Push the part b of the slide cam through the slot on the left
side of the loading base.
(2) Draw out the tray toward the front.
ATTENTION:
When reattaching the tray, move the part c of the slide cam to
the right (See Fig.3).
Fig.2
Fig.3
a
a
A
 Loading...