2-2
UX-G6/FS-G6
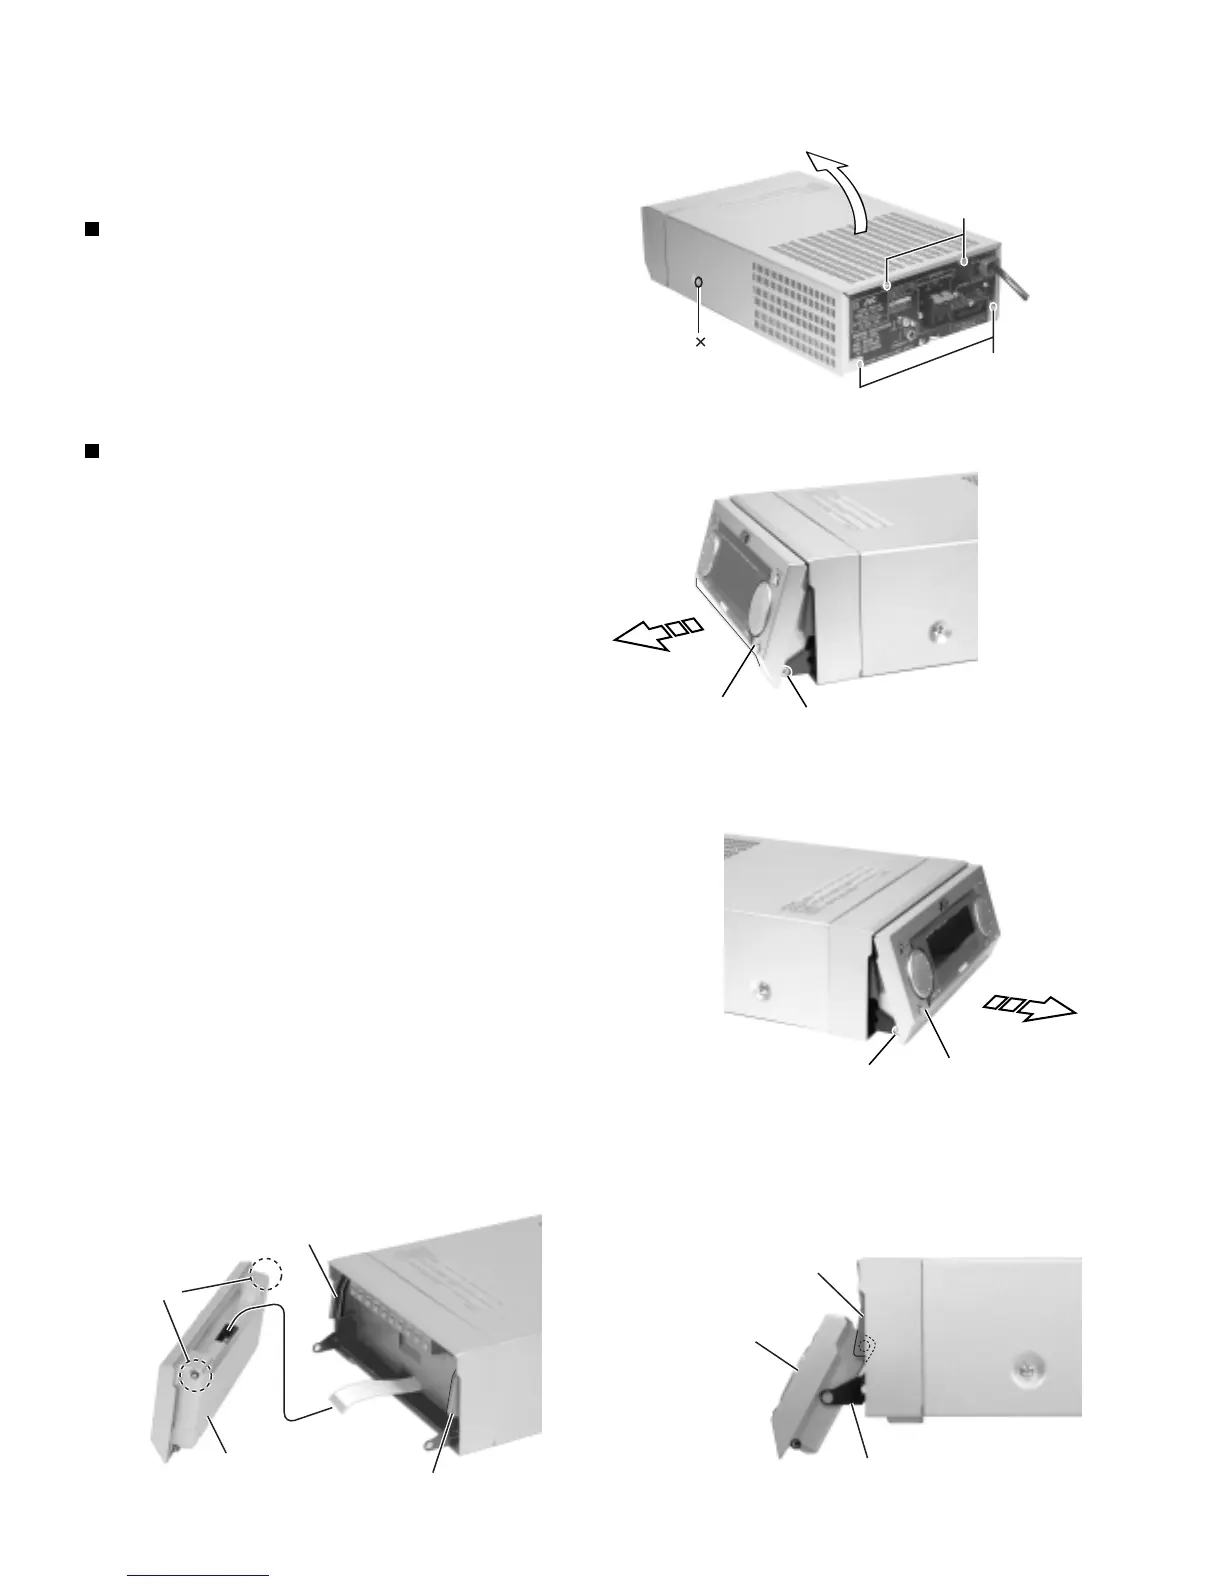
Disassembly method
(AX-UXG6)
Removing the top cover (See Fig.1)
1. Remove the two screws A and the four screws B
attaching the top cover.
2. Remove the top cover from behind in the direc-
tion of the arrow while pulling the sides outward.
Removing the front panel assembly
(See Fig.2 to 5)
1. Pull out the lower part of the front panel assembly
manually as shown in Fig.2 and 3.
2. Remove the two screws C with collars attaching
the front panel assembly.
3. Remove the front panel assembly downward
along the front sub panel rails as shown in Fig.4
and 5.
ATTENTION: Do not lose the two collars of the
part a when removing the front
panel assembly.
4. Disconnect the card wire extending from the
upper part of the front panel assembly.
(When reattaching the front panel assembly, fit
the parts "a" on both sides of the front panel
assembly to the grooves of the front sub panel
rails and move the assembly upward along the
rails.)
Fig. 1
Fig. 2
A 2
B
B
C
Front panel assembly
Fig. 3
Fig. 4Fig. 5
C
Front panel assembly
Front panel assembly
Front sub panel
Slide bracket
Parts a
Front panel assembly
Rail
Rail

 Loading...