1-12 (No.MB211)
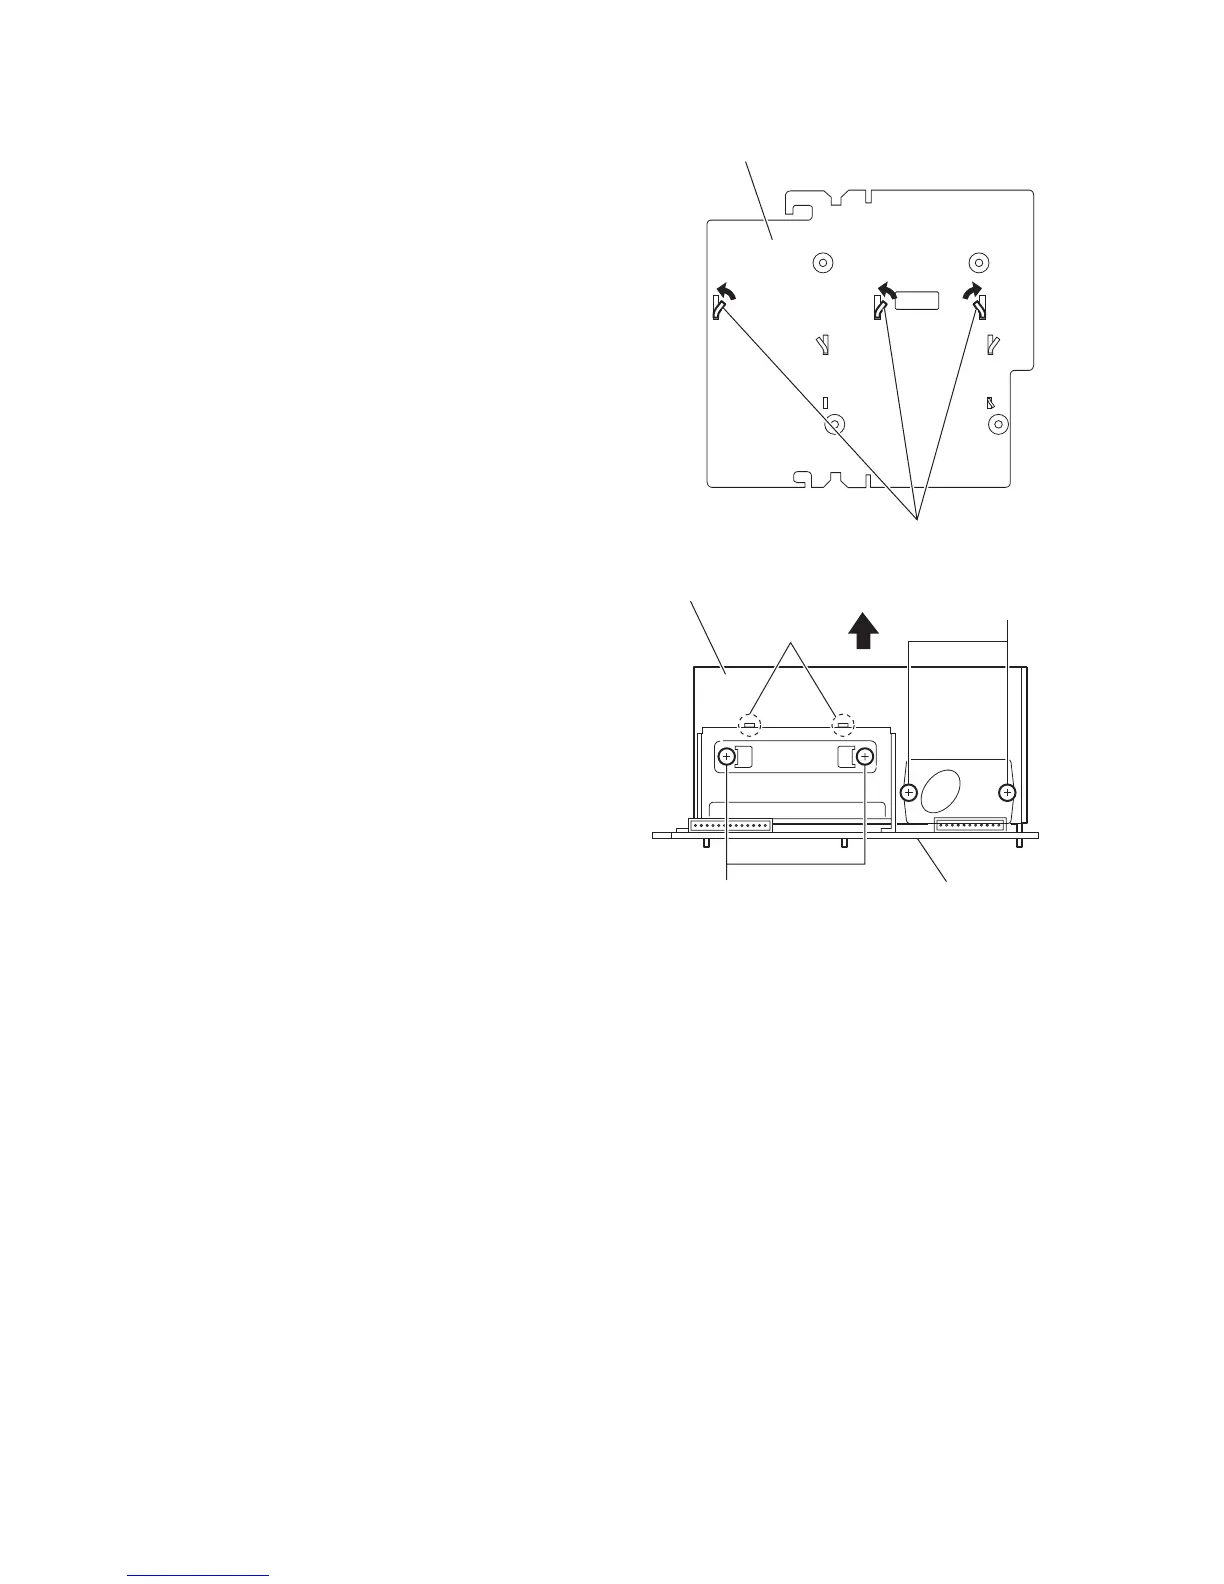
3.1.8 Removing the heat sink
(See Figs.12 and 13)
• Remove the metal cover, front panel assembly, rear panel,
power supply board, micon board and power amplifier board.
(1) From the reverse side of the power amplifier board, bend
the claws i of the heat sink in the direction of the arrow.
(See Fig.12.)
(2) From the forward side of the power amplifier board, remove
the four screws M attaching the heat sink. (See Fig.13.)
(3) Disengage the joints j and remove the heat sink in the di-
rection of the arrow. (See Fig.13.)
Fig.12
Fig.13
Power amplifier board
i
M
Power amplifier board
M
Heat sink
j
 Loading...