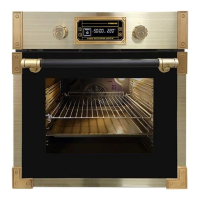
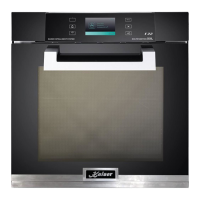
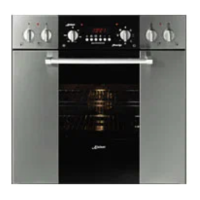
The Kaiser EH 6427 *AD is a built-in electric oven designed for domestic use, offering a range of cooking functions and user-friendly features. This appliance is manufactured by OLAN-Haushaltsgeräte in Berlin, Germany, and complies with statutory safety requirements and EU directives for security, hygiene, and environmental protection.
Function Description:
The oven offers a variety of operating functions, controlled via a combination of touch buttons (14-17) and rotary knobs (18, 19) on the control panel. The display (20) provides visual feedback on the selected modes and settings.
Available cooking functions include:
- Conventional Cooking (F--1): Utilizes top and bottom heating elements for cooking a single dish. Food should be placed in the oven once the cooking temperature is reached. Temperature adjustments can be made towards the end of the cycle.
- Defrost (F--2): Activates the fan without heat, circulating cold air to rapidly defrost frozen food.
- Bottom Heat (F--3): Uses only the bottom heating element.
- Top Heat (F--4): Uses only the top heating element.
- Hot Air + Grill (F--5): Combines hot air circulation with the grill function.
- Fan Cooking (F--6): A fan positioned at the back circulates hot air, providing uniform heat for faster cooking. This mode is suitable for cooking multiple dishes on different shelves, even if they are of different types (e.g., fish and meat). Pre-heating is not essential for pastries in this mode.
- Top Heat + Grill (F--7): Combines top heating with the grill function.
- ECO - Energy Saving Mode (F--8): In this mode, the blower fan operates constantly, and heating elements cycle with pauses, while the thermostat maintains the correct cooking process.
- Pyrolytic Self Cleaning (F--9): Heats the oven interior to 400 °C to decompose all organic matter. The oven door locks automatically during this process and remains locked until the temperature drops below 300 °C.
The oven also features a Rotisserie (if available), which allows for rotating spit roasting of foods like shashliks, fowl, and sausages. The rotisserie activates and deactivates simultaneously with the Grill functions. A Cooling Fan automatically switches on when the outer shell temperature exceeds 60 °C to cool the appliance and surrounding furniture.
Important Technical Specifications:
- Power Supply: Refer to the V/Hz indicated on the appliance's data plate.
- Oven Light: 25W, G9 connection, temperature resistance up to 450 °C.
- Temperature Range: 50 - 250 °C for most cooking functions.
- Cooking Time Range: 5 - 150 minutes.
- Delayed Start Time: Up to 23 hours 59 minutes.
- Pyrolytic Cleaning Time: Default 1.5 hours, adjustable between 1 and 2 hours.
- Telescopic Rails (if available): Can support a load of up to 15 kg when fully pulled out. Made of stainless steel to prevent corrosion.
Usage Features:
- Digital Clock Timer: Allows for automatic, semi-automatic, or manual operation cycles.
- Setting Current Time: In standby, press key 15 once, turn rotary knob 19 to set hours, press key 15 again to set minutes, then press key 15 to confirm.
- Adjusting Temperature and Cooking Time: Select a baking function with rotary knob 18. The default temperature (7) and cooking time (4) will appear. Adjust temperature with rotary knob 19 (50-250 °C). Press key 14 to switch to time setting, then adjust cooking time with rotary knob 19 (5-150 min). Press key 16 to start.
- Delayed Start Function: After setting cooking function, time, and temperature, press key 15 to enter cooking end time. Set hours and minutes using rotary knob 19, pressing key 15 to switch between them. Press key 16 to enter standby. The oven will start and stop automatically according to the set parameters.
- Countdown Timer: In standby, press key 14 to enter timer setting. Icon 11 and clock icon 4 (hour value) will flash. Set hours with rotary knob 19, then press key 14 again to set minutes. Press key 16 to confirm. The icon 11 remains lit when active. An audible signal sounds when time is reached, stopped by pressing key 17.
- Pizza Stone (if available): Place on the grill grate in the middle or lower levels. Use pizza program F--6 or set maximum temperature. Preheat the oven with the stone. Pour flour (corn, rice, wheat, or rye) on the stone for easy removal and a crispy crust.
- Safety Precautions:
- Always disconnect the appliance from the power supply before cleaning or maintenance.
- Do not use damaged appliances.
- Repairs should only be performed by licensed technicians.
- Ensure proper electrical connection and grounding.
- Do not climb, stand, lean, or sit on the appliance.
- Keep children and pets away from the appliance during use.
- Wear oven gloves when handling hot items.
- Do not store flammable materials in the oven.
- Open the oven door carefully to avoid hot air and steam.
- Be cautious when cooking with alcohol, as vapors can ignite.
- Do not place aluminum foil or trays directly on the oven bottom.
Maintenance Features:
- General Cleaning: Clean the oven thoroughly with soap and water before first use. Operate at maximum temperature for 30 minutes to burn off manufacturing residues. Clean the oven after every use with tepid water and washing-up liquid. Dry with a rag or by leaving the door open. Do not use abrasive, acid, alkaline, or chlorine-based cleaners, especially on painted or enameled surfaces.
- Replacing Oven Light: Disconnect power. Place a tea cloth in the oven. Unscrew the glass cover, replace the 25W G9 bulb, reassemble, and reconnect power.
- Self-Cleaning Catalytic Panels (if available): These panels (1) are coated with a micro-porous catalytic enamel that oxidizes and vaporizes grease and oil at temperatures above 200 °C. If the oven is not clean after cooking fatty foods, operate the empty oven for 60 minutes (max.) at maximum temperature. Do not wash or clean these panels with abrasive, acid, or alkaline products.
- Pyrolytic Self-Cleaning: Before starting, remove all non-pyrolytic accessories (1), tableware, utensils, side racks, and telescopic systems from the oven chamber. Ensure the oven seal tape (2) is not damaged. The room should be well ventilated during the process due to potential smoke and odor. After cleaning, use a dry cloth for any residues. Do not use water or other cleaning agents. The door remains locked until the temperature drops below 300 °C.
- Removing Oven Door: Open the door fully, lift levers (1), close the door to the first stop, then lift upwards and outwards to remove (2). To replace, fit hinges and lower levers.
- Removing Door Glass: Remove the oven door. Place it with the glass on a flat, soft surface. Unscrew side screws and remove fixing plate (3). Gently lift and remove the inner glass. Unscrew screws and release side clamps (4). Gently pull out and remove the middle and outer glass (5). Clean all parts and reassemble in reverse order.
- Telescopic Rails: Easily removable for cleaning.
The manufacturer reserves the right to make modifications in design and equipment that lead to positive changes in technical qualities without prior notification.