5
Service and Repair Manual
Model 2500V
1
2
3
4
5
Important! Before carrying out any repairs the hammer should be checked for electrical safety and for mechanical
performance. For electrical safety the hammer should be placed on a non-conductive surface which is either
of a wooden construction (with the mains supply disconnected) which contains no metal parts or a bench
which is insulated by a rubber mat. The hammer should then be checked by high voltage flash testing. On
completion of dismantling procedure all electrical components should then be checked for electrical safety.
The hammer should ONLY be checked for hammer performance if the unit passes the electrical safety test.
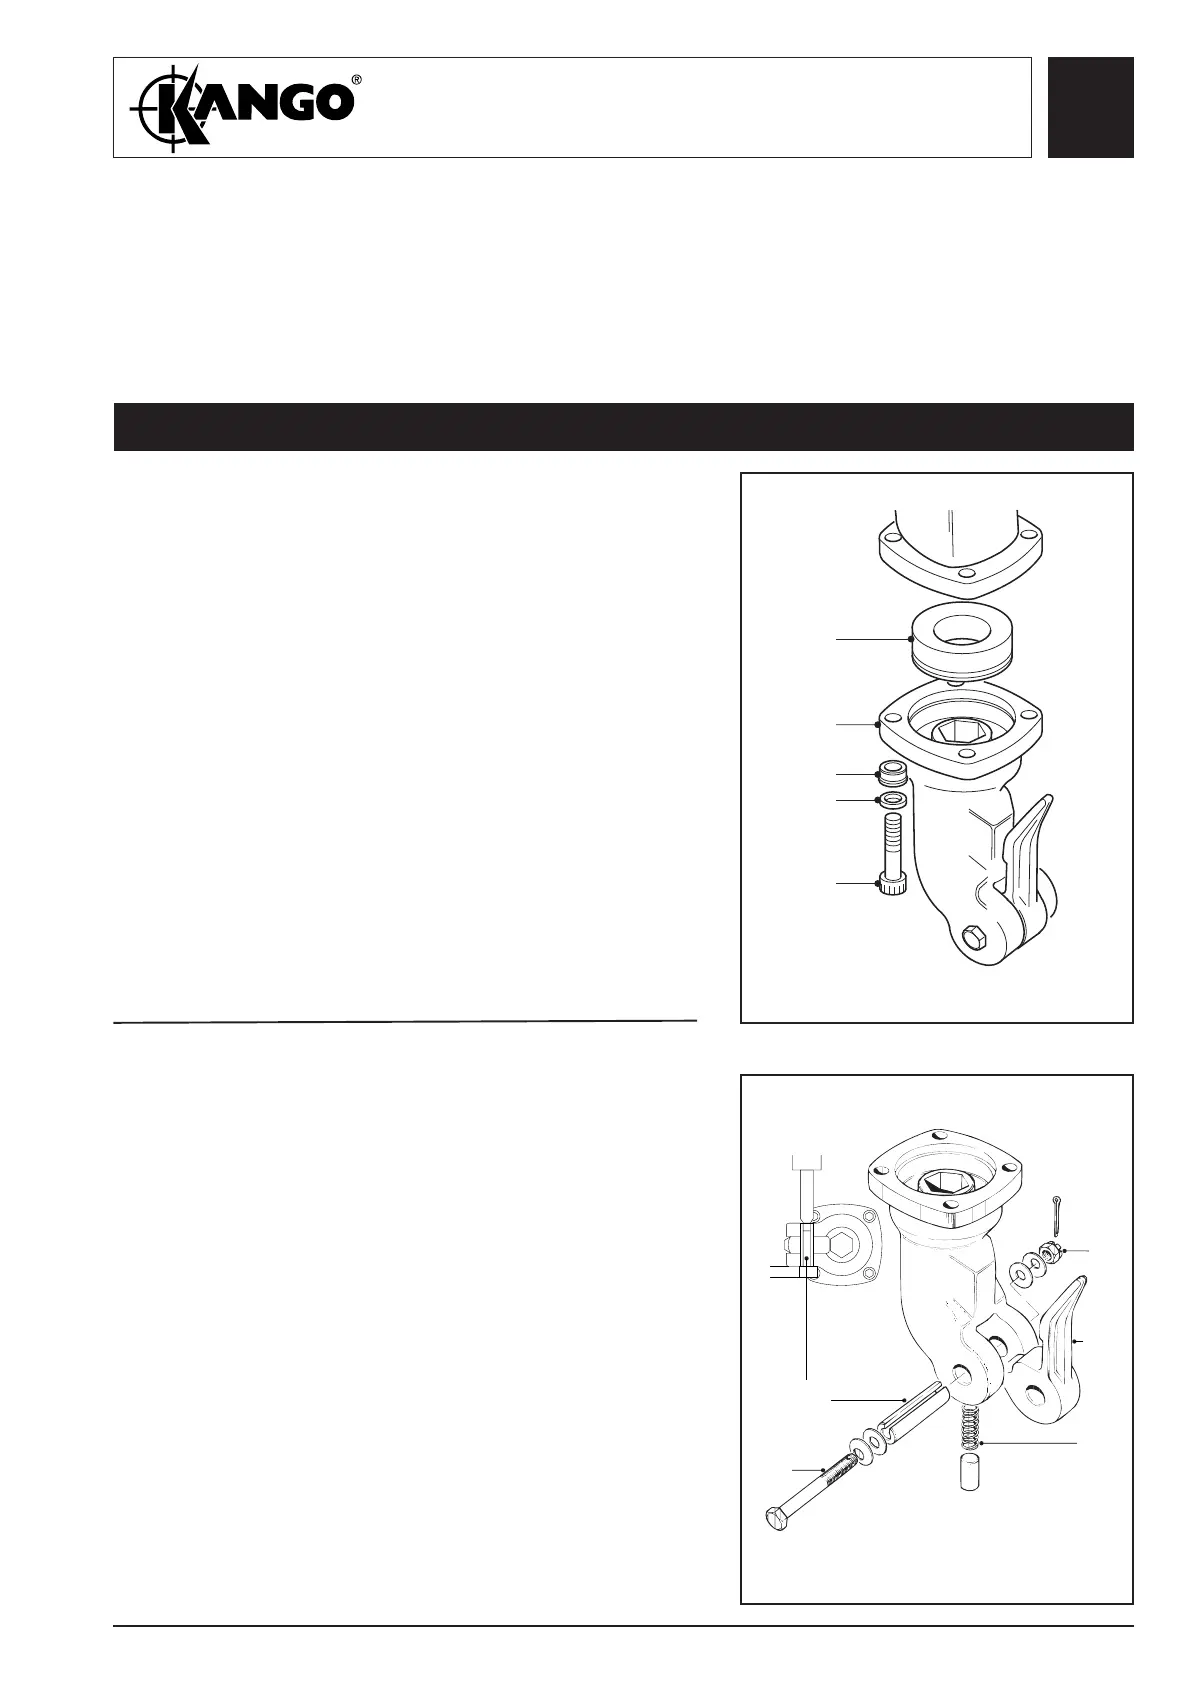
1. Remove the four cap screws (5) washers (4) and
cups (3). Lift off nosepiece (2).
2. Remove buffer (1) it may be necessary to lever the
buffer with a screwdriver to aid removal.
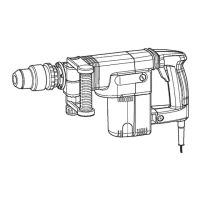
1. Remove the split pin and remove the castellated
nut (1) remove the dished and flat washer.
2. Remove bolt (4) together with the dished and flat
washer.
3. Press out the tension pin (5), see service tool list.
4. Remove the latch (2) plunger and spring (3).
DISMANTLING
Dismantling
the nosepiece
Removing
the nosepiece
1
2
3
4
5
Fig. 2
Fig. 1
1
5
4
3
2