EasyManua.ls Logo

Kärcher G 2600 PC - User Manual

Kärcher G 2600 PC
46 pages
Print Icon
To Next Page IconTo Next Page
Loading...
9.800-499.0 01/10A
G 2600 PC
English 2
Español 16
Français 31

Other manuals for Kärcher G 2600 PC

Questions and Answers

  • L
    Lisa BassAug 20, 2025
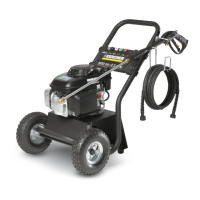
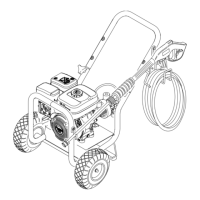
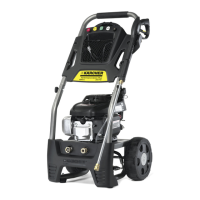
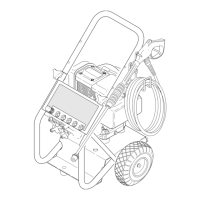
    Why Kärcher G 2600 PC Pressure Washer does not reach high pressure?
    • J
      josephblackAug 20, 2025
      If your Kärcher Pressure Washer isn't reaching high pressure, make sure you're using a garden hose with a 5/8 inch diameter or larger. Check the hose for any kinks, leaks, or blockages that might be restricting the water supply. Ensure the water is turned on full force. Also, inspect the water inlet filter for clogs and rinse it out in warm water if needed. Verify that the high-pressure nozzle is attached instead of the black detergent nozzle.
  • B
    Brian FischerAug 22, 2025
    Why Kärcher G 2600 PC output pressure varies high and low?
    • H
      Henry GutierrezAug 22, 2025
      If the output pressure of your Kärcher Pressure Washer varies, ensure that the water is turned on full force and check the garden hose for kinks, leaks, or blockages. Also, the pump may be sucking air. Check that hoses and fittings are airtight. Turn off the machine and purge the pump by squeezing the trigger gun until a steady flow of water emerges through the nozzle. The water inlet filter may be clogged, so remove it and rinse it in warm water. Also, the spray nozzle might be obstructed; blow out or remove any debris with a fine needle. If the gun, hose, or spray wand is calcified, run distilled vinegar through the detergent suction tube.
  • A
    Allison ParksAug 25, 2025
    Why is there no detergent coming out of my Kärcher G 2600 PC?
    • L
      Lori EdwardsAug 25, 2025
      If you're not getting any detergent from your Kärcher Pressure Washer, start by checking that the detergent suction tube is properly connected to the machine. If the detergent is too thick, dilute it, or use Kärcher® detergent for best results. Also, the filter on the detergent suction tube may be clogged; run warm water through it to remove any debris. Inspect the detergent suction tube for damage or clogs, and remove any obstructions or replace the tube if necessary. Ensure a black detergent nozzle is attached instead of a high-pressure nozzle. Open the metering valve.
  • D
    David HorneAug 26, 2025
    What to do if garden hose connection leaks on Kärcher G 2600 PC Pressure Washer?
    • D
      Donna NortonAug 26, 2025
      If your garden hose connection is leaking on your Kärcher Pressure Washer, check the fittings to ensure they are tight, and replace them if necessary. Also, inspect the rubber washer and insert a new one if it's missing or worn.
  • P
    Pamela ChandlerAug 28, 2025
    Why is my Kärcher G 2600 PC Pressure Washer spray wand leaking?
    • S
      Shawn RichardsonAug 28, 2025
      If your Kärcher Pressure Washer spray wand is leaking, make sure it is properly attached by turning the swivel nut of the gun clockwise until the connection is tight. If the o-ring or plastic insert is broken, call Customer Support.
  • W
    williamsjoshuaAug 30, 2025
    Why is my Kärcher Pressure Washer pump noisy?
    • R
      Ricky CarlsonAug 30, 2025
      If your Kärcher Pressure Washer pump is noisy, check that the hoses and fittings are airtight, as the pump may be sucking in air. Turn off the machine and purge the pump by squeezing the trigger gun until a steady flow of water emerges through the nozzle.
  • J
    Jonathan RichardsAug 31, 2025
    Why is my Kärcher G 2600 PC leaking water from the pump?
    • E
      Emma MurphySep 1, 2025
      If your Kärcher Pressure Washer has water leaking from the pump (up to 10 drops per minute is permissible), first try tightening the fittings. If the water seals are damaged or worn, call Customer Support. If the thermal protection device is activated, it will auto-reset. Do not run the pump for more than 5 minutes without spraying.
  • D
    Daniel RodriguezSep 2, 2025
    What causes an oil drip in Kärcher G 2600 PC?
    • P
      Pam WilliamsSep 3, 2025
      If you observe an oil drip from your Kärcher Pressure Washer, it may be due to damaged or worn oil seals. Contact Customer Support for assistance.
  • R
    Rachel AndersonSep 4, 2025
    How to start a Kärcher G 2600 PC when the engine won't start?
    • N
      Natalie PierceSep 4, 2025
      If your Kärcher Pressure Washer's engine won't start, there are several potential causes. First, ensure the gas tank is filled with gasoline. Next, check that the choke is in the correct position by sliding the choke lever to the closed position. Also, release any built-up water pressure by squeezing the trigger. If these steps don’t work, consult the engine manual for further troubleshooting.
  • R
    rachel65Sep 6, 2025
    Why is my Kärcher G 2600 PC not reaching high pressure?
    • J
      jessica37Sep 6, 2025
      Several factors can prevent your Kärcher Pressure Washer from reaching high pressure. Make sure you are using a 5/8 inch or larger garden hose. Check the garden hose for any kinks, leaks, or blockages that may be restricting the water supply. Ensure the water is turned on full force. Clean the water inlet filter by removing it and rinsing it in warm water. Verify that the high pressure nozzle is attached instead of the black detergent nozzle.

Summary

Model Overview

Important Safety Instructions

Risk of Injection or Injury

High pressure jets can be dangerous if misused and must not be directed at persons, animals, etc.

Risk Of Explosion

Do not use acids, alkaline, solvents, or any flammable material.

Gun Kicks Back

Hold with both hands; safety lock prevents accidental engagement.

Engine Exhaust Chemicals

Contains chemicals known to cause cancer, birth defects, or reproductive harm.

Risk of Asphyxiation

Use this product only in a well ventilated area.

Risk of Fire

Do not add fuel when operating; avoid hot surfaces.

Water Supply

Assembly Instructions

Step 1: Attach Handle

Align holes, insert bolts, and tighten with knobs.

Step 2: Mount Gun;Hose Handle

Mount the gun/hose storage handle.

Step 3: Mount Nozzle Holder

Mount the nozzle holder with enclosed nylon rivets.

Step 4: Place Nozzles

Place the quick connect nozzles in the nozzle holder.

Step 5: Attach Wand

Attach the wand to the spray gun.

Step 6: Insert Nozzle

Pull collar back to insert nozzle until it clicks.

Step 7: Release Collar

Release collar and push nozzle until it clicks.

Step 8: Insert High Pressure Hose

Pull collar back at spray gun and insert high pressure hose until it clicks.

Operating Instructions

Check Oil Level

Ensure oil level is between 'FULL' and 'ADD' marks on the dipstick.

Fill Gas Tank

Fill with unleaded gasoline; do not add oil to gasoline.

Connect High Pressure Hose

Pull back collar and insert high pressure hose until it clicks.

Connect Garden Hose

Connect garden hose to unit's water inlet.

Turn On Water

Connect garden hose to cold water source and turn water on completely.

Purge Air

Unlock safety lock, trigger gun to eliminate trapped air until steady water flow.

Set Choke

Pull choke rod to ON position (or OFF for warm engine).

Turn On Engine

Move the engine stop switch to the ON position.

Start Engine

Pull the starter handle; repeat if necessary, squeeze trigger to release pressure.

Using the Accessories

Quick Connect Nozzles

Color-coded nozzles provide spray widths 0° to 65° and are accessible in nozzle holder.

0° Spray Angle (Red)

For particularly stubborn accumulation of grime. Not for soft materials.

25° Spray Angle (Green)

For dirt accumulation over a large surface.

40° Spray Angle (White)

For moderate dirt accumulation over a large surface.

65° Spray Angle (Black Detergent)

For operating with detergent or cleaning with low pressure.

Working with Detergents

Detergent Application Method

Detergents are applied using the black nozzle at low pressure.

Step 1: Install Detergent Nozzle

Install the black detergent nozzle for detergent application at low pressure.

Step 2: Prepare Detergent Container

Fill container with detergent and place suction tube filter into it.

Step 3: Apply Detergent

With engine running, pull trigger to draw and apply detergent; do not let it dry.

Step 4: Rinse System

Draw fresh water through the suction tube to rinse detergents from the injection system.

Caution: Prohibited Chemicals

Avoid bleach, solvents, TSP, ammonia, and acid-based products as they damage the unit.

Taking a Break

Step 1: Turn Off Engine

Move the engine stop switch to the OFF position.

Step 2: Engage Safety Lock

Release trigger and engage gun safety lock.

Shutting Down & Clean-Up

Step 1: Rinse Detergent System

Remove suction tube and siphon water for one minute to rinse.

Step 2: Turn Off Engine

Move the engine stop switch to the OFF position.

Step 3: Turn Off Water

Turn off the water source.

Step 4: Release Pressure

Press trigger to release water pressure.

Step 5: Engage Safety Lock

Release trigger and engage gun safety lock.

Step 6: Disconnect Garden Hose

Disconnect the garden hose from the water inlet.

Step 7: Disconnect High Pressure Hose

Disconnect the high pressure hose from the high pressure outlet.

Winterizing and Long-Term Storage

Step 1: Disconnect Water

Disconnect all water connections.

Step 2: Purge Pump

Run machine briefly to expel remaining water from pump.

Step 3: Avoid Hose Kinks

Do not allow high pressure hose to become kinked.

Step 4: Storage Location

Store in a room not reaching freezing temperatures, away from heat sources.

Caution: Storage Directions

Failure to follow directions will void warranty and damage the unit.

Maintenance Instructions

Kärcher Pump Maintenance

Ships with oil. Inspect for leaks. No user maintenance required.

Engine Maintenance

Follow engine manufacturer's specifications for maintenance.

Cleaning Tips

Deck Cleaning

Pre-rinse, apply detergent low pressure, rinse high pressure, overlap sections.

Caution: Dirtblaster on Wood

Do not use Dirtblaster spray nozzle on wood surface as it may cause damage.

House Siding Cleaning

Pre-rinse, apply detergent low pressure, rinse high pressure, use brush for stubborn dirt.

Caution: Dirtblaster on Siding

Do not use Dirtblaster spray nozzle on siding as it may cause damage.

Cement Patios, Brick and Stone

Pre-rinse, apply detergent low pressure, rinse high pressure, use Dirtblaster for stains.

Cars, Boats & Motorcycles

Pre-rinse, apply detergent low pressure, rinse high pressure, use brush for stubborn dirt.

Caution: Dirtblaster on Vehicles

Do not use Dirtblaster spray nozzle on vehicles as it may cause damage.

Barbecue Grills & Outdoor Equipment

Pre-rinse, apply detergent low pressure, rinse high pressure, use Dirtblaster for stubborn dirt.

Caution: Dirtblaster on Sensitive Surfaces

Do not use Dirtblaster spray nozzle on cloth, plastic or sensitive surfaces.

Patio & Lawn Furniture

Pre-rinse, apply detergent low pressure, rinse high pressure, use brush for stubborn dirt.

Caution: Dirtblaster on Furniture

Do not use Dirtblaster spray nozzle on patio or lawn furniture as it may cause damage.

Caution: Test Surface First

Test spray pattern and distance in an inconspicuous area first.

Caution: Painted Surfaces

Use extreme caution on peeling/chipping painted surfaces as pressure may remove paint.

Caution: Food Contact Surfaces

Flush surfaces that contact food with plenty of drinking water.

Optional Accessories

Optional accessories enhance cleaning capabilities; check website for pricing and information.

Troubleshooting

Caution: Spark Plug Cable

Remove spark plug cable before making any repair to prevent accidental ignition.

Engine Will Not Start

Possible causes: No gasoline, choke incorrect, pressure built up. Solutions provided.

Unit Does Not Reach High Pressure

Possible causes: Hose diameter, water supply, filter, nozzle. Solutions provided.

Output Pressure Varies

Possible causes: Water supply, pump sucking air, filter, nozzle, calcification. Solutions provided.

No Detergent

Possible causes: Connection, detergent thickness, filter, suction tube. Solutions provided.

Garden Hose Connection Leaks

Possible causes: Loose fittings, missing/worn washer, improper attachment. Solutions provided.

Spray Wand Leaks

Possible causes: Broken o-ring or plastic insert. Solution: Call Customer Support.

Pump is Noisy

Possible causes: Pump sucking air, loose fittings. Solutions provided.

Water Leaks from Pump

Possible causes: Loose fittings, worn water seals. Solutions provided.

Oil Drip

Possible cause: Damaged or worn oil seals. Solution: Call Customer Support.

Thermal Protection Device

Device will auto reset. Do not run pump for more than 5 minutes without spraying.

Kärcher G 2600 PC Specifications

General IconGeneral
BrandKärcher
ModelG 2600 PC
CategoryPressure Washer
LanguageEnglish

Related product manuals