English 11
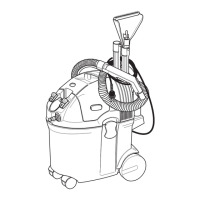
Installing accessories
Carpet cleaning
Use the spray suction tube and the spray extraction
floor nozzle for carpet cleaning.
1 Plug the spray suction tubes together and the con-
nect to the spray suction hose; all parts must audibly
latch into place
2 Push the spray extraction floor nozzle on to the
spray suction tube until it audibly clicks into place.
● To separate the spray suction tubes and spray ex-
traction floor nozzle, press the respective unlocking
button and pull the parts from each other.
Illustration C
Illustration D
Upholstery cleaning
Use the spray extraction upholstery nozzle, spray ex-
traction crevice nozzle or spray extraction floor nozzle
for cleaning as required, e.g. for upholstery and mat-
tresses.
● Push the spray extraction upholstery nozzle, spray
extraction crevice nozzle or spray extraction floor
nozzle on to the spray suction hose handle until it
audibly clicks into place.
● To separate the spray extraction upholstery nozzle,
spray extraction crevice nozzle or spray extraction
floor nozzle, press the respective unlocking button
and pull it off the spray suction hose.
Illustration E
Illustration F
Illustration G
Switching on the device
몇 WARNING
Risk of electric shock
If the power cable is not completely unwound, the dan-
ger exists of you straining and damaging the mains ca-
ble by overestimating the range of the cable.
Always completely unwind the power cable.
1. Completely remove the power cable from the cable
hook.
2. Plug the mains plug into a socket.
Illustration L
3. Turn the power switch to position I (On).
Illustration M
Start the suction motor and pump.
4. Close the air damper completely.
Illustration N
Operation
Cleaning carpets or upholstery
Note
Warm water (maximum 50 °C) increases the cleaning
effect.
Note
Only use the RM 519 detergent from KÄRCHER for
cleaning.
ATTENTION
Danger from cleaning solution
Risk of damage
Before using the device, check the object to be cleaned
for colour fastness and water resistance in an inconspic-
uous place.
1. Fill the fresh water tank with detergent and water,
see chapter Filling the fresh water tank.
2. Switch on the device, see Chapter Switching on the
device
3. Select the accessory as required and press the le-
ver on the handle to spray the cleaning solution.
4. To spray large areas, first press the lever on the han-
dle and then press the locking button.
Illustration O
5. Pull the spray extraction upholstery nozzle or spray
extraction floor nozzle backwards over the surface
to be cleaned in overlapping paths, do not push.
Illustration P
Note
For faster and more effective work, the spray extraction
floor nozzle can also be used for cleaning upholstery
(e.g. large sofas).
Note
When the wastewater container is full, a float switch
closes the suction opening and the device runs at a
higher speed.
6. Switch off the device immediately and empty the
waste water container, see chapter Emptying the
waste water tank.
Cleaning methods
Light / Normal soiling
1. Turn the power switch to position I (On).
Illustration M
Start the suction motor and pump.
2. Press the lever for spraying.
Cleaning solution is sprayed.
Illustration O
3. Release the lever for spraying and suck up the
cleaning solution residue.
If necessary, the air leakage slider can be adjusted
to regulate the suction power.
Illustration N
4. After cleaning, clean the upholstery and carpet with
clear, warm water and impregnate if desired.
Heavily soiling or stains
1. Turn the power switch to position I (On).
Illustration M
Start the suction motor and pump.
2. Press the lever for spraying.
Illustration O
Cleaning solution is sprayed.
3. Turn the power switch to position 0 (Off).
Illustration Q
4. Allow the cleaning solution to act for at least
5 minutes.
5. Turn the power switch to position I (On).
Start the suction motor and pump.
Illustration M
6. Suck off any residues of the cleaning solution.
If necessary, the air leakage slider can be adjusted
to regulate the suction power.
Illustration N
7. Repeat the process if necessary.
8. After cleaning, clean the upholstery and carpet with
clear, warm water and impregnate if desired.
Ending operation
Note
To ensure that no cleaning and dirt particles remain in
the lines, carry out a system cleaning (without the addi-
tion of detergents) after each application.
1. Turn the power switch to position 0 (Off).
Illustration Q
2. Empty the waste water tank, see chapter Emptying
the waste water tank.