Do you have a question about the Kaysun KAY-26 DN7 and is the answer not in the manual?
Instructions to prevent injury, damage, and ensure safe operation.
Warnings for installation and operation to prevent hazards.
Cautions for installation, operation, and maintenance.
Guidelines for operating the unit safely and efficiently.
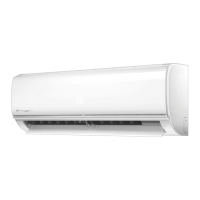
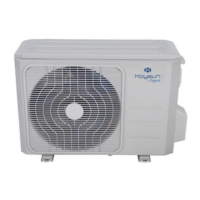
Lists the model names for indoor and outdoor units.
Detailed technical specifications for various models, including electrical and performance data.
Provides overall dimensions and a table for indoor unit models.
Detailed diagram and dimensions for KAY-26 DN7 indoor unit.
Detailed diagrams and dimensions for KAY-35/52 DN7 indoor units.
Detailed diagram and dimensions for KAY-71 DN7 indoor unit.
Illustrates clearances for outdoor unit installation.
Detailed dimensions for KAE-26 DN7 outdoor unit.
Detailed dimensions for KAE-35/52 DN7 outdoor units.
Detailed dimensions for KAE-71 DN7 outdoor unit.
Specifies torque values for connecting refrigerant pipes.
Guidelines for selecting power cord size based on appliance current.
Details maximum pipe length, elevation, and refrigerant charge.
Procedure for initial system installation, including air purging.
Procedure for evacuating the system using a vacuum pump.
Procedure for purging air from the system using refrigerant.
Procedure for adding refrigerant for longer pipe runs.
Procedure for adding refrigerant to older systems.
Procedures for re-installing after indoor unit repair.
Procedure to recover refrigerant before indoor unit service.
Procedure for purging air after indoor unit repair.
Procedures for re-installing after outdoor unit repair.
Procedure for evacuating the entire system before outdoor unit service.
Procedure for charging the system with refrigerant.
Step-by-step guide for removing the air filter from the indoor unit.
Instructions for removing the horizontal louver.
Steps to secure the indoor unit for piping connections.
Steps to remove the front panel assembly of the indoor unit.
Instructions for removing the Printed Circuit Board (PCB).
Steps for removing the electrical control box.
Procedure for removing the chassis assembly of the indoor unit.
Steps for removing the evaporator assembly from the indoor unit.
List of abbreviations used for sensors and functions.
Explanation of icons and codes displayed on the indoor unit.
Details various protection mechanisms for the compressor and unit.
Describes the fan-only operation mode.
Explains compressor and fan running rules during cooling.
Details compressor and fan running rules for heating mode.
Explains the defrosting mode operation and conditions.
Description of the auto mode operation.
Details the drying mode operation and characteristics.
Explains forced cooling and forced auto modes.
Describes the sleep and economy modes.
Explains the auto-restart feature after power failure.
How the unit detects and indicates refrigerant leakage.
Functionality for 8°C heating mode.
Explains the self-cleaning function for heat pump models.
Describes the 'Follow me' temperature sensing function.
Explains the silent operation mode to reduce noise.
How to enter information inquiry status for diagnostics.
Lists codes and meanings for the information enquiry status.
Role of the multi-function board in connecting controllers.
Settings for CP remote on-off control.
Settings for general ON-OFF control via switches.
Notes on controller compatibility and network addressing.
Clarifies network address usage for specific controllers.
Details on connecting and addressing non-polar wired controllers.
States the signal status for alarm outputs.
Wiring diagrams for connecting controllers.
General safety precautions for troubleshooting and capacitor discharge.
Table of indoor unit error codes and their corresponding LED status.
Troubleshooting steps for EEPROM errors.
Troubleshooting steps for communication errors between units.
Troubleshooting steps for fan speed control issues.
Troubleshooting steps for refrigerant leakage detection.
Troubleshooting steps for temperature sensor faults.
Troubleshooting for sensor errors and voltage issues.
Troubleshooting steps for overload current protection.
Troubleshooting for IPM/IGBT related errors.
Method for checking IPM continuity using a tester.
Troubleshooting for voltage protection issues.
Troubleshooting for compressor top high-temperature protection.
Troubleshooting for inverter compressor drive errors.
Procedure to check temperature sensor resistance.
Procedure to measure compressor winding resistance.
| Brand | Kaysun |
|---|---|
| Model | KAY-26 DN7 |
| Category | Air Conditioner |
| Language | English |