9
E
L
L
NN
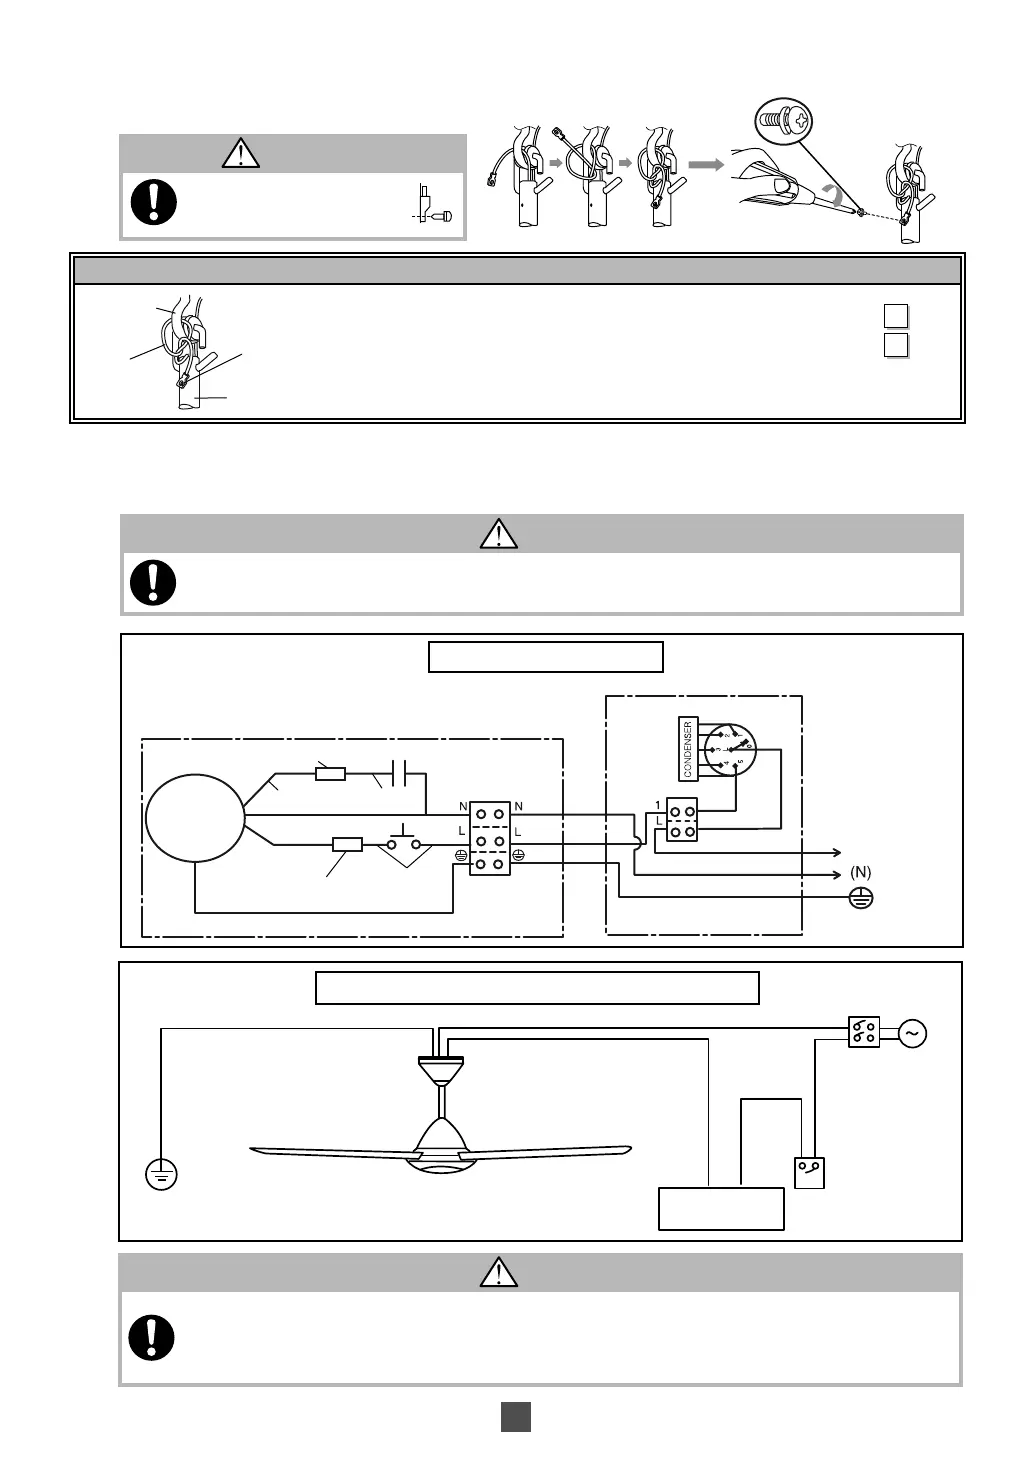
CAUTION
Safety Wire must fi x correctly.
Can cause injury if Ceiling Fan
drops.
Safety Wire Screw
(with washer)
Red
Live
Black
Green/Yellow
Black
White
Ceiling Fan
Terminal
Terminal
Live in
Earth
Neutral
Motor
Regulator
Live in
WIRING DIAGRAM
Brown
Connector
Capacitor
Source
Connector
Brown
Earth
Rated voltage is
mentioned on product.
Regulator
Ceiling Fan
Wall switch
(On / Off)
Check Point After Installation
1. The Ceiling Fan is securely fi xed onto the Ceiling Hook.
2. The Safety Wire is loopped to the Ceiling Hook and securely screwed to
the Pipe.
Check
Ceiling Hook
Safety Wire Screw
Safety Wire
Pipe
WARNING
Electrical wiring must be done by competent personnel.
Can cause fi re, electrical shock, Ceiling Fan drops and injuries.
CAUTION
This product is not provided with cord and plug or with other means for connection from the supply. When connect
or change the power cord or lead wire, it must be performed by qualifi ed personnel in order to avoid a hazard.
Please use 227IEC53(RVV) or thickness of tube is 1mm or above. (Other requirements such as diameter of lead
wire, please use according to the regulation of the country). This product should be installed with a double poles
single throw switch (Breaker Switch) with minimum 3mm contact gap in the fi xed installation circuit.
E)
Wiring Instruction
1
1
Connect power supply according to the Wiring Instruction below.
2
Loop the Safety Wire to the Ceiling Hook and screw it to the Pipe using Safety Wire Screw. Use the screw which was
removed from Page 4, Step A1.
CONNECTING THE POWER SUPPLY