17
HALF RACK, HALF RACK LONG BASE
ASSEMBLY INSTRUCTIONS
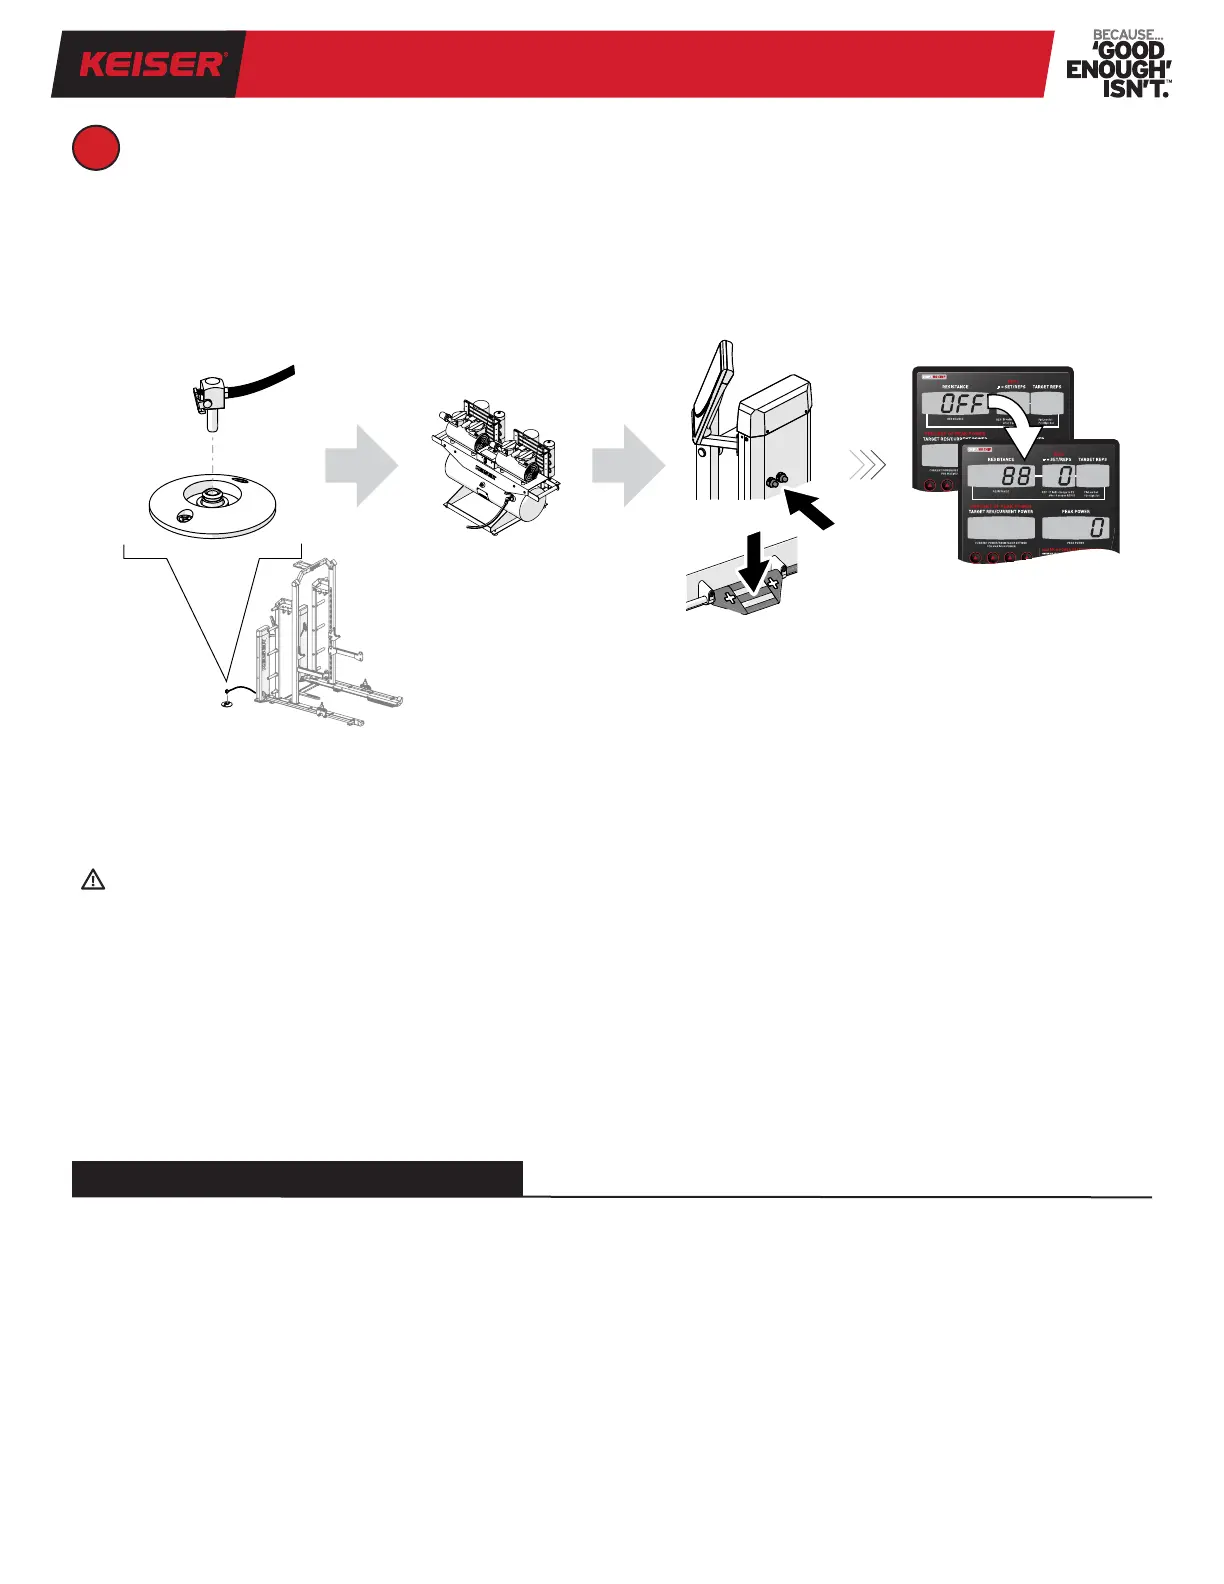
1. Connect the Quick Disconnect of the Half Rack to the Outlet (see Figure 6).
Figure 6. Air System Setup Reference
WARNING: Never connect Keiser pneumatic equipment to an air source that is capable of exceeding 120 psi / 8.27 bar.
Over pressurizing Keiser pneumatic equipment may cause tubing to burst, breakage of equipment, abnormal operation, or serious
injury. Use only clean, dry, regulated compressed air at the rated pressure range of 100–120 psi / 6.89–8.27 bar.
2. Plug the Compressor into a power source to power the Compressor ON. Allow the Compressor to build up to a minimum of
100 psi / 6.89 bar.
3. Press the + and then the – Thumb Buttons and Foot Pedals a few times to ensure air cycles through and both Power Displays
power ON.
Keiser Air Compressor manuals are available at keiser.com/support (search: Air Compressor manuals).
1. Make sure the Half Rack has been installed according to the instructions and check all bolts are properly tightened and
torqued to specication (see items checklist with reference pages below):
2. Ensure the Half Rack is connected to the Compressor/Air Supply and the Compressor/Air Supply is powered ON.
3. Read the Operation Manual before using the equipment (enclosed with the product and also available keiser.com/
support, search: Half Rack manuals).
4. Store Assembly Instructions for future reference.
FINAL INSTALLATION CHECKLIST
9
AIR SYSTEM SETUP & FINAL INSTALLATION
Connect Quick-Disconnect
to the Outlet
Keiser Compressor
(air supply)
Power Display
Powered ON
Press Thumb Buttons and
Foot Pedals to Cycle Air
□ Power Modules (page 10)
□ Power Displays (pages 10 and 14)
□ Bench Positioner (page 12)
□ Platform (if applicable, page 12)
□ Posts (page 13)
□ Cross Braces (page 14)
□ Weight Stacks (page 15)


 To Next Page
 Loading...