SECTION1
Getting
Started
Step
5:
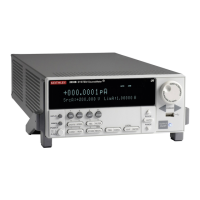
-Enter
Compliance
Value
A.
Press
Source
COMPU-
ANCE.
COMPLIANCE
•
B.
Using
the
keypad,
key
in
55mA.
+55E-3
AMPS
C.
Press
ENTER.
Indicator
denotes
that
COM-
PUANCE
is
enab!ed
(com-
pliance
limit
is
displayed).
A
compliance
limit of 55mA
will
protect
the
400m
W
de-
vice
from
damage
(7V
x 55mA
=
385m
W).
Exponent
form
shown.
The
value
can
instead
be
keyed
in
as
+0.055
amps.
Pressing
CANCEL
will
re-
turn
display
to
the
previously
established
compliance
limit.
Step
6-
Select
Remote Sense
WARNING
With remote sensing enabled,
an
open sense lead will result
in lethal voltages appearing
at
OUTPUT
HI and GUARD.
This voltage
can
cause injury or death, and damage external
circuitry. Always make sure that the sense leads
are
properly
connected before enabling remote sense. Never
change
con-
nections with power applied.
Be
sure to always discharge
and/or disconnect external power sources.
A.
Press
MENU
and
use
ro-
tary
knob
to
display
present
sense
selection.
B.
If
in
local
sense,
press
SE-
LECT
to
display
remote
sense.
I
REMOTE
SENSE
C.
Press
ENTER
and
then
MENU.
1-26
SELECT
buttons
toggle
be-
tween
local
and
remote
sense.
+
+
Step
7-
Select
Autorange
Press
AUTO
RANGE
AUTORANGE
•
Step
8-
Perform
Sweep
A.
Press
OPERATE
OPERATE
•
B.
Press
MANUAL
Trigger
to
start
the
sweep.
MANUAL
•
Step
9-
Standby
Press
OPERATE
to
place
unit
in
standby
after
sweep
is
completed.
This
button
toggles
between
autorange
and
manual
range.
Indicator
denotes
that
AUTO
RANGE
is
enabled.
With
AUTO
RANGE
en-
abled,
the
lowest
possible
measurement
range
will
be
used
at
each
step
of
the
sweep.
Otherwise,
all
measurements
would
be
made
on
the
100mA
range
(as
set
by
the
compli-
ance
value).
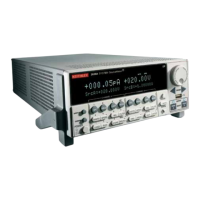
Indicator
denotes
that
OPER-
ATE
is
enabled.
The
output
is
at
the
bias
level
(OV),
but
the
sweep
has
not
yet
started
(MANUAL
Trig-
ger
indicator
blinking).
While
the
sweep
is
in
pro-
gress,
the
MANUAL
Trigger
indicator
stops
blinking,
and
the
voltage
source
steps
can
be
observed
on
the
display.
 Loading...