2600AS-903-01 Rev. A / September 2008 5
Series 2600A SourceMeter® Instruments Quick Start Guide
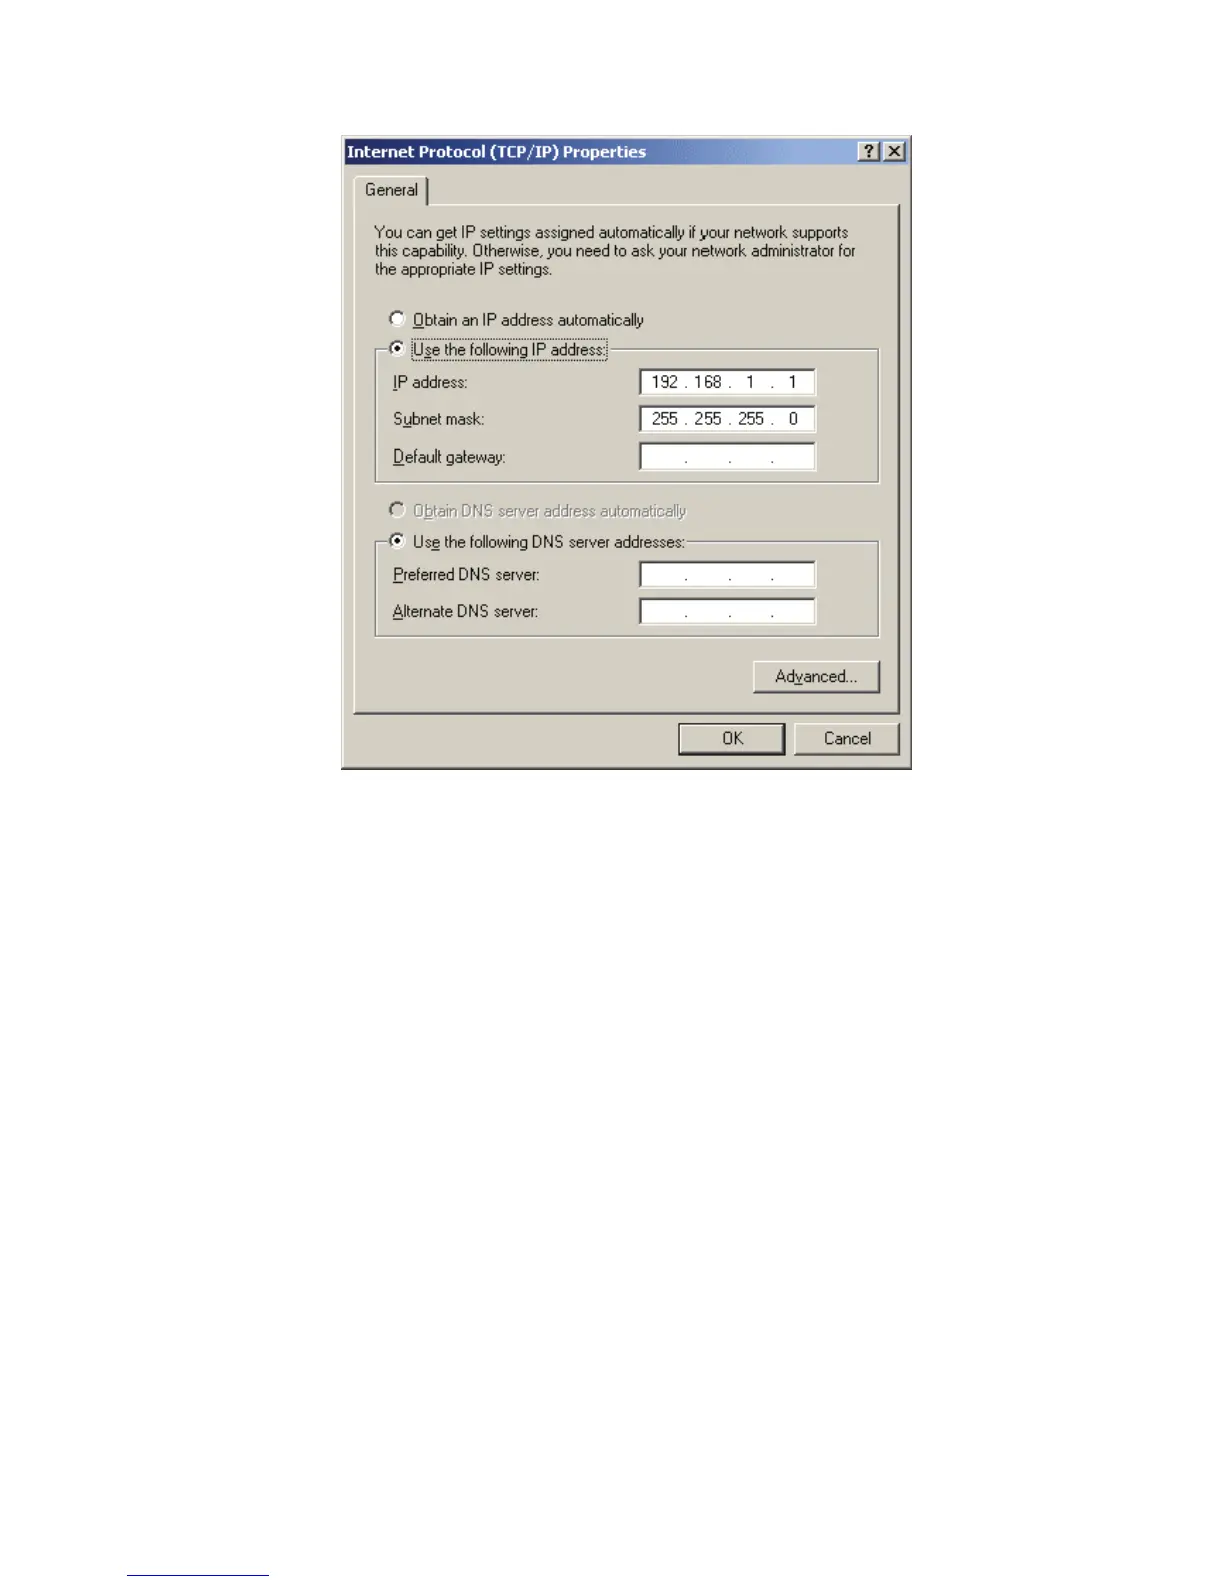
The Internet Protocol (TCP/IP) Properties dialog box
3. Set the IP Address
a. DECISION: Is the IP address and subnet mask field populated?
Yes: If populated, record this address and subnet mask to use in "Configure the instrument's LAN settings" section.
NO: blank, enter the IP address of 192.168.0.3 and subnet mask of 255.255.255.0 in the field to use in "Configure the instrument's LAN
settings" section.
b. After selecting Use the following IP address and recording or entering the IP address, click OK.
Configure the Instrument's LAN settings
Use the following tasks to use the front panel to configure the instrument.
1. Press the MENU key. MAIN MENU will be displayed. Use the navigation wheel to select LAN. The LAN MENU will be displayed.
2. Change the method of how the instrument assigns its IP address.
a. Select CONFIG > METHOD > MANUAL, then Enter.
b. Press the EXIT key one time to return to the LAN MENU.
c. Select APPLY_SETTINGS > YES, then Enter.
NOTE: You must apply changes before changes to the IP Address take place.
3. Enter the IP address from within the LAN MENU.
a. Select CONFIG > IP-ADDRESS.
b. Refer to the recorded computer's IP address. You will use a portion of the computer's address as a base for the instrument's unique ID. Only the
last three numbers (after the last decimal point) will be different between the PC and instrument. The last three digits may be anything from 1-
255 for a subnet mask of 255.255.255.0.
For example: The picture of the Internet Protocol (TCP/IP) Properties dialog box shows that the computer's IP address is 192.168.1.1. A unique
address for the instrument is 192.168.001.101.
NOTE: The instrument can have leading zeros, but the computer cannot.
c. Use the navigation wheel to select and enter an appropriate IP-ADDRESS for the instrument.
NOTE: When changing a multiple-character value, such as an IP address or channel pattern name, push the navigation wheel to enter edit mode and
rotate the navigation wheel to change the character's value as desired, but do not leave edit mode. Use the CURSOR keys to scroll to the
other characters and use the navigation wheel to change their value as needed.
d. Push the wheel or press the ENTER key when finished changing all the characters.
e. Press the EXIT key to return to the LAN MENU.
f. Select APPLY_SETTINGS > YES, then Enter.
NOTE: You must apply changes before changes to the IP Address take place.
 Loading...