Do you have a question about the KeLi XK3118K9 and is the answer not in the manual?
Set the division value (1/2/5/10/20/50/100) for calibration.
Initiate compensation calibration by pressing 0 and Input, leading to step 7.
Configure decimal places (0-4) for calibration values.
Enter system parameters like scale type, stability, and zero tracing range.
Input the full capacity value for the weighing indicator.
Confirm zero position with no load before calibration.
Add weights (>=50% of full capacity) for accurate calibration.
Set the communication address for the indicator (01-26).
Configure the serial communication baud rate (600-9600 bps).
Select serial communication mode: continuous sending or command response.
Adjust filter strength (0-6) for signal processing.
Configure special parameters like power saving, weight unit, and data record usage.
Set the lower limit for three-section division value switching.
Set the upper limit for three-section division value switching.
Finalize calibration and return to weighing status.
View the date of the last calibration.
Save current calibration parameters to the indicator.
Restore saved calibration parameters to the indicator.
View the date when calibration parameters were last backed up.
Set or revise the password for timing shut-down.
Configure the date for automatic timing shut-down.
Procedure to unlock the indicator using a random password.
Details on how overloading records are created and managed.
Information on deleting overloading records after re-calibration.
Steps to view stored overloading records, including date and weight.
Procedure to print the stored overloading records.
Indicates an issue with the division value setting.
Indicates an error in the decimal point setting.
Indicates that the allowed usage period has expired.
Manages unstable data during calibration steps 6 and 7.
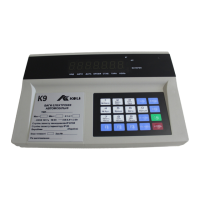
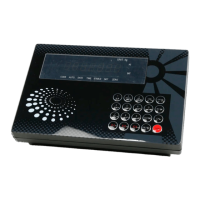
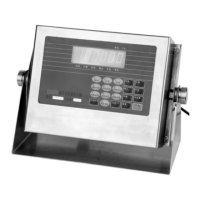
The XK3118K9 Weighing Indicator is a versatile device designed for precise weight measurement and comprehensive calibration management. It offers a range of features for both routine operation and advanced configuration, ensuring accuracy and reliability in various applications.
The primary function of the XK3118K9 is to provide accurate weight readings. It supports a wide array of load cell configurations, allowing it to be integrated into diverse weighing systems. The indicator is equipped with a robust calibration system that enables users to fine-tune its performance for specific operational requirements. This includes setting division values, decimal point precision, and full capacity, all crucial for tailoring the device to different weighing tasks.
Beyond basic weighing, the indicator incorporates advanced features such as a multi-section division display, which automatically adjusts the division value based on the gross weight. This enhances precision across a broad weighing range. It also includes a sophisticated parameter setting system that allows users to configure various operational aspects, such as power-saving modes, weight units (kg or ton), and data record management for cargo and vehicle numbers.
The device is designed with communication capabilities, allowing it to integrate with other systems through serial communication. Users can adjust the baud rate and communication mode to suit their network infrastructure. A filter strength setting helps to stabilize readings in environments with vibrations or disturbances, ensuring consistent and reliable measurements.
For enhanced data management, the XK3118K9 can record and store overloading events, providing a historical log of instances where the weight on the platform exceeded the alarm value. This feature is vital for monitoring system integrity and preventing damage due to excessive loads. The device also supports the printing of these records, facilitating documentation and analysis.
Operating the XK3118K9 is designed to be intuitive, with a clear display and straightforward input methods. The calibration process is initiated by a touch switch, followed by a series of guided steps that allow users to input necessary values such as division, decimal bits, and full capacity. The indicator provides clear feedback during calibration, including stability symbols, to ensure accurate setup.
The device offers flexible parameter settings that can be adjusted to optimize performance for specific applications. For instance, users can select between non-business and business scale applications, configure stability ranges, and set zero-tracing parameters. Manual and power-on zero-setting ranges further enhance operational flexibility, allowing the device to adapt to different environmental conditions and startup procedures.
A notable usage feature is the ability to perform compensation calibration. This allows for fine adjustments to improve accuracy, especially when dealing with specific load cell characteristics or environmental factors. The indicator guides the user through the process of adding known weights and confirming the input, ensuring precise compensation.
The XK3118K9 also includes a timing shut-down function, which can be configured with a password and a specific date. This feature allows for controlled usage periods, which can be particularly useful in rental or managed environments. The device provides a mechanism for unlocking even if the password is lost or the usage period expires, ensuring continued functionality under controlled circumstances.
For data integrity and record-keeping, the indicator supports the inquiry and printing of calibration dates, as well as overloading records. This allows users to easily access historical data for auditing, maintenance, or operational analysis. The ability to backup and recover calibration parameters adds another layer of security, protecting critical settings from accidental loss.
The XK3118K9 incorporates several features designed to facilitate maintenance and ensure long-term reliability. The calibration system itself is a key maintenance tool, allowing users to periodically recalibrate the device to maintain accuracy over time. The guided calibration steps and clear feedback make this process manageable, even for non-specialized personnel.
The device's ability to backup and recover calibration parameters is a crucial maintenance feature. In the event of a system reset or accidental data loss, these parameters can be restored, minimizing downtime and ensuring consistent performance. The indicator also allows users to inquire about the date of the last calibration and backup, providing a clear history for maintenance scheduling.
Error information is clearly displayed, with specific codes like Err 14, Err 15, and Err 36 indicating issues such as incorrect division value settings, decimal settings, or expired usage periods. This immediate feedback helps users diagnose problems quickly and take appropriate corrective actions. The Ctnn 0 message, displayed during calibration when stable data cannot be collected, offers options to proceed with unstable data, skip the step, or return to weighing status, providing flexibility in challenging environments.
The overloading record function serves as a proactive maintenance tool. By logging instances of excessive loads, it helps users identify potential misuse or system vulnerabilities that could lead to damage. This information can be used to implement preventative measures or schedule inspections of the weighing platform and load cells. The ability to delete overloading records after a successful re-calibration ensures that the log remains relevant and manageable.
The robust design, including support for multiple load cells and a stable power supply (AC and DC battery), contributes to overall maintainability by ensuring consistent operation and reducing the likelihood of power-related issues. The detailed manual provides comprehensive guidance for all operational and maintenance procedures, empowering users to effectively manage the device's performance and longevity.
| Model | XK3118K9 |
|---|---|
| Category | Measuring Instruments |
| Type | Weighing Indicator |
| Accuracy Class | III |
| Operating Humidity | ≤85% RH |
| Load Cell Excitation | DC 5V |
| Max Capacity | Depends on load cell |
| Power Supply | AC 220V, 50Hz or DC 12V |
| Operating Temperature | 40°C |
| Communication Interface | RS232 |