9
Section 1.3
FINDING A SUITABLE LOCATION
Before Proceeding: You must have: a suitable ceiling and joist structure, tools and materials
needed, and a level at location in the ceiling.
Goal: To nd a location free of hazards and
obstructions that will provide room for the
installation and use of the attic ladder.
Avoid installing attic ladder over other stairs.
Step 1. Pick a potential location for installation.
Check that the size of rough opening matches
what is listed in Table 1 for the model being
installed.
Step 2. If there is no ceiling and the attic ladder will
t between the joists so that no joists need to
be cut, go to Section 1.6,
page 13, "FRAMING
THE ROUGH OPENING”. If there is no ceiling,
but one or more joists need to be cut, go to
Section 1.5,
page 12, “CUTTING THE CEILING
JOISTS”. If there is a ceiling at this location, you
will need to inspect the area above this location
as described in steps 3 and 4.
Step 3. Go into the overhead space and nd the area above your chosen location.
This area may be located by:
A) Listening for tapping from below
B) Measuring distances from walls or other objects common to the overhead space and
the room below.
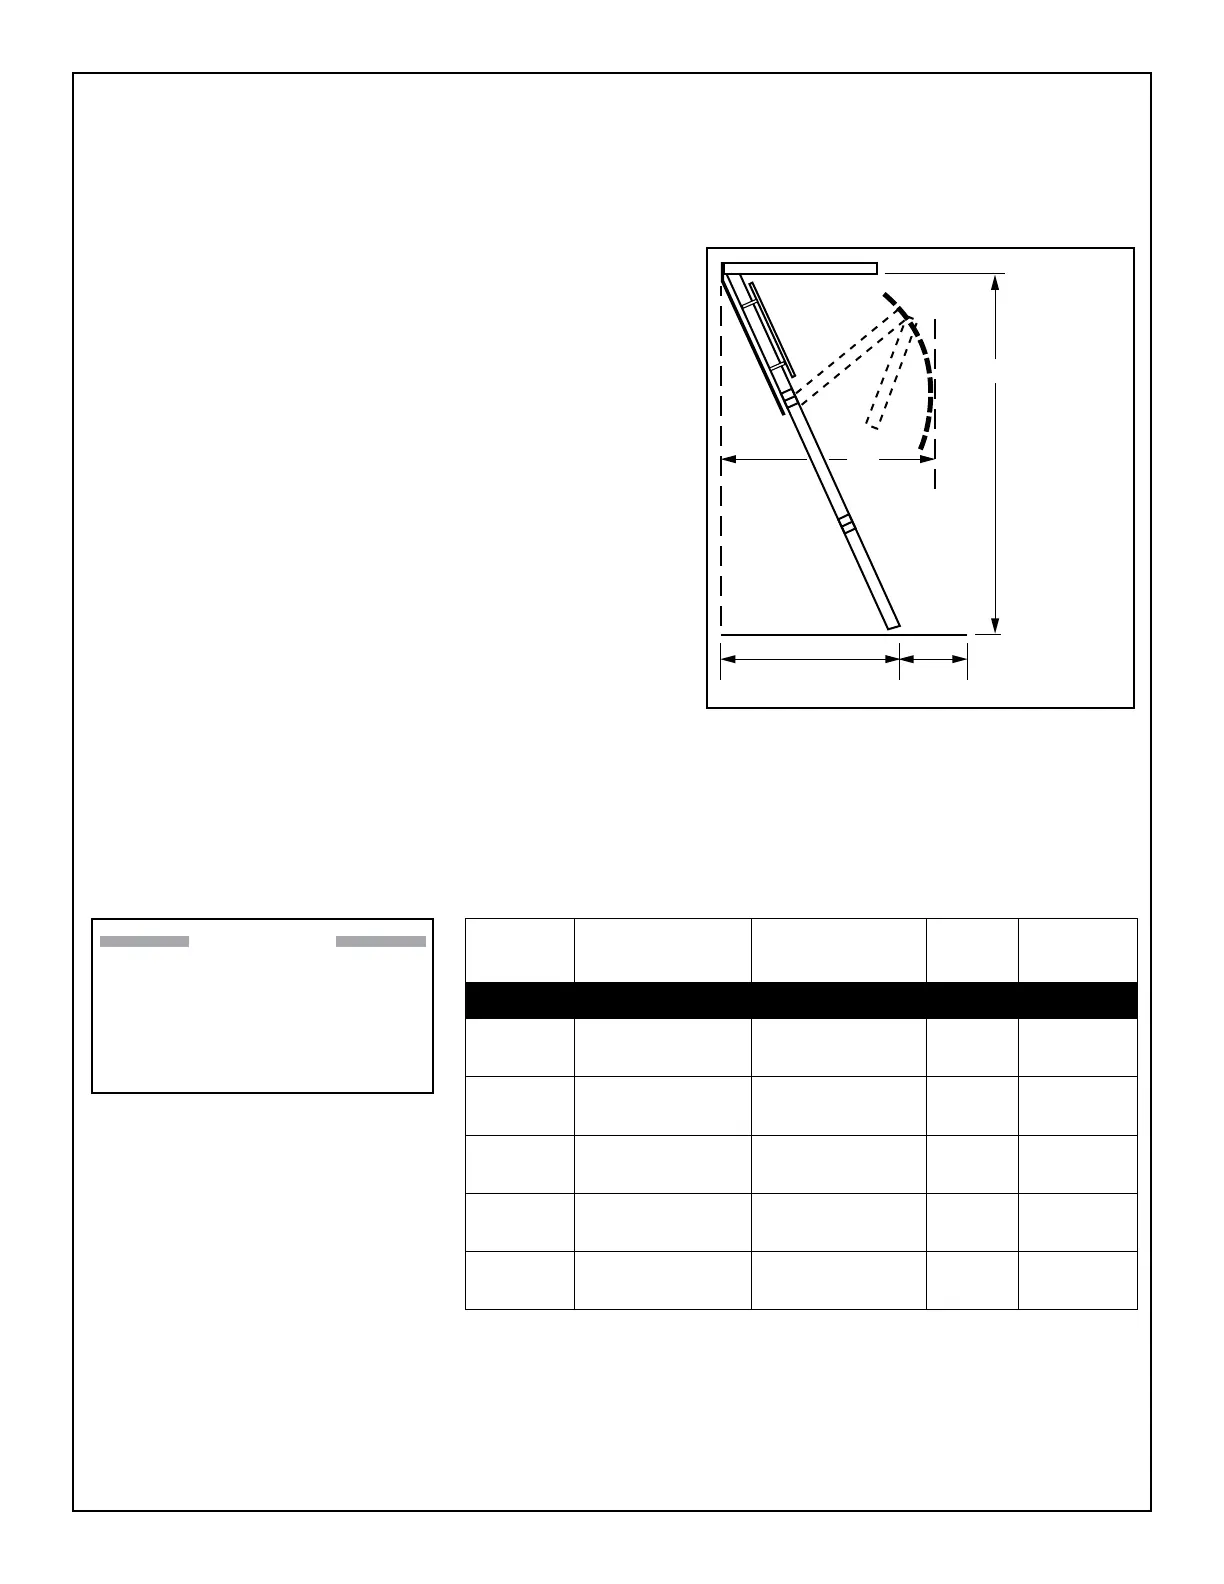
LS 2' *
SC
FC
Description:
FC - Floor to
ceiling height
SC - Swing
clearance
LS - Landing
space
* Recommended
spacing to climb
ladder
FIGURE 3
WARNING
Do not drive metal nails or other
conductive objects into the ceiling
unless you are sure they will not
contact electric wires. Contact with an
electric wire can be deadly.
TABLE 1
Rough
Opening
Ceiling Height Range
Landing
Space (1)
Swing
Clearance (2)
W2208
W2210
(1.88 m)
(1.88 m)
WU2210
(1.88 m)
*Products sold in Canada will have model numbers ending in "CA".
 Loading...