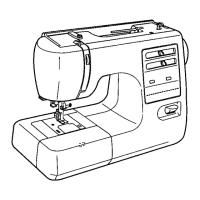
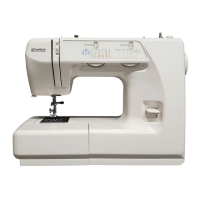
Do you have a question about the Kenmore 385.16231 and is the answer not in the manual?
| Brand | Kenmore |
|---|---|
| Model | 385.16231 |
| Type | Mechanical |
| Needle Type | 15x1 |
| Stitch Width | 5mm |
| Stitch Length | 4mm |
| Buttonhole Styles | 1-step |
| Needle Threader | Yes |
| Mechanical | Yes |
| Top Loading Bobbin | Yes |
| Bobbin Type | Top Loading |
| Stitch Options | Straight, Zigzag |
| Presser Feet | Buttonhole |
| Speed Control | Variable |
Instructions to reduce the risk of electric shock from the sewing machine.
Precautions to prevent burns, fire, electric shock, or injury to persons.
Steps to connect the sewing machine to the power source and outlet.
Essential safety precautions to follow while operating the machine.
Adjusting the screw that holds the needle in place.
Classification of fabrics by weight for needle selection.
Types of fabrics categorized by weight.
Recommended needle types for different fabrics.
Corresponding needle sizes for various fabric weights.
Step-by-step guide for threading the upper thread through the machine.
Achieving ideal needle thread tension for zigzag stitches.
Recognizing and correcting overly tight needle thread tension for zigzag.
Identifying and correcting loose needle thread tension for zigzag.
Settings and procedures for sewing a straight stitch.
Step-by-step guide to begin sewing a straight stitch.
How to fasten the end of a seam and prepare for the next.
Attaching the zipper foot to the machine.
Preparing fabric and zipper for sewing.
Step-by-step guide to sewing a zipper.
Completing the zipper sewing process and removing basting stitches.
Settings and usage for the basic zigzag stitch.
Settings and use for the straight stretch stitch.
Settings and procedure for automatic buttonholes.
Attaching the automatic buttonhole foot and preparing it.
Marking the buttonhole position on the fabric.
Part of the attachment: guide slot.
Sewing automatic buttonholes with the attachment.
Aligning the fabric with the buttonhole foot's center mark.
Part of the attachment: guide block.
Aligning the fabric edge with the guide plate's measure mark.
Part of the attachment: guide plate.
Placing the fabric correctly behind the machine.
Part of the attachment: template.
Part of the attachment: catch.
Part of the attachment: setting mark.
Part of the attachment: gear.
Part of the attachment: base plate.
Part of the attachment: lever.
Steps for sewing manual buttonholes.
Sewing the first side and bartack of the manual buttonhole.
Moving the buttonhole lever for the next side.
Sewing the second side and bartack of the manual buttonhole.
Selecting buttonhole templates for different styles and sizes.
Causes and solutions for needle thread breaking.
Causes and solutions for bobbin thread breaking.
Causes and solutions for needle breakage.
Causes and solutions for skipped stitches.
Causes and solutions for seam puckering.
Causes and solutions for fabric feeding issues.
Causes and solutions for machine malfunction.
Causes and solutions for distorted stitch patterns.
Causes and solutions for noisy machine operation.


