BUTTONS AND BUTTONHOLES
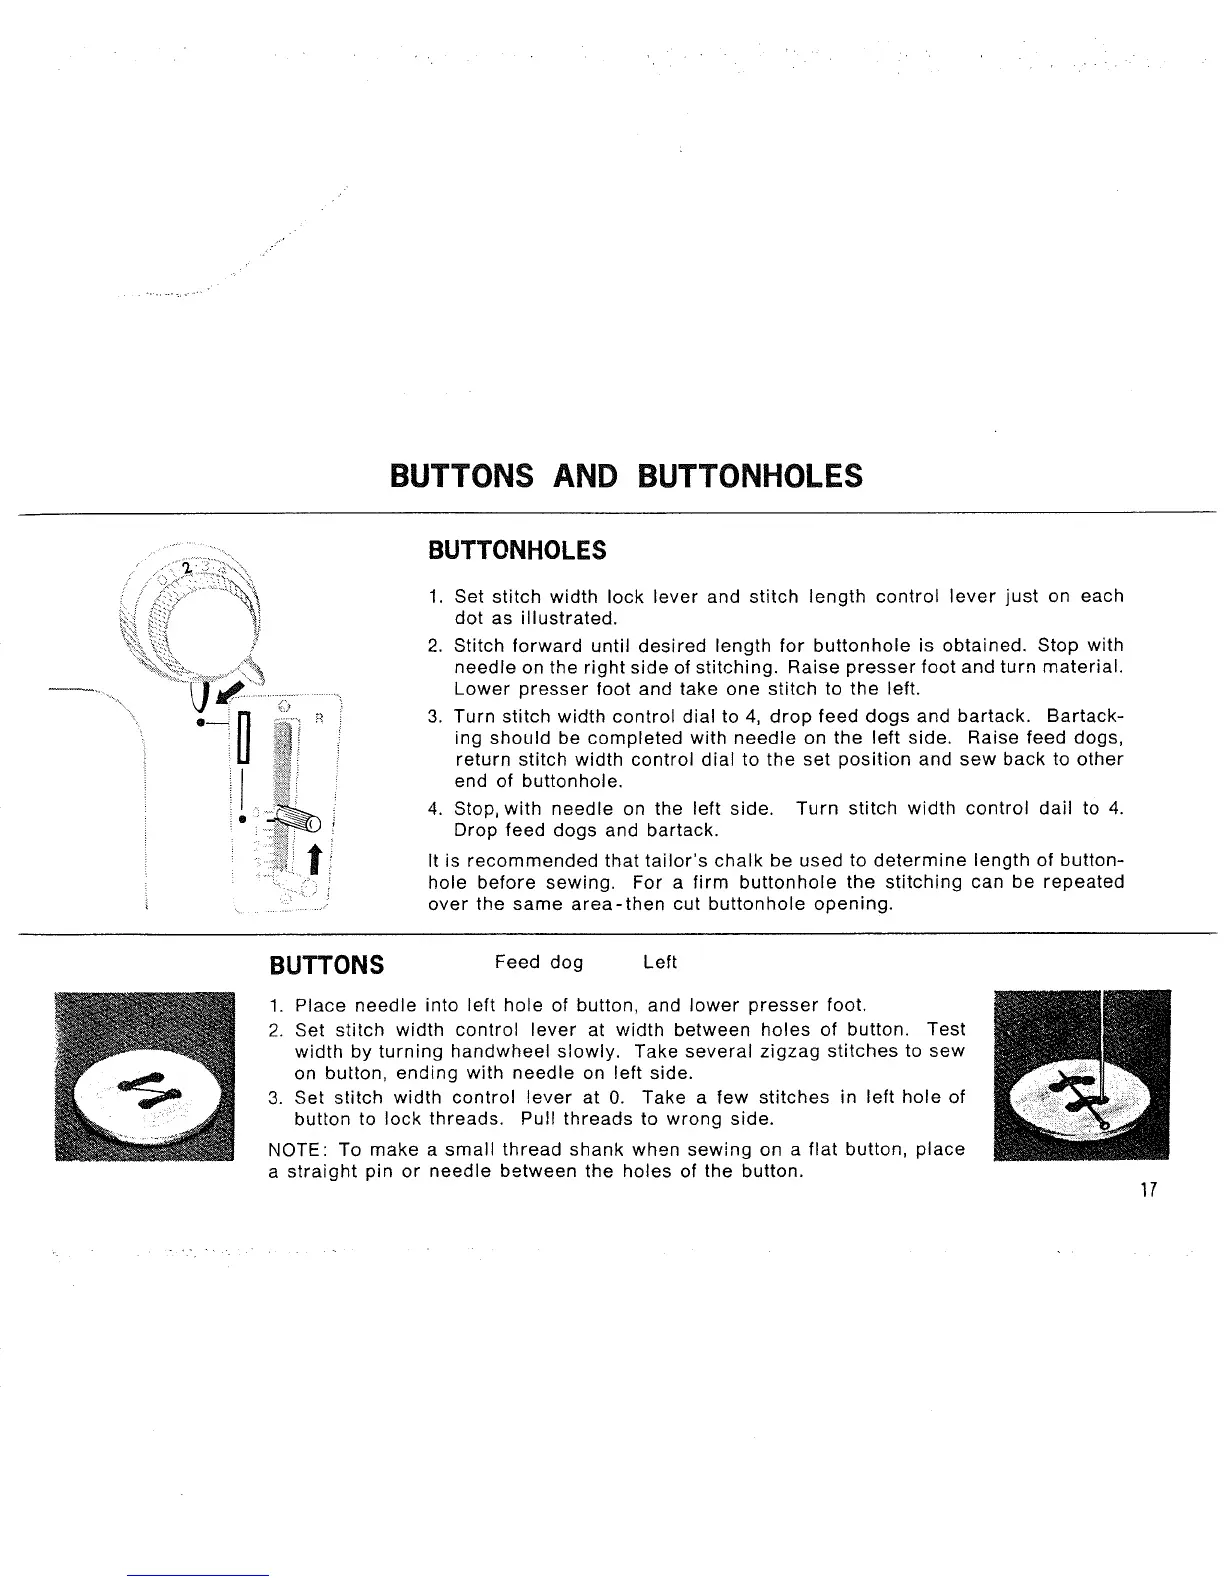
BUTTONHOLES
1. Set stitch width lock lever and stitch length control lever just on each
dot as illustrated.
2. Stitch forward until desired length for buttonhole is obtained. Stop with
needle on the right side of stitching. Raise presser foot and turn material.
Lower presser foot and take one stitch to the left.
3. Turn stitch width control dial to 4, drop feed dogs and bartack. Bartack-
ing should be completed with needle on the left side. Raise feed dogs,
return stitch width control dial to the set position and sew back to other
end of buttonhole.
4. Stop, with needle on the left side. Turn stitch width control dail to 4.
Drop feed dogs and bartack.
It is recommended that tailor's chalk be used to determine length of button-
hole before sewing. For a firm buttonhole the stitching can be repeated
over the same area-then cut buttonhole opening.
BUTTONS Feed dog Left
1. Place needle into left hole of button, and lower presser foot.
2. Set stitch width control lever at width between holes of button. Test
width by turning handwheelslowly. Take several zigzag stitches to sew
on button, ending with needle on left side.
3. Set stitch width control lever at 0. Take a few stitches in left hole of
button to lock threads. Pull threads to wrong side.
NOTE: To make a small thread shank when sewing on a flat button, place
a straight pin or needle between the holes of the button.
17