EasyManua.ls Logo

Kenmore 564.8815022 User Manual

Kenmore 564.8815022
8 pages
To Next Page IconTo Next Page
Page #1 background imageLoading...
Page #1 background image
' I_ARS
Kenmore
BEER DISPENSER
OWNER'S INSTRUCTIONS
MODEL 564.8815022
THIS BOOK:
r_... t_, _n. how to operate and care for your beer dispenser. It also offers tips on how to get the
best, as well as lowest cost, performance.
...... _^-;'", ,,_l=r_.rn_.rlt oarts use
VVlI_:;': ,J,,,,,,_ .... ._ -_
the part number. Do not use the illustra-
tion number.
For parts or service information, call
your nearest Sears store or Service
Center, give the complete model num-
ber listed above.
ice provided below the model number and serial number
nce. They are located on the model number plate on the
FULL ONE-YEAR
W_ ON BEER DISPENSER
For one year from the date of purchase, when this beer dispenser is operated and maintained according to owner's in-
structions attached to or furnished with the product, Sears will repair this beer dispenser, free of charge, if defective in
material or workmanship.
FULL FIVE-YEAR WARRANTY
ON SEALED REFRIGERATION SYSTEM
For five years from the date of purchase, when this beer dispenser is operated and maintained according to owner's
instructions attached to or furnished with the product, Sears will repair the sealed system (consisting of refrigerant, con-
necting tubing and compressor motor), free of charge, if defective in material or workmanship.
WARRANTY SERVICE IS AVAILABLE BY CONTACTING THE NEAREST SEARS
STORE OR SERVICE CENTER THROUGHOUT THE UNITED STATES.
This warranty gives you specific legal rights, and you may also have
other rights which vary from state to state.
Sears, Roebuck and Co., Dept. 698/731A, Sears Tower, Chicago, IL 60684
Part No. 302104 SEARS, ROEBUCK AND CO., U.S.A.
Question and Answer IconNeed help?

Do you have a question about the Kenmore 564.8815022 and is the answer not in the manual?

Kenmore 564.8815022 Specifications

General IconGeneral
BrandKenmore
Model564.8815022
CategoryBeverage Dispenser
LanguageEnglish

Summary

Read This Book

Assembly Instructions

Carton Inventory

Unpack and inspect all items to ensure they are present and in good condition.

Install Casters

Attach the four wheel casters to the bottom corners of the beer dispenser cabinet.

Install Draft Arm Assembly

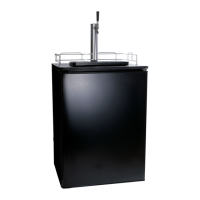
Assemble and attach the draft arm to the top of the cabinet using provided hardware.

Install Guard Rail

Secure the guard rail to the top of the cabinet using small screws.

Installation Procedures

Initial Beer Dispenser Placement

Install the beer dispenser on a strong, level floor away from direct sunlight, heat, and moisture.

Electrical Connection

Connect to a 120V, 60 Hz, 15 Amp grounded AC outlet; do not use extension cords.

Temperature Control

Setting Temperature

Set the control to NORMAL, wait 24 hours, then adjust as needed for optimal temperature.

Defrosting Procedure

When to Defrost

Defrost when ½ inch frost builds up on the cold plate, ideally when changing the keg.

Defrosting Steps

Set control to OFF, leave door open, absorb water, do not use heat or sharp objects.

Beer System Installation

CO2 Cylinder and Regulator Setup

Install CO2 cylinder and regulator, ensuring proper connection of pressure tube and hose clamps.

CO2 Cylinder Operating Instructions

Ensure cylinder valve is fully open and secure the cylinder with retainers to prevent tipping.

Pressure Vessel Safety

Handle CO2 cylinders with care, inspect regularly, and charge only with dry carbon dioxide.

Charging with Dry Carbon Dioxide

Ensure cylinder pressure rating is 1800 PSI or greater and do not exceed 68% fill density.

Keg Tapper and Beer Keg Installation

Connect keg tapper, beer tube, and tap the keg, ensuring proper alignment and no leaks.

Operation and Maintenance

Dispensing Beer

Place drip tray, open beer faucet quickly all the way for dispensing.

Recommended Pressure

The recommended pressure for the CO2 system is 8-10 lbs.

Periodic Cleaning

Clean the beer system periodically using the provided cleaning kit.

Cabinet Cleaning

Clean interior/exterior with baking soda solution or mild soap; avoid harsh cleaners.

Painted Finish Protection

Apply appliance wax or polish regularly for protection against rust and moisture.

Replacing Empty Keg

Procedure for Keg Replacement

Close CO2 valve, remove old tap, then follow procedures C, D, E for tapping a new keg.

Related product manuals