EasyManua.ls Logo

Kenmore 6011 User Manual

Kenmore 6011
8 pages
To Next Page IconTo Next Page
Page #1 background imageLoading...
Page #1 background image
®
FOO WASTE DISPOSERS
J
Installation, Care & Use Manual
TOOLS AND MATERIALS YOU WILL NEED:
Slotted Screwdriver, Adjustable Pliers, Plumber's Putty,
Electrical Tape
TOOLS, MATERIALS, AND ACCESSORIES
YOU MAY NEED:
Phillips Screwdriver, Drain Auger, 3/8" Electrical Clamp
Connector, Wire Nuts (2), Second 1 1/2" Drain Trap,
Hammer, Hacksaw, Water Hose Clamp, Pipe Wrench,
Copper Ground Wire, Dishwasher Drain Connection Kit, Air
Gap, Electrical On/Off Switch, Drain Tube Extension
Read through the entire installation, Care
& Use manual before installing the dis-
poser. Determine which of the tools,
materials, and accessories you will need
before you begin. Make sure you have all
necessary disposer parts before install=
ing the disposer (see part identification
diagram below).
O s j/K OR
'LT-- _t _,-f",_P -
1 <=_-'"-Je .................. fl/r,l. _-N
0_ _ U
Mounting Assembly Disposer Two-Bolt Discharge
A: Stopper H: MountingGasket/SplashBaffle N:Bolt(2)
B:Sink Flange h LowerMounting Ring ._lr O:Discharge Tube (1-1/2" Diam.)
C:FiberGasket J: DishwasherInlet " = P: Flange
D: Backup Ring K: Discharge Outlet Q:Gasket
E: MountingRing L: Wrenchette OF{
F:Screws(3) -- One-Bolt Discharge
G: Snap Ring N:Bolt
,_ O: Discharge Tube (1-1/2" Diam.)
"-- p::Flanget
SAFETY SYMBOLS
Danger indicates an
imminently hazardous situation which,
if not avoided, will result in death or
serious injury.
I_iWARNING I Warning indicates
a potentially hazardous situation
which, if not avoided, could result in
death or serious injury.
I _,CAUTIONI Caution indicates a
potentially hazardous situation which,
if not avoided, may result in minor or
moderate injury.
Part No. 73110 - 1/02
Question and Answer IconNeed help?

Do you have a question about the Kenmore 6011 and is the answer not in the manual?

Kenmore 6011 Specifications

General IconGeneral
BrandKenmore
Model6011
CategoryGarbage Disposal
LanguageEnglish

Summary

Tools and Materials for Disposer Installation

Safety Symbols and Warnings

DANGER: Immediate Hazard Warning

Indicates an imminently hazardous situation which, if not avoided, will result in death or serious injury.

WARNING: Potential Hazard

Indicates a potentially hazardous situation which, if not avoided, could result in death or serious injury.

CAUTION: Minor Hazard

Indicates a potentially hazardous situation which, if not avoided, may result in minor or moderate injury.

Installation Dimensions and Guide

Sink Drain and Mounting Assembly Preparation

Disconnect Sink Drain Components

Steps to disconnect the sink drain trap and remove the sink flange.

Disassemble Mounting Assembly

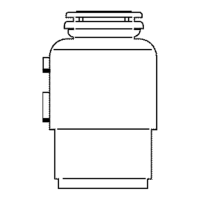
Steps to disassemble the disposer mounting assembly and prepare it for installation.

Install Sink Flange

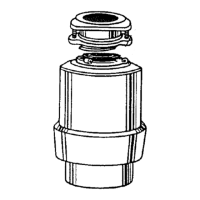
Apply plumber's putty to seal the sink flange and press it firmly into the sink hole.

Attach Upper Mounting Assembly

Securely attach the upper mounting assembly to the sink flange using provided hardware.

Remove and Clean Before New Installation

Remove Existing Disposer

Instructions for safely removing the old disposer unit.

Clean Sink Drain Line

Clear any blockages in the sink drain line before new installation.

Prepare Dishwasher Drain Connection

Instructions for preparing the disposer for a dishwasher connection.

Connect Disposer to Electrical Supply

Electrical Connection Methods

Details on direct wiring or using a plug-in cord.

Disposer Circuit Requirements

Ensuring proper circuit and switch requirements for the disposer.

Grounding Instructions

Proper grounding procedures for direct-wired and cord-connected units.

Connect Disposer and Attach Discharge Tube

Connect Disposer to Mounting Assembly

Securely connect the disposer to the assembled mounting hardware.

Attach Discharge Tube to Waste Drain

Install the discharge tube, ensuring proper alignment and sealing.

Dishwasher Connection and Decal

Connect Dishwasher Drain

Connect the dishwasher drain hose to the disposer through an air gap.

Attach Specification Decal

Apply the disposer specification decal for service information.

Final Installation Check

Fill sink, turn on disposer, and check for leaks.

Operating and Maintenance Instructions

Continuous and Batch Feed Operation

How to operate both continuous and batch feed disposer models.

Disposer Cleaning and Jam Release

Procedures for cleaning the disposer and releasing jams.

Kenmore Food Waste Disposer Warranty Information

Related product manuals