First Steps
This Owner's Guide provides specific operating instructionsfor
your model. Use the unit only as instructedin this Owner's Guide.
Before starting the appliance, follow these important first steps.
Installation
° Choose a place that is near a grounded electrical outlet. Do
Not use an extension cord or an adapter plug.
* If possible, place the refrigerator out of direct sunlight and
away from the range, dishwasher or other heat sources.
° The refrigerator must be installed on a floor that is level
and strong enough to support a fully loaded refrigerator.
° Consider water supply availability for models
equipped with an automatic icemaker.
_ CAUTION
DO NOT install the refrigerator where the temperature
will drop below 55°F (13°C) or rise above |IO°F (43°C).
The compressor will not be able to maintain proper
temperatures inside the refrigerator.
DO NOT block the foe grille on the lower front of your
refrigerator. Sufficient air circulation is essenflal for the
proper operation of your refrigerator.
Door Opening
Your refrigerator should be positioned to allow easy access
to a counter when removing food. To make this possible,
the direction in which the doors open can be reversed. See
Door Removal & Reversal Instructions.
NOTE
If your refrigerator is placed with the door hinge side
against a wall, you may have to allow additional space
so the door can be opened wider.
Leveling
All four corners of your refrigerator must rest firmly on a
solid fioon Your refrigerator is equipped with adjustable
front rollers or front leveling screws to help level your unit.
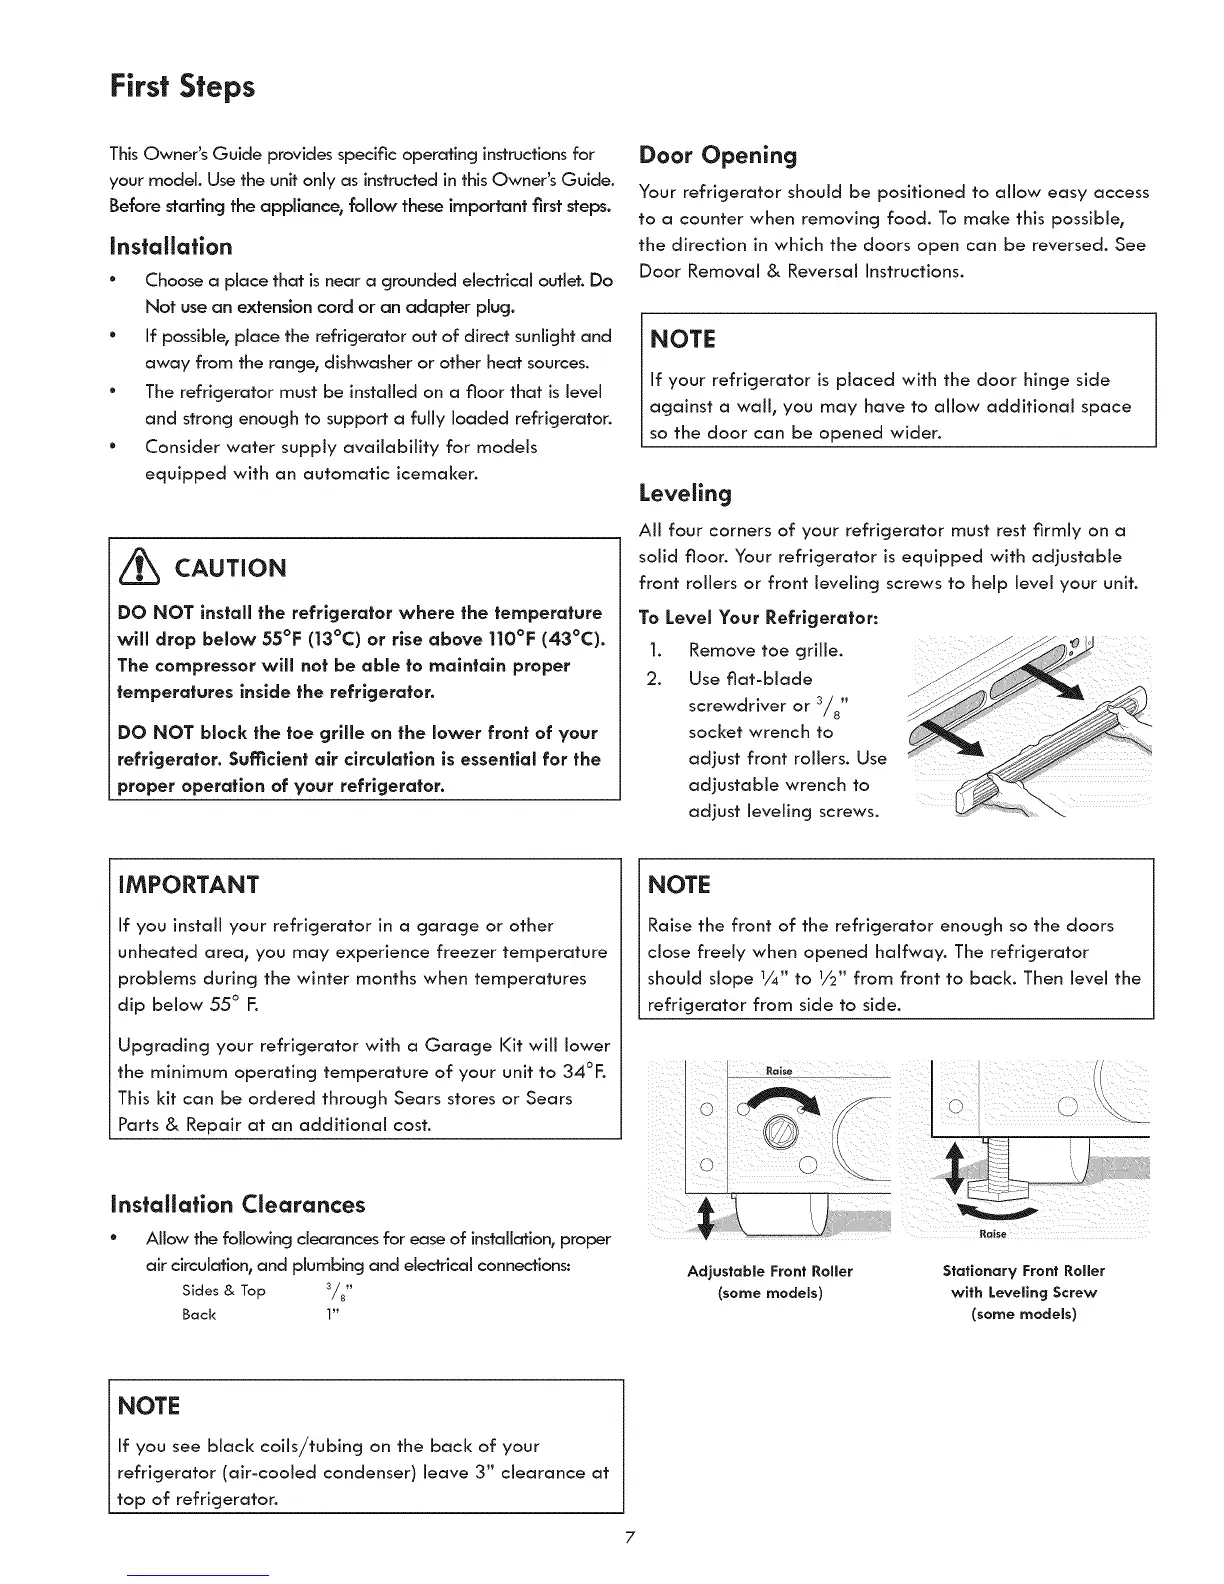
To Level Your Refrigerator:
1. Remove toe grille. _ e °
2. Usefiat-blade .
screwdriver or 3/8
socketwrenchto ...................
adjustableadjustfront wrenchrollers, toUse
adjust leveling screws.
IMPORTANT
If you install your refrigerator in a garage or other
unheated area, you may experience freezer temperature
problems during the winter months when temperatures
dip below 55 ° F.
Upgrading your refrigerator with a Garage Kit will lower
the minimum operating temperature of your unit to 34°F.
This kit can be ordered through Sears stores or Sears
Parts & Repair at an additional cost.
Installation Clearances
° Allow the following clearances for ease of installation,proper
air circulation, and plumbing and electrical connections:
Sides & Top 3/8"
Back 1"
NOTE
Raise the front of the refrigerator enough so the doors
close freely when opened halfway. The refrigerator
should slope 1/4" to 1/2" from front to back. Then level the
refrigerator from side to side.
Adjustable Front Roller
(some models)
Raise
Stationary Front Roller
with Leveling Screw
(some models)
NOTE
If you see black coils/tubing on the back of your
refrigerator (air-cooled condenser) leave 3" clearance at
top of refrigerator.
7