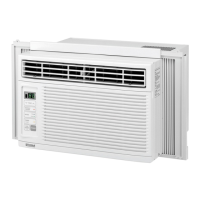
Do you have a question about the Kenmore 75085 - 8,000 BTU Single Room Thru-The-Wall Air Conditioner and is the answer not in the manual?
| Brand | Kenmore |
|---|---|
| Model Number | 75085 |
| Cooling Capacity | 8, 000 BTU |
| Type | Thru-The-Wall |
| Room Size Coverage | Up to 350 sq. ft. |
| Air Flow | 230 CFM |
| Voltage | 115V |
| Number of Cooling Speeds | 3 |
| Number of Fan Speeds | 3 |
| Thermostat | Electronic |
| Remote Control | Yes |
| Filter Type | Washable |
| Installation Type | Thru-the-wall |
Provides crucial safety guidelines for operating the air conditioner to prevent harm or damage.
Warns against storing flammable liquids near the appliance and using extension cords or adapter plugs.
Details precautions to reduce risks of fire, electric shock, or injury during use and installation.
Emphasizes proper grounding and electrical service requirements for shock and fire hazard prevention.
Offers advice on efficient operation, including proper unit sizing, placement, and airflow management.
Details the recommended grounding method and prohibits cord modifications or improper plug use.
Outlines required voltage, amperage, and circuit breaker/fuse specifications for proper operation.
Explains the function and testing procedure for the current interrupter device on the power cord.
Specifies requirements for wall sleeves and the importance of using a Kenmore sleeve for optimal performance.
Lists necessary hardware components required for the installation process.
Lists all the tools needed to perform the installation correctly.
Guides users to check available electrical service and ensure compatibility with the unit's plug.
Describes how to identify different wall sleeve types and prepare them for unit installation.
Provides general steps for installing the air conditioner into the wall sleeve, including unit sloping.
Introduces three distinct procedures for installing the air conditioner into various wall sleeve types.
Step-by-step guide for installing the air conditioner using a new sleeve, including grille and insulation placement.
Focuses on attaching insulation strips and securing the plastic rear grille for a proper fit.
Covers installing the unit into the sleeve and assembling the front trim pieces for a finished look.
Details redirecting rear louvers and installing the plastic grille for sleeves without a rear grille.
Explains attaching insulation strips and fitting baffles and support blocks based on sleeve depth.
Provides instructions for adjusting baffles and support blocks based on the wall sleeve's depth measurement.
Guides attaching support blocks and sliding the baffle into place within the wall sleeve.
Covers installing the unit into the sleeve and assembling the trim as described in Procedure A.
Details redirecting rear louvers and installing the plastic grille for sleeves without a rear grille.
Explains attaching horizontal and around insulation strips to the inside of the wall sleeve.
Guides cutting and attaching baffles and support blocks based on sleeve depth and attaching them to the sleeve.
Details attaching shims to achieve the necessary rearward slope for proper unit draining.
Covers replacing the metal rear grille with the plastic one and installing the unit into the wall sleeve.
Instructs on assembling the front trim pieces, referencing steps from Procedure A.
Explains the functions of the air conditioner, including cooling, dehumidifying, and filtering air.
Describes common sounds like pinging, humming, or clicking and their causes.
Discusses how room size, heat load, and humidity affect unit capacity and run time.
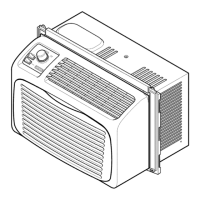
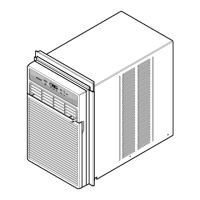
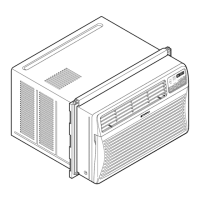
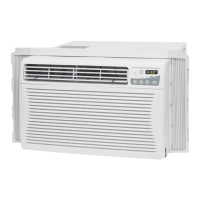
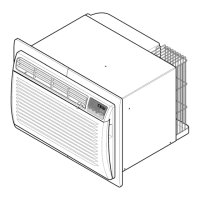
Identifies the main components of the air conditioner unit, such as the cabinet, grilles, and filter.
Provides step-by-step instructions for starting and operating the air conditioner after installation.
Explains how to use the vent control to recirculate air or exhaust it to the outside.
Details the functions of buttons like FAN SPEED, MODE, TIMER, TEMP, and POWER on the control panel.
Explains how to set the timer for automatic shut-off or delayed start-up of the unit.
Describes different operating modes and the unit's behavior after a power failure.
Details how to use the remote control for power, temperature, fan speed, timer, and mode settings.
Mentions operational notes for the remote control and its sensor placement.
Instructions on how to insert batteries into the remote control, emphasizing correct polarity and battery type.
Explains how to adjust horizontal and vertical air flow using the unit's louvers.
Step-by-step guide on how to remove, wash, and replace the air filter for optimal performance.
Instructions for cleaning the front grille, inlet grille, cabinet, and condenser coils.
Detailed steps for safely removing and reattaching the front grille for cleaning or access.
Addresses issues like tripped circuit interrupters, disconnected plugs, blown fuses, or incorrect settings.
Helps diagnose problems like low fan speed, warm temperature settings, or ice formation on coils.
Explains common noises like fan hitting water or window vibration and their causes.
Addresses water dripping inside or outside the unit, often related to installation or high humidity.
Details the coverage provided, including parts, labor, expert service, and "no-lemon" guarantee.
Provides contact information for professional installation services for various home items.
Information on scheduling in-home repairs for appliances and systems, and ordering parts.
Details on locating the nearest Sears Parts & Repair Service Center for carry-in items.
Contact information for purchasing a protection agreement on products serviced by Sears.