16
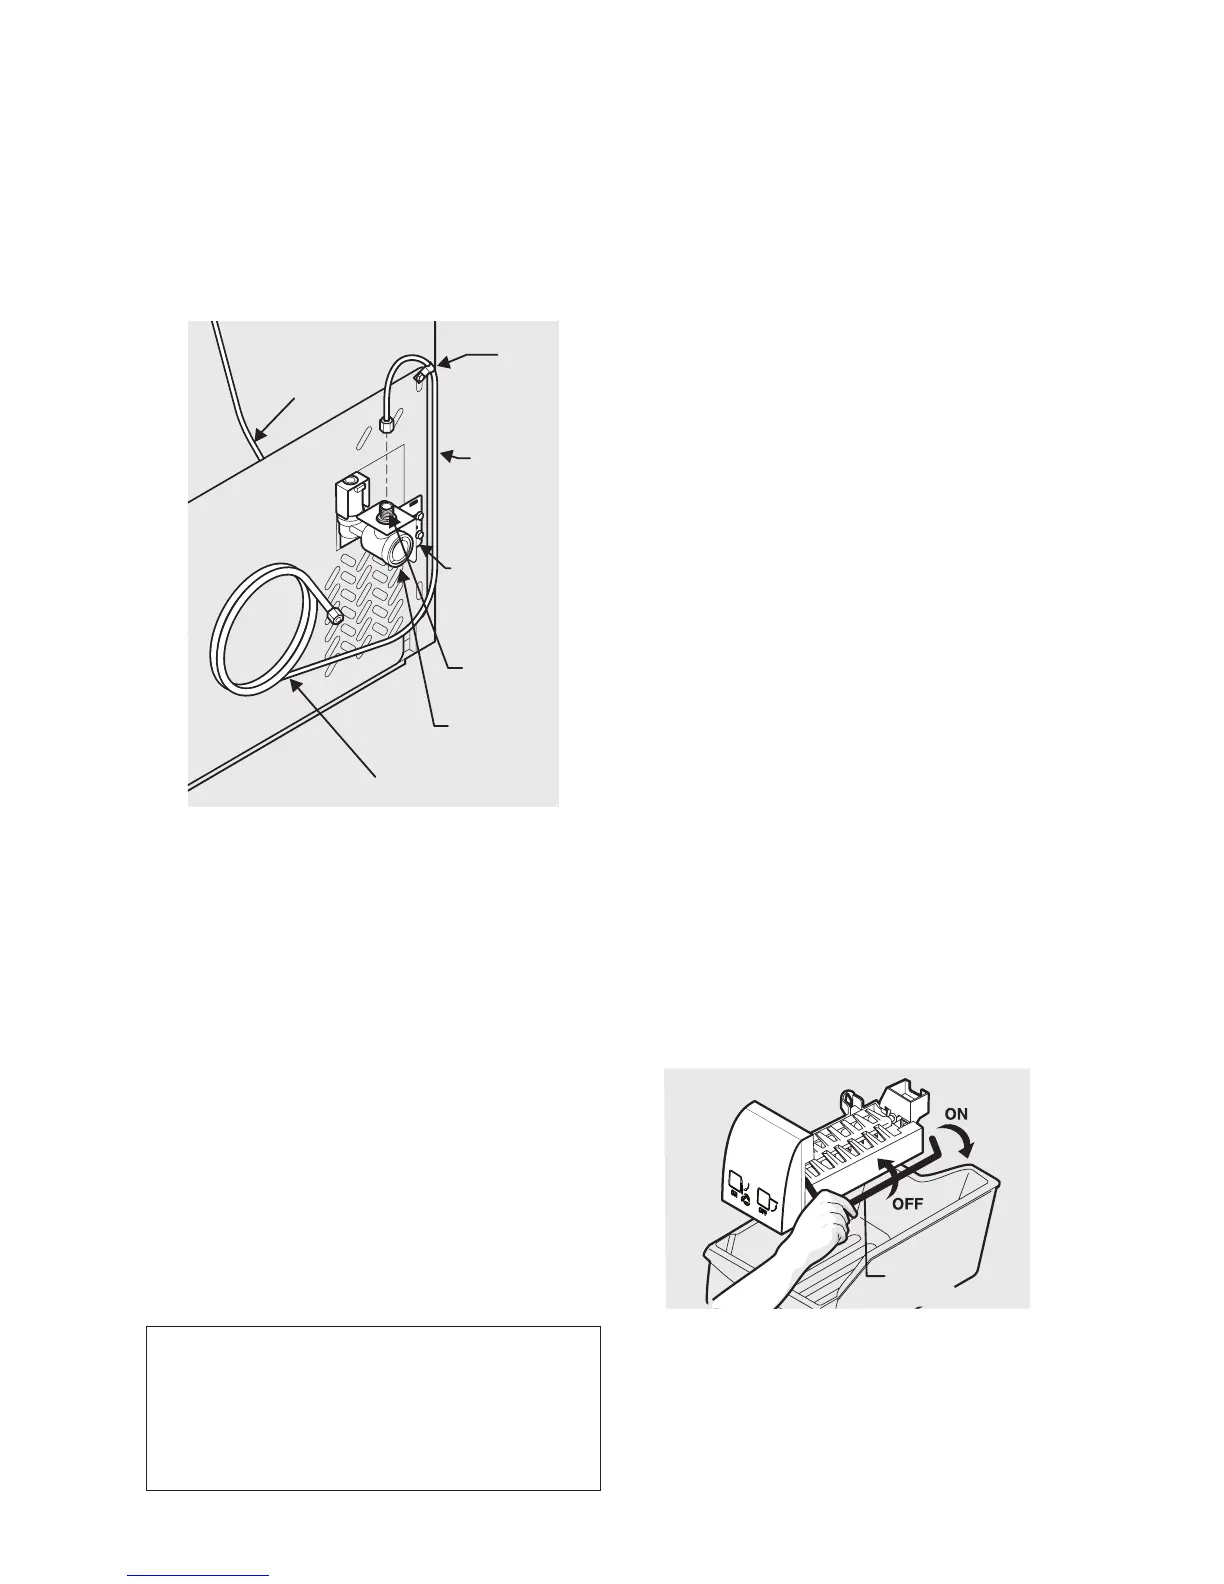
5. With steel clamp and screw, secure
water supply line (copper tubing only)
to rear panel of appliance as shown.
6. Coil excess water supply line (copper
tubing only), about 2½ turns, behind
unit as shown and arrange coils so
they do not vibrate or wear against
any other surface.
7. Turn ON water supply at shuto
valve and tighten any connections
that leak.
8. Reconnect appliance to electrical
power source.
9. To turn ice maker on, lower wire
signal arm (side mounted) or set the
ice maker’s On/O power switch to
the “I” position (rear mounted).
Steel
Clamp
Stainless
Steel
Water Line
Water Valve
Bracket
Valve Inlet
Water Valve
Plastic Water Tubing
to Ice Maker
Fill Tube
If you use stainless steel tubing - the nut and
ferrule are already assembled on the tubing.
Slide compression nut onto valve inlet and
nger tighten compression nut onto valve.
Tighten another half turn with a wrench; DO
NOT overtighten. See below.
NOTE
Check with your local building authority
for recommendations on water lines and
associated materials prior to installing
your new unit.
Connecting Water Supply Ice Service
If your appliance has an automatic ice maker,
it will provide a sucient supply of ice for
normal use. During the initial startup of your
unit, however, no ice will be produced during
the rst 24 hours of operation.
Automatic ice makers are also optional
accessories that may be installed in some
models at any time. Call Sears Parts and
Repair at 1-800-488-1222 for information.
Turning Your Ice Maker On
After the plumbing connections have been
completed, the water supply valve must be
opened. Place the ice container under the
ice maker, pushing it as far back as possible.
Lower the wire signal arm to its “down” or
ON position. New plumbing connections
may cause the rst production of ice cubes
to be discolored or have an odd avor.
These rst cubes should be discarded until
the cubes produced are free of discoloration
and taste.
Turning Your Ice Maker O
To stop the ice maker, lift the wire signal
arm until it clicks and locks in the “up” or
OFF position. The ice maker also turns o
automatically when the ice container is full.
If your model has an adjustable freezer
shelf, place the shelf in the lower position, so
that the wire signal arm will hit the ice when
the container is full.
Wire
 Loading...