ATTACHMENTS ON
",t"
Handle
Button -_ U
• CAUTION ...............
DO NOT attach or remove handle or
wands while cleaner is ON. This
could cause sparking and damage
the electrical contacts.
HANDLE
NOTE: If the
POWER-
MATE TM is
attached, turn
cleaner off
before removing
handle from
wands.
m m 1. Press lock
'=" _1 button, then pull
Upper _ to remove hart-
Wand 1 die from wand
If your model has the optional feature of a
handle release, press it in similarly.
2, Slide attach-
ments firmly on
handle as need-
ed, See chart
below.
ATTACHMENTS ON WANDS
1, To remove
wands from
POWER-
MATE TM, lock
wands in
straight-up
position.
t ' ';2
IR ,,,;,
I tt
I /t
I t I
M
I
Wand Quick
Release Pedal
2. Press wand
release pedal
with foot and
pull the wands
straight up out of
POWER-MATETM,
l=i=m=r
The POWER-
MATE TM plug and
cord do not have to
be removed to use
attachments on the
wands
3, Put attach-
ments on
wands as
needed, See
chart below,
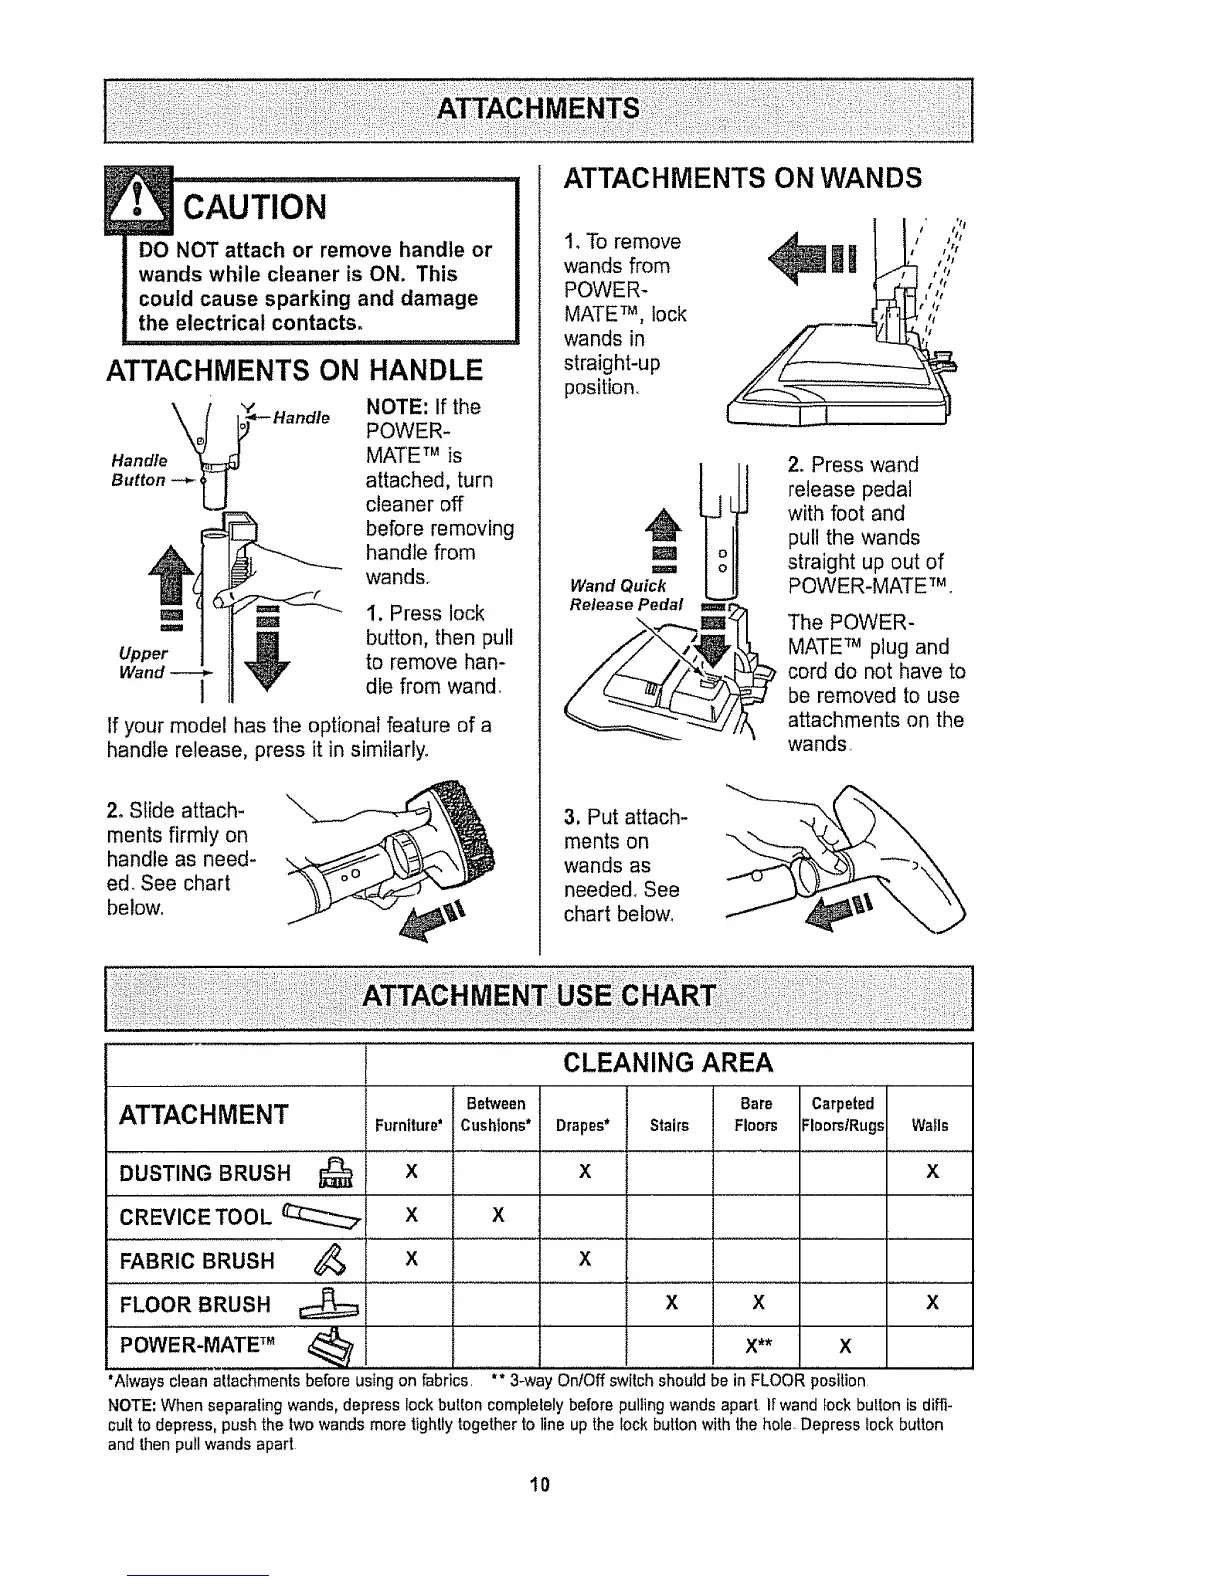
ATTACHMENT
DUST,NGBRUSH...............Q
CREVICE TOOL __
FABRIC BRUSH
FLOOR BRUSH
Furniture*
x
X
Between
Cushions*
X
CLEANING AREA
Bare
Drapes* Stairs Floors
x
Carpeted
FloorslRugs
Walls
X
_, x x
x x x
POWER-MATE TM _ X** X
"Always clean attachments before using on fabrics ** 3-wa OnfOff switch should be in FLOOR position
NOTE',When separaling wands, depress lock button complelely before pulling wands apart Ir wand fock bulton is dih'i-
cult to depress, push the lwo wands more tightly togetherto line up the lock button with the hole Depress lock button
and then pull wands apart
I0