Do you have a question about the Kenmore Sears Evaporative table top Humidifier 42.14121 (3 gallon) and is the answer not in the manual?
| Type | Evaporative |
|---|---|
| Tank Capacity | 3 gallon |
| Model Number | 42.14121 |
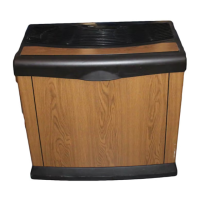
| Design | Table top |
| Brand | Kenmore Sears |
| Category | Humidifier |
Crucial safety warning to read all instructions before initial use of the product.
Provides a phone number for questions or comments regarding the Kenmore Humidifier.
Explains how maintaining proper humidity benefits health and home furnishings.
Details how the humidifier uses a filter pad and fan to disperse moisture.
Emphasizes reading all instructions before using the humidifier for safety.
Explains the polarized plug and its safety function, advising against modification.
Stresses placing the humidifier on a firm, flat surface to prevent spillage and damage.
Do not use with damaged cord/plug; return for repair if malfunctioning.
Keep cords away from traffic and carpeting to prevent tripping hazards.
Always unplug the unit when not in use, moving, or servicing it.
Do not place the humidifier near heat sources like stoves or radiators.
Highlights the need for regular cleaning as per instructions for optimal performance.
Advises turning off if humidity exceeds 60% and using a hygrometer.
Explains how humidifiers help relieve dry air symptoms and static electricity.
Describes the process of drawing dry air through a filter pad for moisture dispersion.
Explains the system that adjusts moisture output based on room humidity.
Recommends disinfecting all humidifiers before their first use.
Instructions to unplug and remove the upper motor housing and water tanks.
Advice to remove the filter pad and wipe residual water before filling.
Instructions on how to fill the water tanks with cool tap water.
Guidance on properly placing the filled water tanks back onto the base.
Critical caution against pouring water into the exhaust grill, stating risks.
Ensure firm placement and handle carefully due to water spillage risks.
Sears disclaims responsibility for property damage caused by water spillage.
Instructions for plugging into a polarized outlet, avoiding extensions and wet hands.
Adjust the Humidity Level (Humidistat) knob to the desired setting.
Choose between HIGH, MED, or LOW for desired humidifying speed and duration.
Guidance on troubleshooting fan start issues by adjusting the humidistat setting.
Adjust the air outlet grill to direct moisture appropriately, avoiding damage.
How to set the desired humidity and the automatic ON/OFF cycle.
Instructions on turning the filter pad and emptying the base reservoir.
Highlights the need for weekly cleaning to prevent mineral buildup and maintain performance.
Initial step to turn off and unplug the humidifier before cleaning.
Remove upper motor housing, water tank, and filter pad from the base.
Empty and rinse the base reservoir and water tank with clean tap water.
Critical note emphasizing filter pad removal before cleaning to prevent damage.
Instructions for removing scale using white vinegar solution.
Strict warning against using flammable solvents, paint thinner, or gasoline for cleaning.
Guidance on cleaning interior surfaces with a soft cloth; avoid soap and abrasives.
Instructions for cleaning the upper motor assembly with a dry cloth.
Procedure for disinfecting the reservoir and water tank using household bleach.
Advice on filter pad discoloration, cleaning, and when to replace it.
Recommends changing filter pads seasonally or more often based on usage and water quality.
Emphasizes using Sears brand filter pads (#14804) for optimal performance and to prevent damage.
Instructions to replace the filter pad, upper motor assembly, and water tank onto the base.
Clean and dry the humidifier thoroughly according to cleaning instructions.
Crucial advice to ensure all components are dry before storing to prevent deposits or growth.
Instructions to dispose of the used filter pad and save the frame for next season.
Place the humidifier in its original carton and store in a cool, dry place.
Information on how to purchase new filter replacement pads.
Lists the input voltage, current, and power consumption of the humidifier.
Warning against using water treatments not designed for this type of humidifier.
Advises against attempting self-repair and provides a customer service hotline number.
Details part descriptions and their corresponding part numbers.
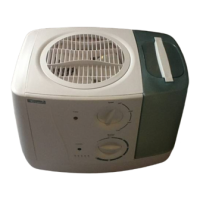
Visual diagram labeling the main components of the humidifier.
Provides phone number and necessary information for ordering replacement parts.
Outlines the terms of the one-year warranty for defects in material or workmanship.
Explains how and where warranty service can be obtained within the US and Canada.
Specifies that the warranty does not cover replacement filter pads.