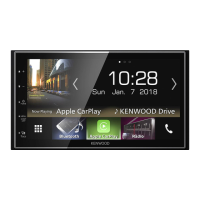
Do you have a question about the Kenwood DMX 7709S and is the answer not in the manual?
Key features including EQ, time alignment, and crossover settings for audio tuning.
Details on optional modules for satellite radio, cameras, and additional audio/video inputs.
How to connect and use smartphones for music, navigation, and apps via wired connections.
Crucial notes regarding parking brake connection, amplifier use, and steering wheel control compatibility.
A list of all items provided in the Kenwood DMX 7709S installation kit for the Saab 9-5.
Essential tools required for the basic installation of the infotainment system.
Initial step to straighten bent tabs on the metal radio basket for proper fitment.
A note explaining that altering the basket is for aesthetic flush fit, not functional necessity.
Trimming approximately 2mm from basket tabs to ensure tight fit with dash panels.
Optional step to paint the radio basket flat black to hide shiny metal.
Attaching foam strips to the basket for improved aesthetics around the fascia.
Confirming the basket and dash panels fit correctly with adequate clearance.
Bending the basket's tabs to secure it firmly in place within the dash.
Connecting the ILLUMI wire to the cigarette lighter circuit for display dimming with headlights.
Wiring the RED +15 wire to allow the radio to play with the ignition key in the OFF position.
Guidelines for routing the USB port cable and microphone wire within the vehicle.
Instructions for routing the rear camera harness and connecting its signal and power.
Key for identifying speaker connections within the main wiring harness.
Identifies wires for Speed Pulse, Park Brake, Reverse Gear, and Amp Remote.
Identifies the various input and output terminals on the back of the Kenwood unit.
Details on connecting audio and video sources using 4-pole mini plugs.
Explains how to connect the optional SiriusXM Connect Vehicle Tuner.
Procedure to access and check the current APP and SYS software versions on the receiver.
Steps to download, decompress, and copy firmware files to a USB memory device.
Detailed steps for updating the receiver's firmware using the prepared USB media.
| Resolution | 800 x 480 pixels |
|---|---|
| Touchscreen | Yes |
| Apple CarPlay | Yes |
| Android Auto | Yes |
| Bluetooth | Yes |
| Backup/Rear Camera Input | Yes |
| SiriusXM Ready | Yes |
| Preamp Outputs | 3 Pairs (Front, Rear, Subwoofer) |
| Peak Output | 50 watts x 4 channels |
| Steering Wheel Control Compatible | Yes |
| HD Radio | Yes |
| Built-in Microphone | Yes |
| HDMI Input | No |
| DVD Playback | No |
| CD Playback | No |
| USB Port/Input | Yes |
| RMS Power Output | 22 watts RMS |


